Category: Uncategorized

Table Of Contents
Inspecting Plumbing Systems
Inspectors begin by thoroughly examining the plumbing systems throughout a property. They check for visible signs of wear and tear on pipes and fittings, which can indicate potential leaks. Appliances connected to the plumbing, such as water heaters and washing machines, are also assessed. This comprehensive look helps identify any areas prone to issues that could contribute to water damage.
During the Water Damage Inspection, inspectors utilize specialized tools to detect hidden leaks. They often measure moisture levels in walls and ceilings, as elevated readings can signal underlying plumbing problems. Inspectors pay close attention to joints and connections, where leaks are more likely to occur. These steps are essential for pinpointing vulnerabilities before they escalate into significant damage.
Locating Leaks in Pipes
Inspectors use a variety of techniques to locate leaks in pipes during a Water Damage Inspection. They often start by visually inspecting exposed pipes for signs of corrosion or moisture accumulation. If the leak is not obvious, inspectors may employ more advanced tools such as thermal imaging cameras to detect temperature variations that indicate damp areas. Additionally, listening devices can be used to pick up the faint sound of water escaping from pipes hidden behind walls or under floors.
Once a leak is suspected, further assessment involves pressure testing the plumbing system. This method checks for any drop in water pressure that could signal a leak’s presence. Inspectors may also access crawl spaces or basements to examine the condition of pipes in those areas. Identifying the exact location of a leak promptly helps prevent extensive water damage that could pose significant risks to the structure and the health of occupants.
Roof and Gutter Evaluation
Roof and gutter evaluation plays a crucial role in a comprehensive water damage inspection. Inspectors closely examine the roof for missing shingles, signs of wear, and structural deformities that could lead to leaks. They also assess flashings around chimneys and vents to ensure they are properly sealed. A compromised roof can allow water to seep into the underlying materials and cause significant damage over time.
Gutters are equally important in this evaluation process. Inspectors check for clogs or pooling water, which can indicate that gutters are not functioning as intended. They evaluate the alignment and pitch of the gutters to ensure proper drainage away from the foundation. If gutters are blocked or misconfigured, they may contribute to water overflow, potentially resulting in serious damage to both the roof and the building’s walls.
Assessing Water Flow and Drainage
Assessing water flow and drainage is crucial in any water damage inspection process. Inspectors carefully examine the landscape surrounding a property to evaluate how the terrain directs rainwater. Properly designed grading should facilitate runoff away from the foundation, as improper drainage can lead to significant moisture problems over time. Inspectors also pay special attention to driveways, patios, and walkways, noting any settling or pooling that could indicate inadequate drainage solutions.
Gutters and downspouts play a pivotal role in effective drainage management. Inspectors look for blockages or damages that could restrict water flow, leading to overflow and potential water intrusion into the home. Proper function of these systems ensures rainwater is dispensed away from the structure. During a water damage inspection, any signs of wear, rust, or misalignment in gutters can point to a history of water problems affecting the property, necessitating further investigation and potential repairs.
Evaluating Basements and Crawl Spaces
Inspectors often begin the evaluation of basements and crawl spaces by searching for visible signs of water intrusion. They look for moisture stains on walls, floors, and ceilings that could indicate a leak or flooding. Inspectors also check for the presence of mold or mildew, both of which thrive in damp environments. Along with visual cues, inspectors may use moisture meters to measure humidity levels within these areas. This comprehensive approach helps identify problem spots that may require further investigation.
During the Water Damage Inspection, it is crucial to assess the structural integrity of the home. Inspectors evaluate the condition of wooden beams and supports for signs of rot or decay caused by prolonged exposure to moisture. Additionally, they examine insulation materials, ensuring they remain dry and effective. Any signs of erosion in the foundation can also flag potential water issues that need addressing. This careful inspection process is vital for maintaining a safe and healthy living environment.
Signs of Water Intrusion Below Ground
Inspectors often focus on basements and crawl spaces to identify signs of water intrusion below ground. These areas are particularly vulnerable due to their proximity to the water table and potential drainage issues. The presence of damp spots, mold growth, or unusual odors can indicate significant moisture problems. Inspectors may use moisture meters to gauge the levels within the walls and flooring, providing insight into any underlying issues that may not be immediately visible.
During a Water Damage Inspection, attention is also given to the wall and floor joints. Cracks in foundations can allow water to seep in, especially during heavy rains or rapid snowmelt. Inspectors will look for efflorescence, a white, powdery substance that forms when water evaporates from concrete surfaces, leaving behind mineral deposits. This further supports the need for thorough assessments in these often overlooked areas to ensure a comprehensive understanding of potential water damage.
FAQS
What are the first steps inspectors take when checking for water damage?
Inspectors typically start by evaluating plumbing systems to identify any leaks in pipes, followed by a thorough examination of the roof and gutters to ensure proper drainage.
How do inspectors locate leaks in pipes?
Inspectors use a combination of visual inspections, moisture meters, and sometimes thermal imaging to detect leaks within the plumbing systems.
Why is roof and gutter evaluation important in water damage inspections?
Roof and gutter evaluations are crucial because they help identify potential entry points for water, ensuring that water is properly channeled away from the property.
What indicators do inspectors look for in basements and crawl spaces?
Inspectors look for signs of water intrusion, such as water stains, mold growth, and dampness, which can indicate ongoing or past water damage.
How can homeowners prevent water damage inspections from becoming necessary?
Homeowners can prevent water damage by regularly maintaining plumbing systems, cleaning gutters, and ensuring proper drainage around the property to avoid water accumulation.
Related Links

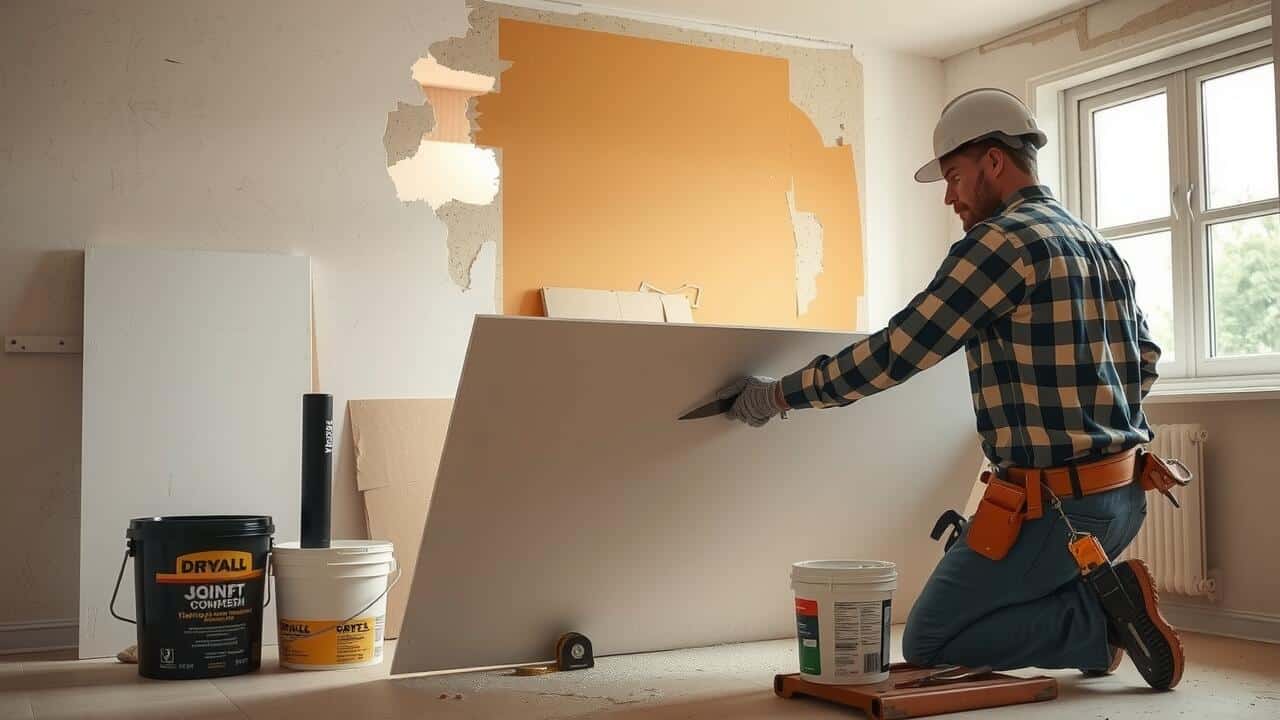
Table Of Contents
Regional Price Variations
The cost of drywall replacement can fluctuate significantly based on regional differences across the United States. In urban areas where the cost of living is higher, labor and material expenses tend to be elevated. For instance, drywall replacement in cities like San Francisco or New York City may carry a premium compared to smaller towns or rural areas where competition is less fierce and overhead costs are lower. Homeowners in these high-demand regions should budget accordingly, as the price may reflect the local market dynamics.
In contrast, regions with a lower cost of living often see more affordable pricing for drywall replacement. Areas in the Midwest or Southern states, for instance, typically offer lower labor rates and material costs, making the process more economical for homeowners. Regional availability of supplies also plays a role; areas with easy access to building materials may experience lower costs. As homeowners look into drywall replacement in various locales, understanding these regional price variations can help them make informed decisions and plan their budgets effectively.
How Location Affects Replacement Costs
The cost of drywall replacement can vary significantly based on geographical location. Areas with a higher cost of living, such as urban centers, typically experience increased labor rates and material prices. In contrast, rural regions may offer more affordable options, making drywall replacement generally less expensive. Factors such as regional demand, availability of skilled labor, and local building codes can further influence the overall expense.
In addition to labor and materials, transportation costs can impact drywall replacement in different locales. For example, remote areas may face higher shipping fees for drywall and associated supplies, resulting in increased project costs. Local competition among contractors also plays a crucial role, often affecting pricing flexibility. Understanding these location-specific factors can help homeowners prepare for the financial implications of drywall replacement in their area.
Hidden Costs to Consider
When planning for drywall replacement, many homeowners overlook hidden costs that can significantly impact the overall budget. For instance, when you begin a drywall replacement project, you may need to factor in costs for materials beyond the drywall itself. These can include tape, mud, and other supplies essential for a proper finish. This can quickly add up, especially if you are completing multiple rooms or require specialty materials for certain areas.
Another significant consideration is the potential need for permits and inspections, particularly if local regulations require them for structural changes or extensive renovations. Drywall replacement in areas subject to strict building codes might involve additional fees. Moreover, if the project reveals underlying issues such as mold or outdated wiring, these unforeseen repairs can further inflate your costs and extend the duration of the project. Always review your specific circumstances to avoid surprises during the replacement process.
Permits and Inspection Fees
Permits and inspection fees can significantly impact the overall cost of drywall replacement in various locations. Local building codes often require homeowners to obtain permits before undertaking significant renovations. These permits ensure that the work meets safety standards and adheres to zoning regulations. Depending on the jurisdiction, the fees for these permits can vary substantially, ranging from a nominal charge to several hundred dollars.
In addition to permit fees, inspections may also be mandated once the drywall is installed. Inspectors check for compliance with safety and construction codes, emphasizing the importance of quality workmanship. The associated costs for inspections, which may include additional fees for re-inspections if issues are found, should be factored into the budget for drywall replacement in order to avoid unexpected expenses during the project.
Time Estimates for Drywall Replacement
Time estimates for drywall replacement can vary significantly based on the room size and existing conditions. For small projects, such as replacing drywall in a bathroom or closet, the job may take approximately one to two days. Larger spaces, like living rooms or open areas, might require several days to complete. Work complexity can increase with the need for additional framing, insulation, or electrical adjustments, which adds to the overall duration.
Drywall replacement in larger homes may also be influenced by crew size and experience level. A skilled team can expedite the process, potentially reducing overall time compared to a DIY approach. Homeowners should also consider drying times for tape and joint compound, which typically require additional waiting periods before painting or finishing can begin. Accurate planning can lead to a smoother replacement process and satisfaction with the final results.
Duration of the Project by Room Size
The duration of drywall replacement can vary significantly based on the size of the room being worked on. Smaller spaces, such as closets or half-baths, may only take a few hours to complete. In contrast, larger areas like living rooms or basements might require a couple of days to finish all aspects, including hanging, taping, and finishing the drywall.
Additionally, the complexity of the project plays a role in how long drywall replacement takes. For instance, intricately designed rooms with curves or architectural features can extend the timeframe due to the extra effort required. As a result, homeowners planning for drywall replacement in these more complicated spaces should anticipate a longer project duration to accommodate these challenges.
FAQS
What is the average cost to replace a piece of drywall?
The average cost to replace a piece of drywall typically ranges from $1.50 to $3.00 per square foot, depending on factors such as location, materials, and labor costs.
Are there additional costs associated with drywall replacement?
Yes, there can be additional costs such as permits, inspection fees, and potential hidden costs like repairs to water damage or mold remediation.
How does the size of the room affect drywall replacement costs?
Larger rooms may have lower per-square-foot costs due to economies of scale, but the overall expense will be higher due to the increased amount of drywall needed.
Do I need a permit for drywall replacement?
In many cases, a permit is required for drywall replacement, especially in larger projects or if it involves structural changes. It’s best to check with local building codes.
How long does it typically take to replace drywall in a room?
The duration of a drywall replacement project can vary by room size, but it generally takes anywhere from a few hours to several days, factoring in installation, drying time, and finishing work.
Related Links

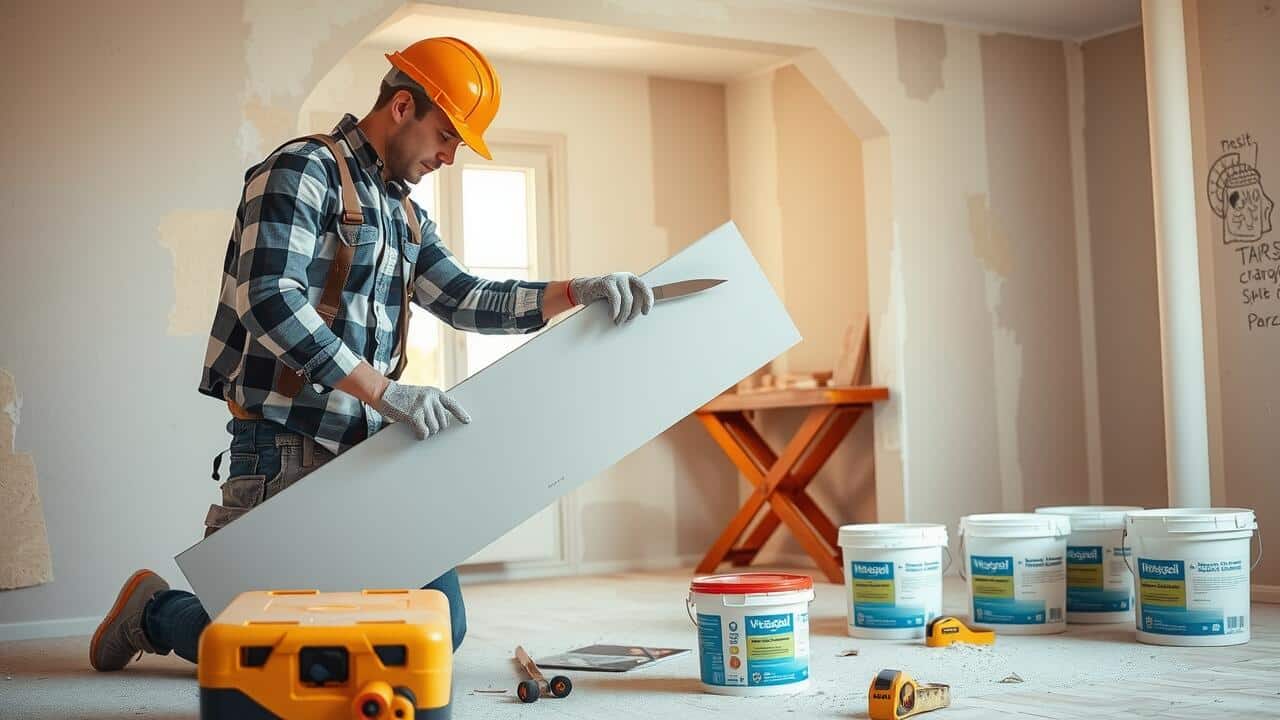
Table Of Contents
Step-by-Step Process of Removing Old Drywall
Removing old drywall is a straightforward process that can help you prepare for drywall replacement. Begin by turning off power to any electrical outlets and light switches in the area. Use a utility knife to cut around the edges of the drywall, ensuring you don’t damage any underlying wiring or plumbing. If the drywall is held in place by screws, use a drill or screwdriver to remove them. For nails, a pry bar can assist in pulling them out without causing further damage to the surrounding structure.
Once the edges are cut and fasteners removed, gently pull the drywall away from the studs. In cases where the drywall is stuck due to joint compound or paint, using a putty knife can help loosen it. Dispose of the old drywall properly, as it can be heavy and awkward to handle. After removal, check the studs for any water damage or mold before proceeding with drywall replacement to ensure a solid foundation for your new installation.
Tips for Safe Removal
When tackling drywall replacement, safety should always be the first priority. Begin by wearing protective gear such as goggles, gloves, and a dust mask. Ensure the work area is well-ventilated to reduce exposure to dust and debris. It’s also wise to turn off electricity in the room if working near electrical outlets. Familiarize yourself with the layout of any plumbing or electrical lines behind the walls, which could pose hazards during removal.
Avoid using tools that may be too heavy or difficult to maneuver. A utility knife and pry bar are essential for a clean and controlled removal. Cut the drywall into smaller sections for easier handling and disposal. Be cautious of falling debris, especially when removing larger pieces. If you encounter any unexpected problems such as rot or mold, address these issues promptly to ensure a smooth installation of the new drywall.
Installing New Drywall
When installing new drywall, start by measuring the wall space to ensure accuracy. Cut the drywall sheets to fit the dimensions, maintaining a clean edge for a better finish. Position the sheets against the wall, securing them with drywall screws to the studs. Space the screws about 12 to 16 inches apart along the edges and in the center of the sheets to provide adequate support. Plan your layout carefully to minimize seams and waste during the installation.
After securing the drywall, inspect for any gaps or irregularities before moving forward. A straight and level surface is crucial for drywall replacement, as it affects both the appearance and the ease of taping and mudding later on. Use a utility knife to score and snap the drywall for any adjustments, ensuring that cuts are clean and precise. If you have electrical outlets or fixtures, cut openings carefully to accommodate them without compromising the integrity of the boards.
Techniques for a Seamless Finish
Achieving a seamless finish during drywall replacement requires careful attention to detail. Start by ensuring that the edges of the drywall sheets are aligned properly. Install the sheets snugly against each other, minimizing gaps that could become visible after finishing. Use drywall screws to secure the boards firmly, making sure they are slightly recessed without breaking the paper surface. This prepares the area for taping, which is crucial for an even appearance.
Once the boards are in place, apply joint tape to the seams. Consider using either paper or fiberglass tape for this purpose. Paper tape is typically easier to work with and creates a flatter finish, while fiberglass tape may offer more strength. After taping, apply a thin layer of joint compound over the seams, feathering the edges to blend seamlessly into the surrounding drywall. Multiple coats may be necessary to achieve the desired smoothness. Sand between layers for the best results, ensuring that the final surface is ready for priming and painting.
Taping and Mudding Drywall Joints
Taping and mudding drywall joints is an essential step in achieving a professional finish during your drywall replacement project. Start by applying a layer of joint compound over the seams where the drywall sheets meet. Use a putty knife to spread the compound evenly and cover the tape you will place over the seams. The tape helps to reinforce the joint and minimizes the risk of cracking. It is crucial to ensure that the tape is embedded well in the compound, avoiding air bubbles that can lead to imperfections.
Once the tape is applied, you can begin the mudding process. Apply a thin coat of joint compound over the tape, extending beyond the edges to create a smooth transition to the surrounding drywall. Let the compound dry completely, then sand it lightly to achieve a flat surface. Adding additional layers may be necessary, with each layer requiring sanding to ensure a seamless finish. Thoroughness in this stage of drywall replacement will significantly impact the overall appearance of your walls.
Achieving a Smooth Surface
Achieving a smooth surface is essential in the process of drywall replacement. After applying joint compound, also known as mud, it’s important to let each layer dry completely before applying another. Start with a thin layer, then use a drywall knife to extend the compound slightly beyond the edges of the joint, feathering it out to minimize any visible lines. This technique helps create a seamless transition between the joints and the surrounding drywall, ensuring a professional appearance.
Once the compound is dry, sanding is the next crucial step. Use a fine-grit sandpaper attached to a sanding block or pole sander for best results. Lightly sand the dried mud to eliminate any imperfections. It’s also advisable to wear a mask to avoid inhaling dust during this process. After sanding, inspect the area for any remaining flaws, and if needed, apply a second or even third coat of compound, repeating the sanding process until the surface feels smooth and even to the touch.
FAQS
Can I replace drywall myself?
Yes, many homeowners can replace drywall themselves if they have basic DIY skills and the right tools. However, it’s important to understand the process and take safety precautions.
What tools do I need to replace drywall?
You will need a few essential tools, including a drywall saw, utility knife, drywall screws, a drill, a tape measure, and a straight edge. Additionally, a mud pan, drywall knife, and sanding sponge will help with taping and finishing.
How do I ensure a seamless finish when installing new drywall?
To achieve a seamless finish, make sure to properly align the drywall sheets, use joint tape and compound effectively, and sand the joints smoothly after drying. Applying multiple thin coats of mud rather than one thick coat can also help.
What safety precautions should I take when removing old drywall?
Always wear protective gear such as gloves, goggles, and a dust mask to protect yourself from dust and debris. Ensure that the area is well-ventilated and be cautious of any electrical wiring or plumbing behind the drywall.
Is it necessary to hire a professional to replace drywall?
While many people successfully replace drywall themselves, hiring a professional may be beneficial if you are inexperienced or if the project is particularly large or complicated.
Related Links

Table Of Contents
How to Choose a Qualified Inspector
Selecting the right inspector for your water well is crucial to ensuring its integrity and safety. Start by researching local professionals who specialize in water well inspections. Look for reviews and testimonials that reflect their expertise and reliability. You can also ask friends or neighbors for recommendations. When you search for “Water Damage Inspection near me,” you’ll find a range of qualified experts who can evaluate your well’s condition thoroughly.
It’s important to verify certifications and experience. A qualified inspector should have relevant licenses and training specific to water well inspections. Their background in environmental science or geology can be a significant asset. Additionally, consider their familiarity with local regulations and guidelines. This knowledge ensures your well meets all necessary health and safety standards.
Certification and Experience
When selecting a qualified inspector for a water well, it’s crucial to evaluate their certification and experience. An inspector with proper credentials typically holds licenses issued by state or local authorities. Experience in the field plays a significant role in ensuring that the inspector can effectively identify potential issues and provide accurate assessments. An inspector who has worked on various well inspections in different environments will possess valuable insights that can benefit homeowners.
Additionally, searching online for “Water Damage Inspection near me” can yield options that enhance the likelihood of finding a reputable professional. Inspectors with years of experience are likely to stay updated on the latest industry practices and technologies. Their knowledge not only aids in identifying current problems but also helps in suggesting preventive measures for future maintenance. Choosing an experienced inspector ensures a thorough evaluation and promotes long-term well safety and functionality.
Potential Extra Costs to Consider
When planning a water well inspection, homeowners should be aware of potential extra costs that may arise. If the initial inspection uncovers issues, such as contamination or structural concerns, additional tests may be necessary. These can include water quality assessments or geotechnical evaluations. Each of these tests adds to the overall cost, so it’s vital to budget for them when seeking services like “Water Damage Inspection near me.”
Another aspect to consider is the cost associated with repairs or maintenance following the inspection. If the inspector identifies problems with the well casing, pump, or filtration system, homeowners may need to invest in repairs to ensure safe and reliable water supply. These repairs can vary significantly in price depending on the extent of the damage and the parts required. Keeping these potential costs in mind can help homeowners prepare for both immediate and long-term financial commitments related to their water well systems.
Repairs and Maintenance
Maintaining a water well involves regular inspections to ensure that the structure and the water quality remain safe and reliable. Over time, wear and tear can lead to mechanical issues or contamination, making it essential to address any concerns promptly. Homeowners should factor in potential repairs when budgeting for these services. Costs can vary based on the extent of needed repairs, the condition of the well, and any upgrades that may be necessary to meet current standards.
In addition to routine inspections, water damage can occur unexpectedly due to environmental factors or equipment failures. If homeowners suspect their well may be compromised, they should research “Water Damage Inspection near me” to find local professionals capable of assessing the situation accurately. Staying proactive with inspections and maintenance can ultimately save homeowners from expensive challenges down the road, keeping their water supply safe and efficient.
Importance of Regular Inspections
Regular inspections of water wells are crucial for maintaining their functionality and ensuring water quality. Over time, wells can develop issues such as sediment build-up, corrosion, or contamination. Having a professional conduct these inspections can detect potential problems early on, reducing the risk of significant damage and costly repairs. Homeowners are often advised to schedule annual assessments to stay ahead of any adverse conditions.
In addition to protecting physical infrastructure, regular well inspections play a vital role in health and safety. Poorly maintained wells can lead to unsafe drinking water, posing serious health risks to families. To find qualified services, searching for “Water Damage Inspection near me” can yield local experts who understand the specific requirements for well water assessments. This proactive approach helps ensure the long-term safety and reliability of your water supply.
Health and Safety Regulations
Health and safety regulations play a crucial role in the maintenance of water wells. Inspections ensure compliance with local and federal guidelines, minimizing risks associated with contaminated water sources. Regulations often address factors like well construction, siting, and the integrity of the well structure. Compliance not only protects public health but also extends the lifespan of the well itself.
When searching for a qualified inspector, individuals may consider the phrase “Water Damage Inspection near me” to find professionals familiar with regional regulations. An expert inspector will be knowledgeable about the specific health standards relevant to the area. Ensuring that inspections meet these regulations is essential for maintaining safe water quality and protecting the surrounding environment.
FAQS
What is the average cost of a water well inspection?
The average cost of a water well inspection typically ranges from $300 to $500, depending on the complexity of the inspection and the region.
Are there additional costs associated with a water well inspection?
Yes, additional costs may arise if repairs or maintenance are needed, or if special tests (such as water quality testing) are required.
How often should I have my water well inspected?
It is generally recommended to have your water well inspected at least once a year to ensure safety and proper functioning.
What qualifications should I look for in a water well inspector?
Look for inspectors who are certified and have experience in the field, as well as a good reputation and positive reviews from previous clients.
Can I perform my own water well inspection?
While you can conduct basic checks, it’s advisable to hire a qualified inspector for a comprehensive evaluation to ensure compliance with health and safety regulations.
Related Links
Table Of Contents
Steps Involved in Drywall Replacement
Replacing drywall involves several key steps to ensure a successful installation. First, it is essential to assess the extent of damage. Measure the area that needs replacement carefully. Afterward, remove the damaged drywall, taking care to avoid causing further harm to the surrounding structures. This process often includes detaching any screws or nails, as well as ensuring that any insulation behind the drywall is intact and in good condition.
Once the old material has been removed, it’s time to prepare for the new drywall installation. Gather the necessary tools and materials, including drywall sheets, tape, screws, and joint compound. If you’re looking for professional help, searching for “Drywall Replacement near me” can connect you with local contractors who have experience in this area. Ensure the area is clean and level before installing the new sheets. This preparation will aid in achieving a smooth and even finish when the job is completed.
Preparing the Area for Installation
Before starting any drywall replacement project, it’s essential to prepare the area properly. Remove any furniture, appliances, or items that could obstruct the work. Cover the floors with drop cloths or plastic sheeting to protect them from dust and debris generated during the process. Ensuring adequate ventilation in the workspace is also crucial to avoid inhaling potentially harmful particles.
If the project involves multiple rooms or large areas, consider marking the location of electrical outlets, switches, and any pipes to avoid potential damage. Gathering necessary tools and materials in advance minimizes interruptions during installation. Searching for “Drywall Replacement near me” can yield local contractors who can assist if the project feels overwhelming or beyond your skill level.
Tools and Materials Needed
When planning for drywall replacement, having the right tools and materials is essential for achieving a professional finish. Standard tools include a utility knife, drywall tape, and a T-square for making accurate cuts. Additionally, a drywall lift can help you manage heavy sheets, especially for ceilings. Safety glasses and dust masks should not be overlooked, as they protect you during installation.
In terms of materials, you will need the appropriate type of drywall suited for the specific area of replacement, such as moisture-resistant boards for bathrooms or fire-rated sheets for garages. Fasteners like drywall screws and adhesive are also necessary to secure the panels. Local hardware stores often carry these items, and searching for “Drywall Replacement near me” can lead to nearby retailers or contractors offering the supplies you need.
Essential Equipment for the Job
When undertaking drywall replacement, having the right tools is crucial for a successful outcome. Essential equipment includes a utility knife for cutting the drywall sheets, a T-square for ensuring accurate measurements, and drywall screws or nails for securing the panels to the framing. A drill or screwdriver is needed to fasten the drywall properly. Additionally, a taping knife will help smooth out joint compound, and a sanding block is essential for finishing touches. All these tools contribute to a professional-looking installation that can greatly enhance the space.
If you’re unsure about doing the work yourself, searching for “Drywall Replacement near me” can lead you to professionals who are equipped with the necessary tools and experience. Hiring experts can save time and ensure that the job meets local building codes and standards. Whether it’s a minor repair or a full room replacement, the right equipment makes a significant difference in the quality of the final result.
Drywall Installation Techniques
When undertaking drywall installation, proper techniques ensure strength and a polished appearance. Start by measuring the space accurately to cut your drywall sheets to the right size. Use a utility knife or drywall saw for clean cuts. When positioning the sheets, stagger the joints to enhance stability and reduce cracking. It’s essential to secure the drywall with screws rather than nails, as screws provide a stronger hold and are less likely to pop out over time.
For finishing, apply joint tape over the seams before the mudding process begins. Use a taping knife to spread the joint compound evenly, creating a seamless finish. Multiple thin layers of compound help achieve a smooth surface. After drying, sand the surface gently to remove any imperfections. For those looking to hire professionals, searching “Drywall Replacement near me” can lead to experts who offer quality craftsmanship.
Best Practices for a Smooth Finish
Achieving a smooth finish on newly installed drywall requires careful attention to detail. Begin by applying joint compound evenly and thinly with a taping knife. Utilize long strokes for a better blend and to minimize visible seams. After the first coat dries, lightly sand the surface with fine-grit sandpaper to eliminate any imperfections. Repeat this process for subsequent coats, usually two to three, ensuring each layer is adequately dried and sanded for the best results.
Maintaining cleanliness throughout the drywall installation process is crucial. Always wear a dust mask during sanding to minimize inhalation of fine particles. Keep your workspace organized to avoid any debris that could mar the finishing process. If you’re looking for professional help or guidance, consider searching for “Drywall Replacement near me” to find local services that can ensure a seamless appearance.
FAQS
Why would I consider replacing my drywall?
You might consider replacing your drywall if it has significant water damage, mold growth, large holes, or outdated materials that affect the aesthetics and safety of your space.
How do I know if my drywall needs to be replaced?
Signs that your drywall needs replacement include visible water stains, cracks, bulging surfaces, and the presence of mold. If repairs are extensive or recurrent, replacement may be the best option.
Can I replace drywall myself, or should I hire a professional?
While replacing drywall can be a DIY project if you have the right tools and skills, hiring a professional is advisable for larger jobs or if you’re unsure about the process to ensure a quality finish.
What are the costs associated with drywall replacement?
The costs of drywall replacement can vary widely depending on factors like the size of the area, the type of drywall used, labor costs, and any additional materials needed for repairs or finishing.
What should I do to prepare my home for drywall replacement?
To prepare your home, clear the area of furniture and belongings, cover floors and adjacent areas with drop cloths, and ensure proper ventilation if you’re working with adhesives or compounds.
Related Links
Table Of Contents
Advantages of Reconstruction
Reconstruction offers several advantages that extend beyond merely fixing existing issues. One of the primary benefits is its ability to address underlying problems that repairs alone cannot resolve. When a structure is reconstructed, it often integrates modern techniques and materials, enhancing durability and resilience. This comprehensive approach can lead to improved performance over time, ensuring that the structure can withstand future challenges more effectively.
Reconstruction and repair in a broader context also provide opportunities to improve functionality and compliance with contemporary building codes. As needs evolve, reconstruction can adapt a space to serve new purposes or meet updated safety standards. This flexibility allows property owners to maximize the utility of their investments while fostering a safer environment for occupants. Recognizing the long-term gains associated with reconstruction encourages stakeholders to consider this option seriously.
Long-Term Solutions and Structural Integrity
Reconstruction and Repair in any structure aim to restore functionality and extend its lifespan. Reconstruction often provides a more comprehensive solution for damaged buildings, addressing underlying issues that might not be visible during a repair. This approach enables engineers and architects to assess the integrity of the existing framework, ensuring that any structural weaknesses are identified and remedied. By focusing on long-term solutions, reconstruction can dramatically improve the resilience of a structure, making it better equipped to withstand future challenges.
Structural integrity is a critical factor in both reconstruction and repair. A thorough evaluation helps determine if the original materials can be preserved or if new materials are required for enhanced stability. In reconstruction, additional support systems can be implemented to fortify the building against environmental stresses, enhancing overall safety for occupants. The lasting impact of a well-planned reconstruction can significantly reduce the need for future repairs, leading to cost savings and increased durability over time.
Repair Techniques and Methods
Repair techniques often focus on restoring functionality without altering the overall structure of a building. Methods such as patching, resurfacing, and sealing are common practices used to address specific issues like cracks, leaks, or surface damage. These interventions can enhance the immediate usability of the structure while prolonging its lifespan. In many cases, repair efforts are designed to target localized concerns, minimizing the disruption to the overall environment.
Reconstruction and repair in infrastructure and buildings diverge in their approaches. While repairs aim to fix existing damage, reconstruction involves a more comprehensive overhaul. Techniques in this category may include replacing entire sections, upgrading materials to meet modern standards, or even reconfiguring the layout for better utility. This method is essential when damage is extensive or when enhancements are necessary to ensure safety and compliance with current regulations. Each technique plays a vital role in maintaining the integrity and usability of structures over time.
Popular Repair Approaches
Repair approaches often focus on addressing specific issues without altering the overall structure of a building or object. Techniques such as patching, sealing, and resurfacing are commonly used to restore functionality and aesthetics. These methods can be cost-effective and quick, allowing for minimal disruption while extending the life of existing materials. In many cases, repair allows for the preservation of historical features, enhancing the value of heritage buildings.
Reconstruction and repair in a timely manner can prevent further damage and more extensive issues down the line. Homeowners and property managers frequently opt for these methods to maintain safety and efficiency. Incorporating modern materials in repairs can enhance durability. Selecting the right approach depends on the extent of the damage, the age of the structure, and the urgency of the repairs needed.
Reconstruction Processes and Strategies
Reconstruction processes and strategies involve a systematic approach to restoring structures that have been significantly damaged. Analysts begin by conducting thorough assessments, identifying the extent of damage and determining the best course of action. This phase may include evaluations of structural integrity and the materials used in the original construction. By understanding these factors, professionals can create a tailored plan that addresses not just the immediate repairs but also the long-term viability of the structure.
Implementing reconstruction and repair in a strategic manner often requires a multi-phase approach. Initial steps typically focus on stabilizing the site, followed by the demolition of irreparable sections. Once the groundwork is laid, new materials and technologies are incorporated to enhance durability. Ensuring compliance with modern building codes and regulations is crucial during this phase. By integrating advanced techniques, the end goal is to create a resilient structure that not only meets current standards but also stands the test of time.
Steps Involved in Reconstruction
The steps involved in reconstruction begin with a thorough assessment of the damage. Engineers and builders evaluate the structural integrity of the site. This assessment helps determine the extent of the damage and outlines what needs to be addressed during the reconstruction process. Detailed plans are then developed, taking into account necessary permits and regulations. These plans serve as a roadmap for the reconstruction and repair in the affected area.
Once the planning phase is complete, preparations for the actual work begin. This includes clearing debris, establishing safety measures, and mobilizing resources. Skilled laborers and contractors come together to execute the outlined plans. Quality control measures are crucial throughout the reconstruction process to ensure structural integrity and longevity. With careful execution, reconstruction and repair in the region can lead to improved safety and functionality of the buildings involved.
FAQS
Is repair the same as reconstruction?
No, repair and reconstruction are not the same. Repair typically involves fixing or restoring specific components of a structure, while reconstruction refers to rebuilding an entire structure or significant portions of it.
What are the main advantages of reconstruction?
The main advantages of reconstruction include long-term solutions, improved structural integrity, and the ability to implement modern building techniques and materials that enhance safety and functionality.
What are some common repair techniques?
Common repair techniques include patching, resurfacing, sealing, and replacing damaged components. These methods are often less invasive and can be completed in a shorter timeframe than reconstruction.
When should I consider reconstruction over repair?
You should consider reconstruction over repair when the damage is extensive, when the structural integrity is compromised, or when modernizing the building is a priority and repair efforts would not be cost-effective.
What are the steps involved in the reconstruction process?
The steps involved in the reconstruction process typically include assessment of damage, planning and design, obtaining necessary permits, demolition of damaged parts, construction of the new structure, and final inspections.
Related Links
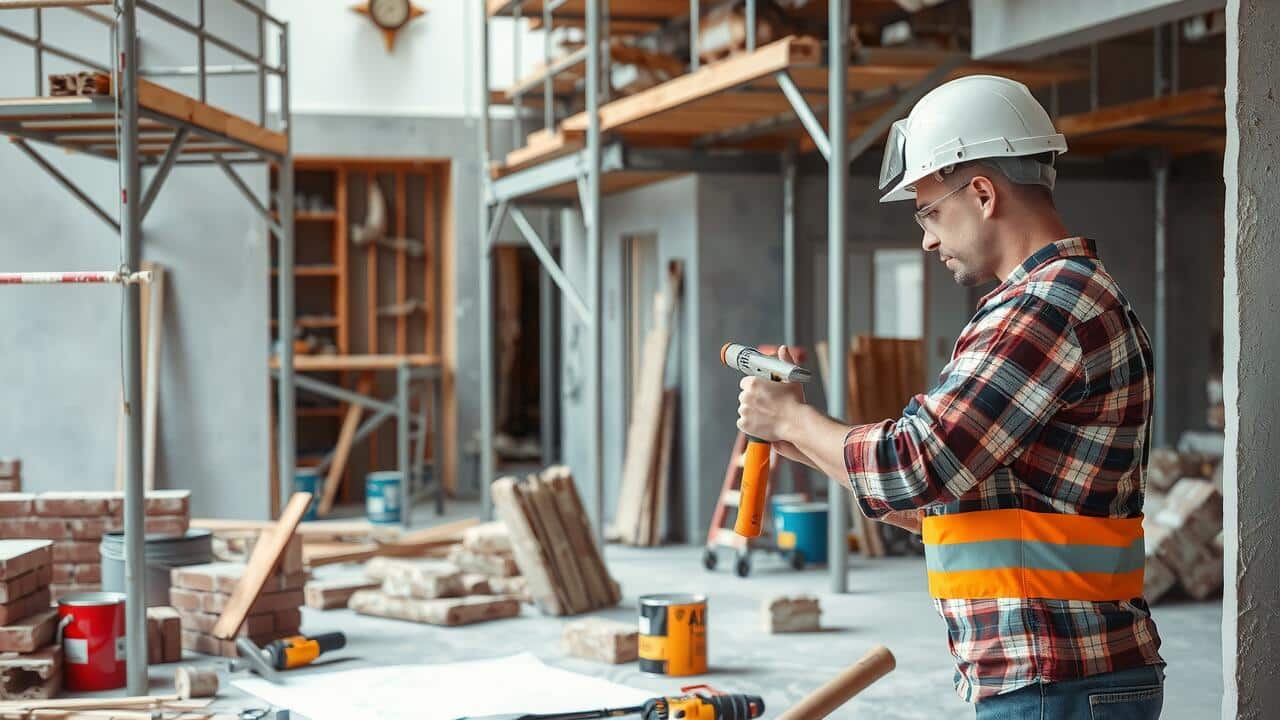
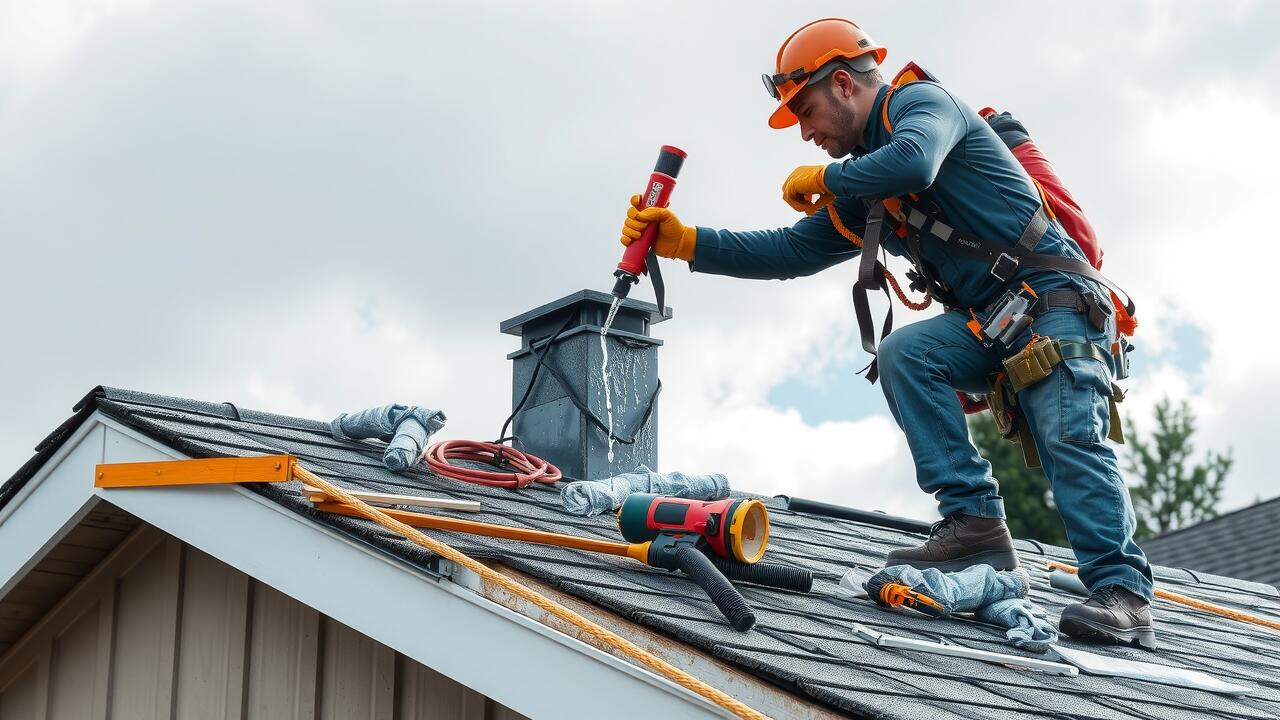
Table Of Contents
Documentation Required
When dealing with a roof leak, proper documentation is crucial for filing an insurance claim. Begin by collecting any relevant photographs that clearly show the extent of the damage. Take detailed pictures of the leak, water stains, and any other affected areas. These images will support your case and help inspectors understand the issue. Additionally, retain any receipts for emergency repairs you may have performed to mitigate further damage. This can demonstrate your proactive approach and may be considered favorably when your claim is evaluated.
Written estimates or invoices from roofing professionals are also important. Having documented proof of the necessary roof leak repair in your home showcases the urgency and potential costs involved. Keep records of any communication with your insurance provider regarding previous claims or discussions about your coverage. This documentation establishes a clear history and can be helpful if questions arise later in the claims process.
Essential Records to Support Your Claim
When dealing with a roof leak, it is crucial to gather all relevant documentation to support your insurance claim. Start by collecting photographs that clearly depict the damage caused by the leak. Specific images of the affected areas, along with close-ups of any visible signs of deterioration, can provide strong evidence of the issue. Additionally, gather any receipts or invoices related to prior roof maintenance or repairs. Such records can demonstrate that you have been proactive in maintaining your roof, which may influence the outcome of your claim.
Documentation of the repair process also plays an essential role in your claim. After obtaining quotes for Roof Leak Repair in your area, ensure you retain any estimates from contractors specifying the extent of the damage and the proposed work required for correction. Written communication between you and your insurance provider, including initial claims forms and correspondence, should be well-organized and easily accessible. This thorough approach not only substantiates your claim but also keeps all parties informed throughout the claims process.
Exclusions and Limitations
Understanding the exclusions and limitations of your homeowner’s insurance policy is crucial when dealing with a leaking roof. Many policies do not cover damage resulting from maintenance neglect or wear and tear over time. If the roof leak arises due to a lack of regular maintenance, the insurer may deny the claim, deeming it a preventable issue. Therefore, homeowners should routinely inspect and maintain their roofs to avoid situations where coverage may be denied.
In addition to maintenance issues, specific events may lead to exclusions in coverage. For instance, if the roof leak occurs due to severe weather conditions, the policy may have clauses that limit the payout based on the extent of the damage. Furthermore, certain materials or types of roofs may not be covered under standard policies. Homeowners considering Roof Leak Repair in their plans should familiarize themselves with these nuances to ensure that they have appropriate coverage in place.
Special Cases Where Coverage May Not Apply
Certain circumstances may lead to a denial of coverage for roof leak repair in your insurance policy. For instance, damage caused by lack of maintenance is often excluded. If your roof developed a leak due to age-related wear or untreated issues, your claim could be rejected. Policies also typically exclude damage resulting from natural disasters not covered in your agreement, making it crucial to review specific terms regarding perils.
Additionally, homeowners should be aware of any modifications made to their property that could void coverage. Unauthorized changes to the roofing structure or materials could limit or eliminate the insurance company’s responsibility for repair costs. Furthermore, if there is evidence of negligence, such as ignoring warning signs of a leak, insurers may also refuse to cover the expenses involved in roof leak repair in these scenarios.
Working with Insurance Adjusters
When dealing with insurance adjusters, effective communication is crucial. Prepare to provide comprehensive information regarding your roof leak, including detailed descriptions of the damage and any temporary repairs made. Having documentation ready will facilitate the discussion. Consider taking photos or videos of the affected areas, as these visual aids can significantly strengthen your position during the inspection process.
The adjuster will likely assess the situation and may ask questions to understand the extent of the damage. Be ready to explain your need for Roof Leak Repair in a clear manner. It’s essential to remain patient during the evaluation. A positive interaction can lead to a more favorable outcome for your insurance claim.
Tips for a Successful Inspection
Thorough preparation is essential for a successful inspection when dealing with a roof leak repair in your home. Gather relevant documentation including photographs of the leak, previous repair records, and any maintenance history. These items help provide a clear narrative of the issue and demonstrate your proactive approach. Make your home accessible for the inspector by clearing any debris or obstacles that might obstruct their view of the roof. This not only fosters a smoother inspection process but also shows your willingness to cooperate.
Communication plays a significant role during the inspection process. Be ready to explain the circumstances surrounding the leak, detailing when you first noticed it and any steps you’ve taken to mitigate the damage. Offering insights into your roof’s age and maintenance can help the adjuster gauge the situation accurately. Always remain open to their questions and concerns. This can foster a more productive dialogue and enhance the likelihood of a favorable outcome for your roof leak repair in the insurance claim process.
FAQS
Is a leaking roof always covered by homeowners insurance?
Not necessarily. Coverage for a leaking roof depends on the cause of the leak and the terms of your specific insurance policy. Typically, leaks caused by sudden and accidental damage may be covered, while those resulting from long-term wear and tear may not be.
What documentation do I need to file a claim for a leaking roof?
You will typically need to provide photos of the leak, any related damage, a copy of your insurance policy, and any repair estimates. Detailed documentation will support your claim and help expedite the process.
Are there exclusions that might affect my claim for a leaking roof?
Yes, common exclusions in homeowners insurance policies may include damage from lack of maintenance, wear and tear, or specific weather-related events like flooding, depending on your policy.
How can I prepare for an inspection by the insurance adjuster?
To prepare for an inspection, document the damage thoroughly with photographs, create a detailed list of repairs needed, and be ready to answer any questions about when the damage occurred and how you discovered it.
What should I do if my claim for a leaking roof is denied?
If your claim is denied, review the denial letter for specific reasons, gather additional documentation that may support your case, and consider contacting your insurance company to discuss the decision or appeal the denial.
Related Links
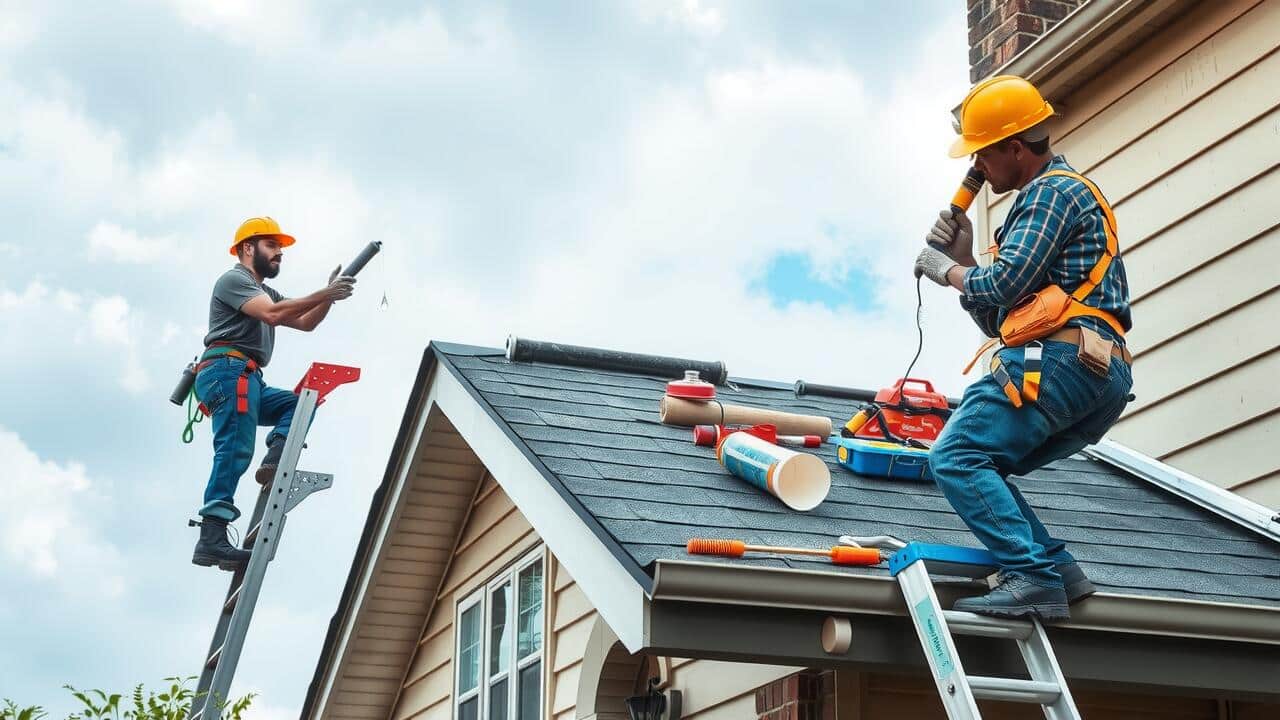
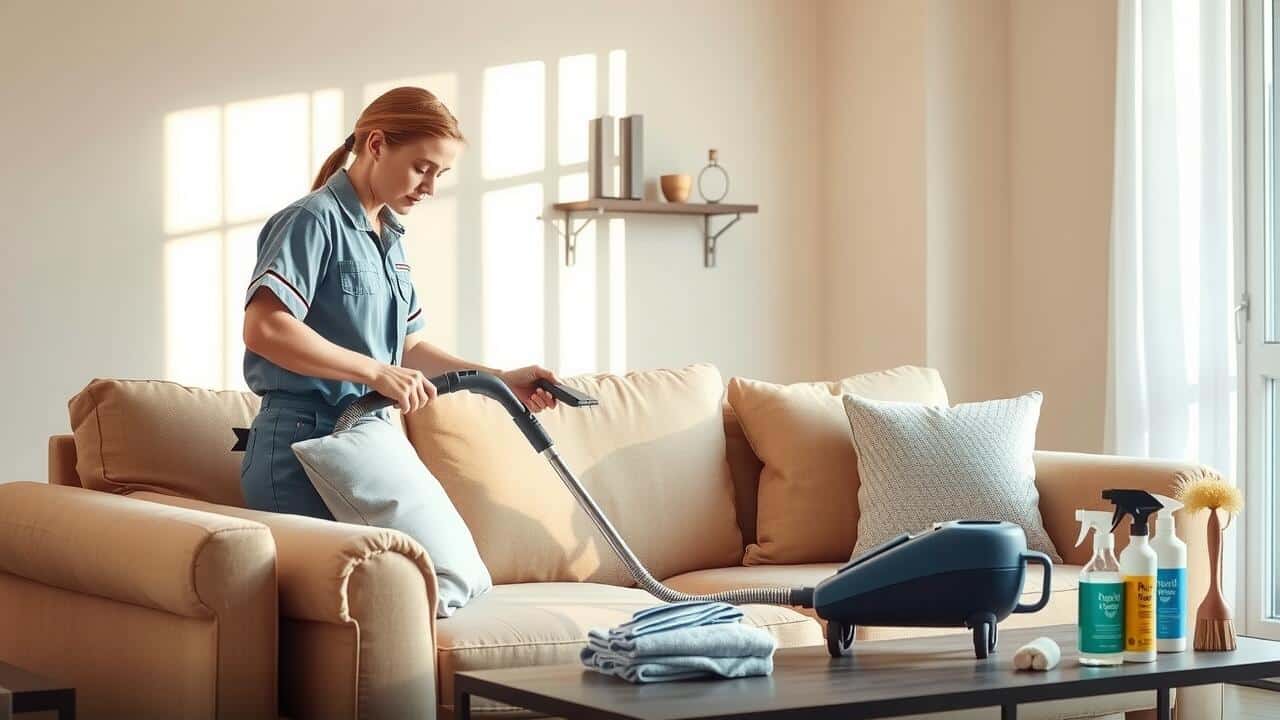
Table Of Contents
Customer Reviews and Experiences
Many customers have shared positive experiences with Stanley Steemer’s upholstery cleaning services. Reviews often highlight the professionalism of the technicians and the thoroughness of the cleaning process. Clients appreciate the removal of tough stains and the fresh appearance of their sofas. The convenience of scheduling appointments has also garnered praise, with users finding the booking process user-friendly.
Some customers mention searching for “Upholstery Cleaning near me” and are pleased to discover that Stanley Steemer has locations available nationwide. The overall satisfaction rating tends to reflect a high level of trust in the brand, with many recommending the service to friends and family. The feedback indicates that customers feel they receive good value for the money spent on couch cleaning.
Insights from Previous Clients
Many clients who have used Stanley Steemer for couch cleaning have shared their satisfaction with the professionalism of the technicians and the effectiveness of the cleaning process. Reviews often highlight the thoroughness of the service, with many noting that their couches looked almost new after treatment. Some customers particularly appreciate the flexibility in scheduling and the ease of booking appointments online. Others mention that the cleaning equipment used is advanced, which contributes to brilliant results.
Additionally, clients frequently recommend searching for “Upholstery Cleaning near me” to find local branches of Stanley Steemer, as their experiences suggest that the quality of service remains consistent across various locations. Feedback often revolves around the friendly nature of the staff and the transparency regarding pricing, which many found reasonable given the level of service provided. Overall, the positive experiences contribute to a strong reputation that encourages repeat business from satisfied customers.
Comparing Costs with Competitors
When comparing costs with competitors, it’s essential to gather information from various upholstery cleaning companies. Many local services offer their own pricing structures, which can greatly vary based on location, the type of fabric, and the cleaning method used. A quick search for “Upholstery Cleaning near me” will help you identify nearby options and their typical rates. This information can provide a benchmark for evaluating Stanley Steemer’s pricing and services.
While Stanley Steemer is known for its thorough cleaning methods and professional staff, it’s beneficial to check reviews and service quality from other companies as well. Some local cleaners might offer more competitive pricing with similar services. By comparing these prices and reading through customer experiences, you’ll gain a clearer picture of how Stanley Steemer measures up against its competitors in the upholstery cleaning market.
How Does Stanley Steemer Stack Up?
When comparing Stanley Steemer’s pricing and service quality with other upholstery cleaning options, customers often emphasize the company’s strong reputation and reliable service. Many clients appreciate the thoroughness of the cleaning process and the professionalism of the technicians. This level of reliability helps justify the price for many, especially for those seeking high-quality upholstery cleaning near me.
Some alternatives may offer lower rates, but they often do not provide the same level of client satisfaction. Local providers may vary widely in their techniques and equipment. Customers frequently find that the comprehensive care offered by Stanley Steemer leads to a longer-lasting clean, making the investment worthwhile for those searching for upholstery cleaning near me.
Preparing Your Couch for Cleaning
Cleaning your couch effectively requires a bit of preparation. Start by removing any cushions or throw blankets. This will provide easier access to all areas of the couch. Dust and debris tend to accumulate in hidden spots, so vacuuming the entire surface is a good idea. Pay attention to the crevices where dirt might be trapped. Using a brush attachment can help gather loose particles.
Consider clearing the space around your couch to facilitate the cleaning process. Move any nearby furniture or items that could obstruct the cleaners. If you have varying types of upholstery, note cleaning instructions for each type. This will ensure that the cleaning professionals can apply the best methods. For anyone seeking efficient services, searching for “upholstery cleaning near me” can provide local options that meet your needs.
Steps to Take Before the Appointment
Preparing your couch for a professional cleaning is essential for achieving the best possible results. Start by removing any items from the couch, such as pillows, throws, and other accessories. This helps the technician access all areas of the upholstery effectively. Additionally, vacuum the couch to eliminate surface dirt and debris. This step aids in preventing the dirt from becoming further embedded in the fabric during the cleaning process.
If you have specific stains or concerns, make a note to discuss them with the technician when they arrive. Clear communication is vital for ensuring that your upholstery receives the appropriate treatment. You may also want to search for “Upholstery Cleaning near me” to compare your options and gather information on services available in your area. Doing this can help you prepare any questions you might have for the professionals.
FAQS
How much does Stanley Steemer typically charge to clean a couch?
The cost to clean a couch with Stanley Steemer generally ranges from $100 to $200, depending on factors like the size of the couch and the type of fabric.
Are there any additional fees I should be aware of when booking a couch cleaning with Stanley Steemer?
Yes, there may be additional fees for services such as stain removal, protective treatments, or if you require the cleaning of additional furniture pieces.
How long does the couch cleaning process take?
The cleaning process usually takes about 1 to 2 hours, depending on the size and condition of the couch.
Can Stanley Steemer clean all types of couch materials?
Stanley Steemer can clean various types of couch materials, including upholstery, leather, and microfiber, but it’s important to check with them beforehand to ensure they can handle your specific fabric.
Is it necessary to prepare my couch before the cleaning appointment?
Yes, it is recommended to vacuum the couch and remove any personal items or loose cushions before the cleaning appointment to ensure the best results.
Related Links


Table Of Contents
Seasonal Trends in Upholstery Cleaning Costs
Upholstery cleaning costs tend to fluctuate throughout the year, influenced by seasonal factors and consumer demand. During the spring and summer months, many homeowners focus on deep cleaning their living spaces, which often includes upholstery cleaning. As a result, service providers may raise their prices to accommodate the increased volume of requests. Conversely, during the fall and winter months, business slows down, and prices may decrease to attract customers in need of cleaning services.
Holidays can also significantly impact upholstery cleaning costs. In the weeks leading up to major holidays, such as Thanksgiving and Christmas, people are more likely to prepare their homes for gatherings. This surge in demand can lead to higher rates for upholstery cleaning services due to the influx of appointments. On the other hand, right after the holiday season, many companies may offer promotions or discounts to encourage business during slower months, creating potential savings opportunities for consumers looking to clean their upholstery.
Peak Seasons for Cleaning Services
Certain times of the year generate higher demand for upholstery cleaning services. Spring and fall are notable peaks as many homeowners undertake seasonal cleaning projects. During these periods, people often feel a strong urge to refresh their living spaces after winter or prepare for the social events of summer and the holidays. This uptick in cleaning activities can make it more challenging to schedule services, as many companies experience a surge in bookings.
Additionally, some cleaning companies may offer seasonal promotions during times of high demand. These promotions can be beneficial for homeowners looking to save on upholstery cleaning costs. It is essential to be aware of these trends and plan accordingly to ensure optimal service availability and potentially better pricing.
How to Get Quotes from Cleaning Companies
When seeking quotes from cleaning companies for upholstery cleaning, start by gathering information from multiple service providers. Contact local businesses directly or utilize online platforms that specialize in connecting customers with cleaning services. During initial communications, provide detailed information about the specific upholstery items needing cleaning, such as sofas, chairs, or curtains. This clarity helps companies offer more accurate estimates based on your requirements.
It’s essential to inquire about the cleaning methods they use, as this can impact cost and effectiveness. Be sure to ask about any additional fees that may apply, such as for special treatments or larger pieces. Collecting detailed quotes allows for better comparison of services, pricing, and overall value. Always remember to check if the estimates include all necessary services associated with upholstery cleaning to avoid unexpected charges.
Factors to Include in Your Request
When requesting quotes for upholstery cleaning, it’s essential to provide detailed information about the specific items you need cleaned. Include the type of fabric, dimensions of the furniture, and any particular stains or issues you want the cleaning company to address. This level of detail enables the cleaning professionals to give you accurate estimates and tailor their services to your needs.
Additionally, mention any previous cleaning history or special requirements for the upholstery cleaning. If your furniture has special conditions, such as being antique or made of delicate materials, communicating this will help avoid potential damage and ensure the right cleaning techniques are used. By being thorough in your request, you set the stage for a more satisfactory service.
Discounts and Promotions for Upholstery Cleaning
Many upholstery cleaning companies offer discounts and promotions to attract new customers and retain existing ones. These deals can vary seasonally or during specific events, making it easier for consumers to find affordable services. Checking the company’s website or social media pages often reveals the latest offers. Additionally, signing up for newsletters may provide exclusive discounts or early access to sales.
When searching for deals on upholstery cleaning, it is beneficial to compare prices across several service providers. Some companies may offer package deals that include multiple types of cleaning services at a reduced rate. Local community boards and websites frequently share promotions and recommendations for upholstery cleaning. Taking advantage of these resources can lead to significant savings.
What to Look for and Where to Find Deals
Finding deals on upholstery cleaning requires a bit of research. Start by checking local directories and review websites. Many cleaning companies list their current promotions or discounts on their websites. Social media platforms can also be valuable resources. Following businesses that offer upholstery cleaning services can lead to discovering exclusive offers or limited-time sales.
In addition to online resources, consider reaching out directly to cleaning companies. Inquire about any seasonal discounts or package deals they might have. Some companies offer loyalty programs that reward repeat customers with discounts on future upholstery cleaning services. Take advantage of word-of-mouth recommendations from friends or family, as personal referrals can often lead to finding the best deals.
FAQS
What is the average cost of upholstery cleaning?
The average cost of upholstery cleaning typically ranges from $100 to $300, depending on factors such as the type of fabric, size of the furniture, and location.
How often should I clean my upholstery?
It is generally recommended to clean your upholstery every 1 to 2 years, but high-traffic areas or homes with pets may need more frequent cleaning.
Are there any seasonal trends in upholstery cleaning costs?
Yes, upholstery cleaning costs can fluctuate with seasonal demand, often peaking in spring and fall when people are looking to refresh their homes.
How can I get quotes from cleaning companies?
You can request quotes by contacting cleaning companies directly, filling out online forms, or using service comparison websites to gather multiple estimates.
What should I look for in discounts or promotions for upholstery cleaning?
Look for seasonal promotions, package deals, or loyalty discounts offered by cleaning companies, as well as customer reviews to find reputable services.
Related Links
Table Of Contents
Areas Prone to Water Damage
Water damage can occur in various areas within a home, often where plumbing fixtures or appliances are located. Basements are particularly vulnerable due to their proximity to ground moisture. Leaking pipes, overflowing washing machines, and faulty water heaters can leave lasting damage. Attics are also at risk, especially with roof leaks or poor ventilation that allows condensation to build up.
When performing a Water Damage Inspection in these critical areas, professionals will examine both visible signs and hidden sources of moisture. They focus on areas around windows, doors, and roofs as well as inside walls and cabinets. Inspectors often check plumbing systems to identify potential leaks. Early detection can prevent severe structural damage, mold growth, and costly repairs down the line.
Locations at High Risk in Your Home
Certain locations within a home are especially vulnerable to water damage. The basement, often damp and prone to flooding, can show signs of moisture intrusion through walls and floors. Bathrooms and kitchens frequently encounter leaks from plumbing, making them high-risk areas. Inspecting these rooms for potential water damage can save homeowners significant repair costs. Water Damage Inspection in these critical spaces ensures any issues are identified early and addressed promptly.
Attics commonly overlook water damage risk, especially if the roofing has issues or if improper ventilation leads to condensation. Appliances like washing machines and dishwashers can also contribute to water damage if hoses become loose or worn over time. Areas around windows and doors may reveal water stains or mold growth due to improper sealing. Conducting a thorough Water Damage Inspection in these locations helps maintain the structural integrity of a home and prevents further complications.
The Role of Humidity Measurement
Humidity measurement plays a critical role in the Water Damage Inspection in any property. Elevated humidity levels can indicate potential water issues lurking within walls or ceilings. Professionals use hygrometers to assess moisture levels, helping identify areas that may be at risk for damage. Understanding humidity can provide valuable insights into whether moisture intrusion has occurred or if a space is prone to future problems.
Monitoring humidity over time allows for the early detection of issues that may not be immediately visible. A consistent rise in moisture levels may suggest leaks or unresolved water problems in the vicinity. By incorporating humidity measurements into regular inspections, homeowners can take proactive steps to mitigate risks and ensure a healthier living environment.
Understanding Moisture Levels in Your Environment
Moisture levels in your environment play a crucial role in understanding the potential for water damage. Various factors affect humidity, such as weather conditions, ventilation, and building materials. Regularly monitoring indoor humidity can help identify problems before they escalate. High moisture levels can create an environment conducive to mold growth and structural weaknesses, making it essential to maintain optimal humidity levels within the home.
Water Damage Inspection in areas with elevated humidity becomes a critical process. Professionals often use specialized tools to measure moisture levels in walls, floors, and ceilings. These instruments provide immediate readings, allowing experts to pinpoint potential issues and recommend necessary repairs. Understanding these moisture levels not only aids in effective inspection but also helps homeowners take preventive measures against future damage.
Evaluating Structural Integrity
Water damage can significantly compromise the structural integrity of a building. Inspectors typically look for signs of sagging ceilings, warped floors, and bowing walls, as these may indicate underlying moisture issues. Materials such as wood, drywall, and insulation can weaken over time when exposed to water, leading to a greater risk of structural failure. This makes it essential to conduct a thorough water damage inspection in any area of the home that exhibits these symptoms.
An extensive water damage inspection in residential and commercial properties enables professionals to assess the extent of any damage. They may use advanced techniques such as thermal imaging to detect hidden moisture pockets in walls and ceilings. Identifying these problem areas promptly can prevent further deterioration and ensure that the building remains safe for occupants. Recognizing the signs of water damage early plays a vital role in maintaining the overall safety and longevity of a structure.
How Water Damage Impacts Building Safety
Water damage can compromise the structural integrity of a building, leading to safety concerns. When materials like wood, drywall, and insulation become saturated, they lose strength and can warp. For instance, wooden beams may begin to rot, creating the potential for collapse. Regular water damage inspection in critical areas ensures that any signs of compromised structures are identified early, preventing hazardous situations.
In addition to physical damage, the presence of moisture can foster mold growth, further threatening the safety of occupants. Mold can exacerbate respiratory issues and lead to allergies, impacting overall health. Conducting thorough water damage inspections in spaces such as basements and attics helps in pinpointing moisture sources, allowing for timely remediation and protecting both the building and its inhabitants.
FAQS
What are the common areas prone to water damage in a home?
Common areas prone to water damage include basements, bathrooms, kitchens, and around windows and doors. Roof leaks and plumbing issues are also frequent sources of water damage.
How do professionals identify locations at high risk for water damage?
Professionals identify high-risk locations by inspecting areas with poor drainage, checking for past water damage signs, and evaluating the condition of plumbing and roofing systems.
Why is humidity measurement important in checking for water damage?
Humidity measurement helps assess the moisture levels in the environment, which can indicate the presence of water damage or potential for mold growth. High humidity can worsen water damage issues.
What tools do experts use to measure moisture levels?
Experts typically use moisture meters, thermal imaging cameras, and hygrometers to accurately measure moisture levels in various materials and environments.
How does water damage impact the structural integrity of a building?
Water damage can weaken the structural components of a building, lead to mold growth, and cause materials such as wood and drywall to rot, compromising safety and stability.
