Category: Uncategorized
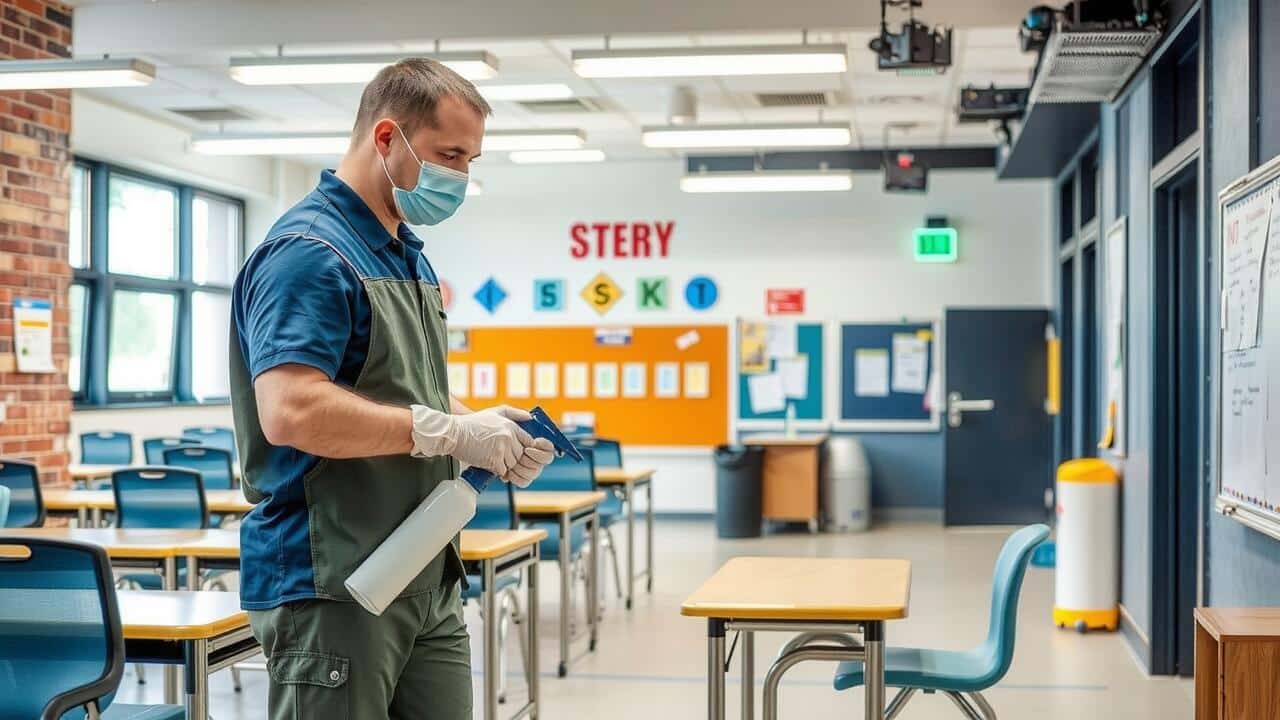
Table Of Contents
How Sanitation Affects Community Well-being
Sanitation plays a crucial role in safeguarding community well-being by providing access to clean water and proper waste management systems. Effective sanitation practices reduce the spread of diseases such as cholera and dysentery, which can thrive in unsanitary conditions. This creates a healthier environment for residents, allowing them to lead more productive lives, contribute positively to the community, and reduce the economic burden on healthcare systems.
Sanitization efforts are essential not only for public health but also for improving overall quality of life. Communities with robust sanitation infrastructure often experience lower rates of disease and increased social equity. Access to safe sanitation facilities can empower both women and children, enabling them to manage their health and hygiene more effectively. In this way, proper sanitation fosters a stronger, more resilient community.
Benefits of Proper Sanitation Systems
Proper sanitation systems play a crucial role in promoting public health and enhancing community well-being. Effective management of waste and sewage reduces the risk of waterborne diseases. Access to clean water and hygienic disposal methods can vastly improve the quality of life for residents. Communities with reliable sanitation infrastructure often experience fewer health problems, leading to increased productivity and economic stability.
Sanitization processes complement sanitation systems by ensuring that surfaces and public spaces remain free from harmful pathogens. Regularly cleaned and disinfected areas contribute to overall hygiene and safety. This proactive approach helps in preventing the spread of infections and maintains a healthier environment for everyone. Properly implemented sanitation systems combined with effective sanitization are essential for fostering safe and thriving communities.
Regulatory Standards for Sanitization
Regulatory standards for sanitization are critical to ensuring public health and safety. These standards often outline requirements for cleaning, disinfecting, and maintaining equipment, facilities, and personal hygiene. Government agencies and health organizations set these guidelines to minimize the spread of infectious diseases in various settings, including healthcare facilities, food service establishments, and public spaces.
Compliance with sanitization regulations can significantly reduce the risk of contamination and illness. Regular inspections and audits help identify potential deficiencies in sanitization practices. Meeting these standards is essential for organizations to assure their customers and employees of a safe environment.
Guidelines from Health Organizations
Health organizations provide clear guidelines to promote effective sanitization practices. The World Health Organization emphasizes the importance of maintaining clean water sources and adequate hygiene facilities. This guidance is essential to prevent the spread of diseases linked to unsanitary conditions. Organizations also advocate for community education on proper sanitization methods to enhance public health outcomes.
In addition to promoting education, these guidelines often include recommendations for regular inspections of sanitization facilities. Ensuring that sanitation systems are functioning correctly helps identify potential risks before they escalate. By following these protocols, communities can significantly reduce health hazards associated with poor sanitation and improve overall well-being.
The Impact of Poor Sanitation
Poor sanitation can lead to severe health consequences for communities, significantly increasing the risk of waterborne diseases. Contaminated water sources often harbor harmful pathogens, causing outbreaks of cholera, dysentery, and other gastrointestinal diseases. When effective sanitization measures are absent, the effects ripple throughout society, particularly impacting vulnerable populations such as children and the elderly. These health issues not only threaten individual well-being but also strain healthcare systems and hinder economic development.
Inadequate sanitation facilities can also contribute to environmental degradation. When waste management systems fail, pollutants can enter local ecosystems, affecting water quality and soil health. This not only jeopardizes human health but also disrupts local agriculture and wildlife. Communities may find it challenging to maintain clean and safe environments when proper sanitization practices are not implemented. The long-term implications can undermine residents’ quality of life and diminish prospects for sustainable growth.
Consequences for Health and Safety
Poor sanitation significantly contributes to health risks within communities. Inadequate waste disposal and contaminated water sources facilitate the spread of diseases such as cholera and dysentery. The lack of proper sanitization measures heightens vulnerability, particularly among children and the elderly. Without effective systems in place, communities face increased healthcare costs and a greater burden on medical resources.
The ramifications extend beyond physical health, influencing safety and overall quality of life. Poor sanitation can lead to environments ripe for vectors like rodents and insects that carry diseases. This scenario creates a cycle of illness that hampers productivity and economic growth. Effective sanitization practices are essential for fostering safe living conditions and ensuring community resilience against health threats.
FAQS
What is the difference between sanitization and sanitation?
Sanitization refers to the process of cleaning and reducing contaminants to safe levels, while sanitation encompasses broader practices and systems that ensure proper hygiene and health within a community.
Why is proper sanitation important for community well-being?
Proper sanitation helps prevent disease, promotes health, and enhances the overall quality of life by ensuring a clean and safe environment for all community members.
What are some benefits of having a proper sanitation system?
Benefits of proper sanitation systems include reduced disease transmission, improved public health, enhanced environmental conditions, and increased community productivity.
What regulatory standards exist for sanitization?
Various regulatory standards for sanitization include guidelines set by governmental health agencies, local ordinances, and international health organizations that ensure safe practices in food handling, waste management, and water quality.
What are the consequences of poor sanitation?
Poor sanitation can lead to serious health risks, including the spread of infectious diseases, environmental pollution, and adverse effects on community safety and well-being.
Related Links


Table Of Contents
Assessing Damaged Contents
Assessing damaged contents after a fire requires a systematic approach to determine which items can be salvaged and which are beyond repair. Begin by conducting a thorough review of all affected belongings. Focus on personal items, furniture, electronics, and appliances. Photographs can be beneficial for records and help in evaluating damages. Items that show minimal exposure to heat or smoke may be salvageable with proper cleaning, while those severely charred or melted typically need to be discarded.
Fire Damage Inspection in this context plays a crucial role in evaluating conditions beyond mere visuals. It provides insight into hidden issues such as structural integrity and lingering odors. Depending on the severity of the fire, smoke damage can permeate materials and require more than surface cleaning. A careful assessment can guide homeowners and insurers in determining the necessary steps for restoration and replacement, ensuring that the most critical decisions about damaged contents are informed and accurate.
Salvageable vs. Non-Salvageable Items
Determining which items can be salvaged after a fire is crucial. Materials like metal and glass often withstand heat better than porous materials, making them more likely to be reusable. Fabrics, paper products, and electronics can sustain significant damage, potentially rendering them non-salvageable. A thorough Fire Damage Inspection in your home allows for an accurate assessment of damaged contents, helping to identify what can be cleaned or restored and what needs to be discarded.
Items that are deemed non-salvageable typically include those that show extensive burn marks, warped structures, or lingering odors of smoke and soot. Mold and mildew can develop rapidly in the aftermath of a fire, particularly in damp areas, complicating restoration efforts. During a Fire Damage Inspection in affected areas, professionals can guide homeowners on the best practices for dealing with contaminated belongings and the safest ways to handle hazardous materials. Understanding these distinctions can alleviate some stress in the recovery process.
Professional Assessment Services
In complex cases of fire damage, hiring a professional assessment service can be a crucial step. Experts bring specialized knowledge and tools that aid in accurately evaluating the extent of damage. Fire Damage Inspection in residential or commercial properties ensures a thorough examination, providing a clear understanding of what can be salvaged and what must be replaced. These assessments often reveal underlying issues that may not be immediately visible, such as smoke infiltration and structural integrity concerns.
Professional inspectors also provide detailed reports that are essential for insurance claims. Their findings can clarify the necessary steps for restoration and guide property owners through the recovery process. Engaging a professional service for Fire Damage Inspection in affected areas helps streamline communication with insurance companies, ensuring that all required documentation is both comprehensive and accurate. This approach minimizes the risk of underreporting damage and maximizes the chances of receiving adequate compensation for losses.
When to Hire an Expert
When assessing fire damage, it can be challenging to determine the extent of destruction and whether items can be salvaged. In many cases, a trained professional can provide valuable insights into the damage that may not be immediately visible to the untrained eye. Hiring an expert for fire damage inspection in your home or business is essential when the damage appears extensive. Their experience allows them to accurately evaluate structural integrity and the condition of contents, ensuring a thorough assessment.
Additionally, complex situations such as disputes with insurance companies or the need for specialized restoration techniques may require expert intervention. A professional can guide property owners through the claims process, assisting with documentation and providing necessary assessments that meet insurance requirements. Engaging in fire damage inspection in these scenarios not only assures a detailed evaluation but also streamlines potential restoration efforts, ultimately facilitating a smoother recovery.
Documenting Damage for Insurance Claims
Documenting fire damage is essential when filing insurance claims. Start by taking detailed photographs of all affected areas and items. Ensure these images capture the extent of the damage. List all damaged belongings, including appliances, furniture, and personal items. This comprehensive inventory will help provide a clear picture of your losses to the insurance adjuster.
In addition to photographs and a list, consider keeping receipts for any items that will need replacing. If you conducted any repairs or temporary fixes to mitigate further damage, document those as well. Engaging in a thorough fire damage inspection in your property can provide critical details for your claim. This process not only aids in recovery efforts but also reinforces your case with the insurance company.
Creating a Comprehensive Inventory
Creating a comprehensive inventory of damaged items is crucial after experiencing a fire. Start by documenting every item affected by smoke and flames, including furniture, electronics, clothing, and personal belongings. Provide specific details such as brand names, model numbers, and purchase dates for each item, as this information will be invaluable for insurance claims. Take photographs when possible to visually support your records. This thorough approach also helps in differentiating between salvageable and non-salvageable items.
Fire damage inspection in a structured manner enhances the assessment process. Organize your inventory by categories, ensuring that you include both the condition and estimated value of each item. This organization aids in discussions with insurance companies and restoration services. It is beneficial to keep copies of your inventory in a safe location and consider utilizing digital tools to streamline the documentation process. The more meticulous your inventory, the smoother the recovery efforts will be.
FAQS
What should I do first after a fire to assess the damage?
The first step after a fire is to ensure that the area is safe. Once it is safe, begin by assessing the damaged contents and separating items into salvageable and non-salvageable categories.
How can I determine which items are salvageable after a fire?
Salvageable items are typically those that can be cleaned, repaired, or restored. Check for signs of heat, smoke, or water damage, and consult professional restoration services if you’re unsure.
When is it necessary to hire a professional for fire damage assessment?
It’s advisable to hire a professional when the damage is extensive, when hazardous materials are involved, or when you need assistance in documenting the damage for insurance claims.
What information should I include in an inventory for insurance claims?
Your inventory should include a comprehensive list of damaged items, their estimated value, photographs of the damage, and any receipts or documentation of purchases.
How can I expedite the insurance claims process after a fire?
To expedite the process, create a detailed inventory of the damaged items, gather all relevant documentation, and promptly submit your claim along with any supporting evidence such as photos and repair estimates.
Related Links


Table Of Contents
Repairing Shingles
Repairing shingles is a critical step in maintaining the integrity of a roof. Missing or damaged shingles can expose the underlying materials to water infiltration, leading to more extensive problems. Identifying the specific issues with the shingles is essential for effective roof leak repair. Signs like curling, cracking, or discoloration indicate that shingles may need replacement or repair.
Once the problems are identified, the repair process is straightforward. For damaged shingles, homeowners can usually remove the affected ones and replace them with new shingles that match the existing ones. Proper sealing and fastening are vital to ensure longevity. Routine inspections of the roof can help detect these issues early, minimizing the need for more drastic interventions later.
Replacing Damaged or Missing Shingles
Replacing damaged or missing shingles is a crucial step in effective roof leak repair. First, inspect the roof thoroughly to identify any shingles that are cracked, broken, or entirely missing. It’s important to select replacement shingles that match the existing ones in color and material to maintain the roof’s integrity and aesthetics. Before starting the repair, gather necessary tools and materials, including a pry bar, roofing nails, and appropriate shingles.
Once you have everything ready, carefully remove the damaged shingles using the pry bar. Ensure that you also remove any nails that remain in place. After clearing the area, place the new shingles over the exposed section, aligning them with the surrounding shingles. Secure the replacements with roofing nails, making sure to follow the manufacturer’s guidelines for proper installation. This method not only addresses the immediate issue but also prevents further complications that can arise from delayed repairs.
Fixing Flashing Issues
Flashing is essential for directing water away from vulnerable areas of the roof, such as valleys, chimneys, and vents. Damaged or improperly installed flashing can lead to leaks, compromising the integrity of the roof structure. Identifying issues such as rust, cracks, or loose seams can help homeowners determine if roof leak repair is necessary. If such issues are present, it is crucial to address them promptly to prevent further water infiltration.
Techniques to repair flashing vary based on the type and severity of damage. For minor issues, applying a roofing sealant over cracks or gaps may suffice. In more severe cases, replacing sections of the flashing may be necessary. This process involves carefully removing the affected flashing, ensuring the underlying materials remain intact, and installing new flashing that matches the existing roof structure. Properly executed repairs will help maintain the roof’s functionality and longevity.
Techniques to Repair Flashing
When tackling flashing issues, it’s important to assess the extent of the damage before proceeding with repairs. Loose or damaged flashing can lead to significant leaks, so securing it is a priority. Many homeowners opt for specialized roofing sealants to reattach or seal existing flashing. It’s essential to clean the area thoroughly before applying any sealant, ensuring that dirt and debris do not hinder adhesion. For more severe cases, replacing the flashing altogether may be necessary.
In situations where the flashing has deteriorated significantly, installing new sections may be the best solution for effective roof leak repair. This process typically involves carefully removing the old flashing and measuring to cut new pieces to size. Using metal flashing provides greater durability against the elements. Once in place, a good practice is to apply a waterproof sealant around the edges. This adds an extra layer of protection against moisture intrusion and promotes the longevity of the roof system.
Addressing Gutter Problems
Gutters play a crucial role in directing rainwater away from the roof and foundation of a house. When gutters become clogged with debris, they can overflow, leading to water damage and increasing the risk of roof leaks. Regular inspection and cleaning of gutters can help prevent these issues from escalating. Homeowners should remove leaves, twigs, and other obstructions to ensure proper flow. Neglected gutters can contribute to roof leaks, making timely roof leak repair even more essential.
In some cases, the gutters themselves may be damaged, causing them to sag or misalign. This misalignment disrupts the intended flow of water, causing pooling and potential leaks. Homeowners can address this by adjusting or replacing broken sections of the gutter system. Utilizing effective materials and ensuring the gutters are securely mounted aids in maintaining proper drainage. Staying proactive about gutter maintenance can significantly contribute to effective roof leak repair and overall roof health.
Ensuring Proper Drainage
Proper drainage is essential for preventing water from accumulating on your roof, which can lead to leaks and significant damage. Clogged gutters often cause water to overflow and seep into the roof structure. Regular cleaning of gutters and downspouts is necessary to remove debris, leaves, and dirt. Installing gutter guards can also help reduce blockages and ensure efficient water flow away from the edges of the roof.
In addition to maintaining gutters, ensuring that the landscape around your home directs water away from the foundation is important. Downhill slopes can assist in guiding runoff away, reducing the risk of water pooling near the base of the house. When evaluating your roof for potential issues, consider how drainage contributes to the effectiveness of your Roof Leak Repair strategies. Making changes to your drainage system can create a significant impact on preventing future leaks.
FAQS
What are the common causes of a leaky roof?
Common causes of a leaky roof include damaged or missing shingles, improper flashing installation, clogged gutters, and deteriorating roofing materials.
How can I tell if my roof has a leak?
Signs of a leaky roof include water stains on ceilings or walls, mold growth, peeling paint, and drips or puddles during rainfall.
Can I repair a leaky roof myself?
While some small repairs can be done by homeowners, it is often advisable to hire a professional to ensure the job is done correctly and safely.
How often should I inspect my roof for leaks?
It is recommended to inspect your roof at least twice a year, especially after severe weather conditions, to catch any potential issues early.
What is flashing, and why is it important for my roof?
Flashing is a material used to direct water away from critical areas of the roof, such as chimneys and vents. Properly installed flashing helps prevent leaks and prolongs the roof’s lifespan.
Related Links
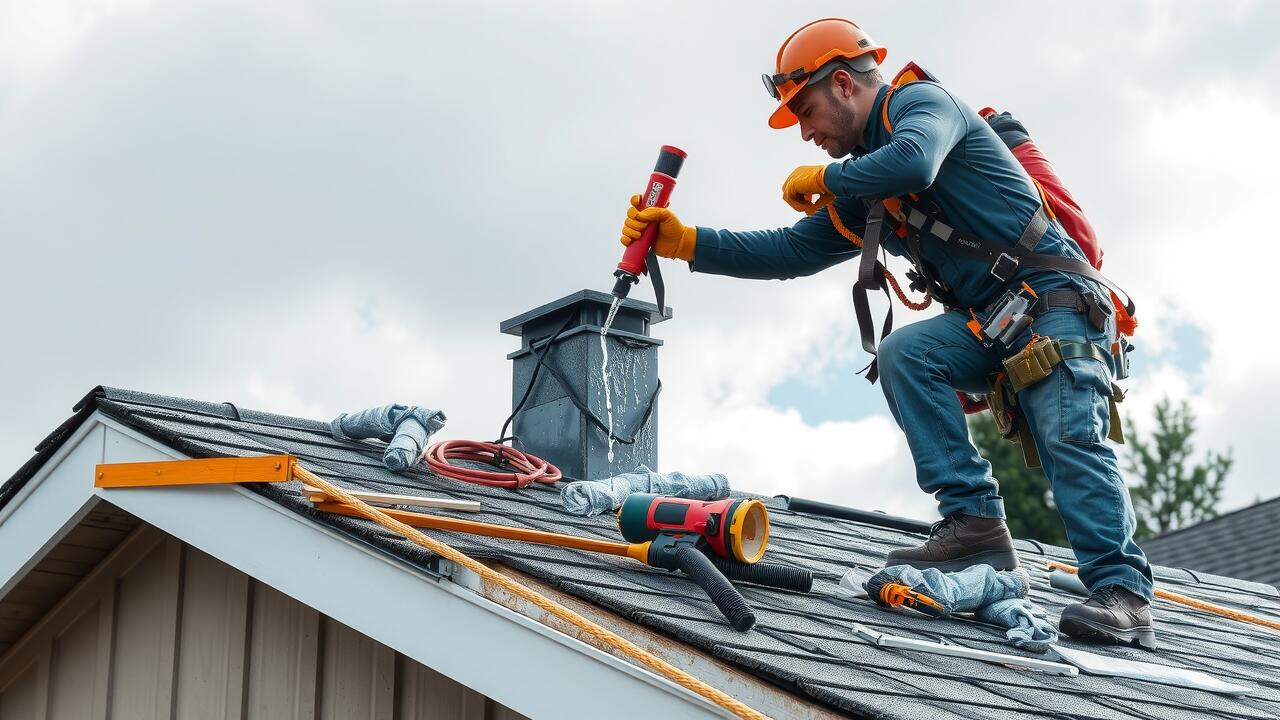

Table Of Contents
Average Cost Estimates
When evaluating the cost of repairing a leaking roof, homeowners can generally expect to pay between $300 and $1,000 for minor repairs. Factors such as the type of roofing material and the extent of the leak can significantly influence the final price. For example, simple fixes on asphalt roofs typically cost less than repairs on more intricate roofing systems like tile or slate. Homeowners should consider getting quotes from multiple contractors to ensure they are receiving a fair assessment.
Additionally, if the leak has caused underlying damage, costs can increase considerably. Water damage, mold remediation, and structural repairs can add several hundred to thousands of dollars depending on the severity of the issues. It is advisable for those searching for solutions to input “Roof Leak Repair near me” in search engines, which can lead them to local professionals who can assess both the leak and any potential damage it may have caused.
National Averages for Roof Leak Repairs
The national averages for roof leak repairs typically range from $300 to $1,500, depending on the severity of the damage and the type of roofing materials involved. Minor leaks often only require patchwork, costing around $300 to $600. More substantial issues, particularly those that require extensive repairs or parts replacement, can increase the costs significantly, often leading to higher estimates especially in larger homes or those with complicated roofing designs.
Homeowners searching for solutions might frequently type “Roof Leak Repair near me” into search engines. This search often yields local contractors who can provide assessments and more precise quotations for repairs. Local rates may vary based on regional market conditions, labor costs, and the availability of materials, making it essential to gather multiple quotes to ensure competitive pricing and quality service.
Additional Costs to Consider
When addressing a roof leak, homeowners should be aware that the initial repair cost may not encompass all necessary expenses. Additional costs can arise from underlying damage that may not be immediately visible. If water has seeped into insulation, drywall, or even the structure of the home, repairs could extend beyond simple patchwork. Homeowners must factor in potential costs for water remediation and restoration of affected areas to ensure a comprehensive fix.
In addition to structural repairs, homeowners might consider the implications of hiring a professional. Searching for “Roof Leak Repair near me” can yield local service providers, but it’s essential to evaluate their qualifications and experience. Choosing the right contractor may involve consulting multiple estimates and checking references. This careful approach can prevent overspending while also ensuring the quality of the repair work is up to acceptable standards.
Underlying Damage and Water Remediation
When dealing with a roof leak, it is essential to assess any underlying damage caused by prolonged exposure to water. Water can infiltrate various components of a home, potentially leading to mold growth, wood rot, or damage to insulation and other interior elements. Ignoring these issues may result in more extensive repairs and higher costs later. Homeowners should consider hiring professionals for a thorough inspection, as they can identify damage that may not be immediately visible.
Water remediation is another critical aspect of handling a roof leak. Simply repairing the roofing material will not suffice if the underlying water issues persist. Effective remediation involves addressing any moisture intrusion and ensuring proper ventilation, which prevents future problems. Homeowners searching for a solution may look up “Roof Leak Repair near me” to find qualified contractors who can perform both repair and remediation services. Taking immediate action can help protect the home from long-term damage and added expenses.
Choosing a Roofing Contractor
Finding the right roofing contractor is crucial when dealing with roof leak repairs. Start your search by asking for recommendations from friends, family, or neighbors who have had similar work done. Online reviews and ratings can also give insight into a contractor’s reputation. Use search terms like “Roof Leak Repair near me” to generate local options and compare their services, experience, and customer feedback. A contractor with a strong local presence is often familiar with regional weather challenges and typical roofing materials.
When evaluating potential contractors, ensure they are licensed and insured. Check if they have experience specifically with roof leak repairs, as this expertise can make a significant difference in the quality of the work. Request written estimates and inquire about warranties or guarantees on their repairs. Transparency in pricing and a clear understanding of the work involved will help you make an informed decision. Aim to choose a contractor who communicates effectively and shows commitment to customer satisfaction, which can lead to successful outcomes.
What to Look for in a Professional
When looking for a roofing contractor, it’s essential to consider a professional’s experience and reputation in the industry. Check online reviews and ratings to gauge customer satisfaction. A good contractor should have a solid portfolio showcasing previous work, particularly in roof leak repair. Asking for references can provide insight into the quality of their service. Ensure they have appropriate licensing and insurance, as this protects you in the event of any issues during the repair process.
Another important factor is the availability of warranty for both materials and labor. A reputable contractor will stand behind their work and offer guarantees. You should also evaluate their communication style. A reliable professional will be responsive, providing clear explanations about the repair process and costs. Local searches like “Roof Leak Repair near me” can help you find contractors familiar with regional weather conditions and roofing styles, leading to more tailored solutions for your specific needs.
FAQS
What is the average cost to repair a leaking roof?
The average cost to repair a leaking roof typically ranges from $300 to $1,500, depending on the extent of the damage and the materials needed.
Are there any additional costs I should consider when repairing a roof leak?
Yes, additional costs may include underlying damage repair, water remediation, and potential upgrades to roofing materials, which can increase the overall price.
How can I find a reliable roofing contractor?
To find a reliable roofing contractor, look for licensed and insured professionals, read online reviews, ask for references, and obtain multiple quotes to compare services and pricing.
What signs indicate that my roof may have underlying damage?
Signs of underlying damage may include water stains on ceilings or walls, mold or mildew growth, sagging areas on the roof, and visible damage to shingles or flashing.
Is it worth repairing a leaking roof, or should I consider a full replacement?
Whether to repair or replace a leaking roof depends on the extent of the damage and the age of the roof. If the damage is minor and the roof is relatively new, repairs may be sufficient. However, if there is significant damage or the roof is nearing the end of its lifespan, replacement may be the better option.
Related Links
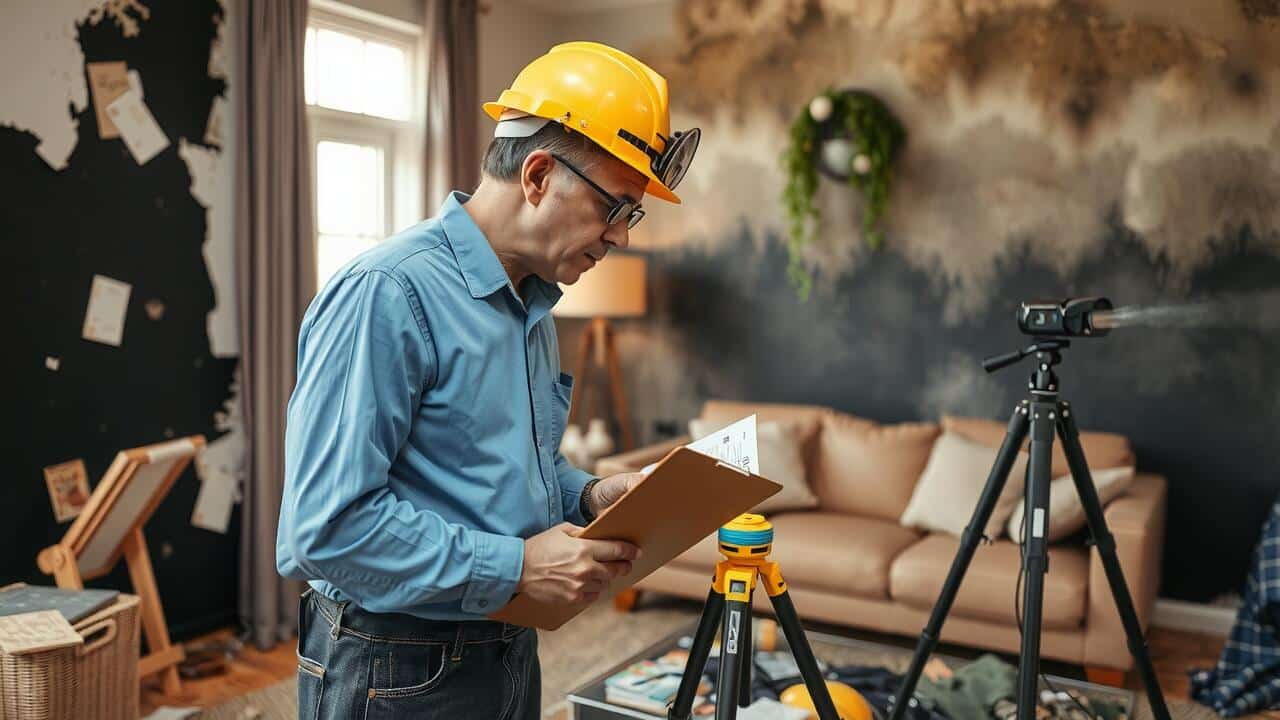
Table Of Contents
Electrical Systems Evaluation
Electrical systems evaluation is a crucial aspect of fire inspections. Inspectors assess wiring, circuits, and outlets for signs of wear or damage. Overheating or frayed wires can lead to electrical fires. The evaluation also involves checking that all systems are properly grounded and free from unauthorized modifications. Fire damage inspection may uncover potential hazards that could escalate into serious emergencies if left unaddressed.
In addition to assessing physical components, inspectors review the overall electrical system’s compliance with local codes and regulations. This helps ensure that any upgrades or installations are up to standard. Evaluators often recommend improvements or replacements when necessary to mitigate risks. Proper maintenance and regular evaluations significantly reduce the likelihood of fire incidents caused by electrical issues.
Identifying Potential Fire Hazards
Identifying potential fire hazards is a crucial aspect of fire damage inspection. Inspectors assess various elements of the property, focusing on areas that could ignite or exacerbate a fire. Common hazards include overloaded electrical outlets, improperly stored flammable materials, and blocked exits. Each of these risks is carefully noted during the inspection process, ensuring that property owners have a clear understanding of vulnerabilities present within their premises.
Another key component involves evaluating the condition of fire safety equipment. Smoke detectors and fire alarms should be functional and adequately placed to provide early warnings. Inspectors also check for the presence of fire extinguishers, ensuring they are accessible, maintained, and appropriately rated for different types of fires. The thorough identification of these potential hazards not only aids in compliance with safety regulations but also plays an essential role in preventing catastrophic events.
Sprinkler Systems Inspection
Sprinkler systems play a crucial role in fire protection. Inspectors assess the condition and operational efficiency of these systems to ensure they function correctly in case of a fire. Regular checks involve verifying the integrity of pipes, sprinkler heads, and water sources. Any obstructions or corrosion can impede performance. During a fire damage inspection, the effectiveness of existing systems is also evaluated in relation to past incidents.
Maintenance is vital for sprinkler systems to operate effectively. Inspectors typically look for signs of wear and tear and ensure that components meet local fire codes. They may also test control valves and alarms to confirm proper functionality. Accurate documentation of these inspections is essential for both safety compliance and future reference. This process not only safeguards property but can also significantly reduce potential fire damage.
Functionality and Maintenance Check
A comprehensive fire inspection involves a thorough functionality and maintenance check of various systems critical to fire safety. Fire alarms, smoke detectors, and sprinkler systems require regular testing to ensure they are in working order. Inspectors verify that these devices function correctly, as any malfunction could lead to devastating outcomes in the event of a fire. Maintenance records should be reviewed to confirm that these systems have received necessary upkeep according to manufacturer recommendations and local regulations.
During the functionality and maintenance check, it is also essential to inspect the condition of fire extinguishers and emergency lighting systems. These devices must be easily accessible and properly marked. The proper placement and operational readiness of these essential tools are crucial for effective response should a fire occur. In conjunction with the Fire Damage Inspection, these checks help identify any deficiencies and facilitate prompt repairs or replacements, ensuring overall safety and compliance with fire codes.
Documentation and Reporting
Accurate documentation is a critical component of the fire inspection process. Inspectors meticulously record their findings, noting any deficiencies in the electrical systems, sprinkler setups, and overall safety protocols. This documentation serves as a valuable reference for both property owners and fire safety officials. It also plays a significant role in future inspections, helping to track improvements or recurring issues. Additionally, it can be crucial when establishing accountability for any fire damage inspection outcomes.
Comprehensive reporting helps ensure compliance with local fire codes and regulations. Inspectors provide detailed summaries that highlight areas where fire prevention measures are lacking. These reports not only guide property owners in making necessary upgrades but also serve as evidence of due diligence in fire safety practices. Effective communication of these findings fosters a culture of safety and responsiveness, ultimately aiming to minimize fire risks and enhance community safety.
Importance of Accurate Records
Accurate records play a crucial role in the context of fire inspections. These documents provide a clear history of inspections conducted, findings noted, and any corrective actions taken. During a Fire Damage Inspection, the thoroughness of these records can facilitate quick identification of recurring issues or patterns that may require further attention. They serve not only as a compliance measure but also as an essential reference for tracking the effectiveness of fire safety measures over time.
Moreover, precise documentation is beneficial for future inspections and audits. In the event of a fire incident, having detailed records can assist in understanding past conditions and ensuring that any necessary improvements are made. This helps to maintain a safer environment and supports regulatory compliance, ultimately contributing to the overall effectiveness of fire prevention strategies within any organization or facility.
FAQS
What are the main components included in a fire inspection?
A fire inspection typically includes an evaluation of electrical systems, identification of potential fire hazards, inspection of sprinkler systems, and a thorough documentation and reporting process.
How are electrical systems evaluated during a fire inspection?
During a fire inspection, electrical systems are evaluated for proper installation, maintenance, and functioning to ensure they are not a potential fire hazard. This includes checking wiring, outlets, and electrical panels.
What types of potential fire hazards are identified?
Inspectors look for various hazards such as overloaded electrical circuits, improperly stored flammable materials, obstructed exits, and malfunctioning fire protection equipment.
Why is a sprinkler system inspection important?
A sprinkler system inspection is crucial to ensure that the system is functional and well-maintained. This includes checking for leaks, proper water pressure, and that all components are in working order to provide effective fire suppression.
What is the significance of documentation and reporting in a fire inspection?
Accurate documentation and reporting are essential for maintaining compliance with fire safety regulations, tracking issues that need to be addressed, and providing a record of the inspection for future reference and liability purposes.
Related Links

Table Of Contents
Paul Davis Restoration
Paul Davis Restoration is a well-established company that provides a range of emergency restoration services. Their expertise encompasses fire and water damage repair, mold remediation, and storm recovery. By utilizing advanced technology and techniques, they aim to restore homes to their original condition. Many customers appreciate their 24/7 availability, ensuring prompt action during crises. Those looking for specialized services often search for “Fire Damage Inspection near me” to assess potential damages efficiently.
The company emphasizes quality in their restoration techniques, relying on certified professionals to handle projects. This commitment to excellence extends through training and ongoing education for their staff, keeping them updated on industry best practices. Moreover, Paul Davis offers comprehensive documentation throughout the restoration process. This meticulous approach fosters transparency and helps clients feel informed about the work being done in their homes. Pricing structures vary based on the extent of damage and required services, but clients often find their rates competitive within the industry.
Evaluating Their Restoration Techniques
Paul Davis Restoration employs advanced techniques and technology in their restoration process. Their team focuses on detailed assessments and tailored strategies depending on the unique needs of each project. When dealing with fire damage, for instance, they emphasize thorough fire damage inspections to determine the exact extent of the destruction. Homeowners searching for “Fire Damage Inspection near me” will find that Paul Davis is equipped to provide comprehensive evaluations and implement effective remediation plans.
Belfor Property Restoration also emphasizes meticulous restoration methods but offers a broader range of services under one roof. Their approach includes advanced moisture control and sophisticated drying equipment, which are crucial after water damage incidents. For clients looking for multi-faceted solutions, Belfor often employs innovative strategies that address various types of damage, including fire-related issues. This versatility can be an essential factor for homeowners seeking reliable restoration options.
Belfor Property Restoration
Belfor Property Restoration stands out for its wide range of services designed to assist homeowners facing various types of disasters. The company specializes in restoration for fire, water, and storm damage, providing timely response and thorough recovery processes. Their expertise in handling high-stakes situations is complemented by state-of-the-art technology and equipment, ensuring a comprehensive approach to restoration. Customers often note the professionalism and competence of Belfor’s technicians, which can significantly reduce stress during a challenging time.
In addition to their commendable service quality, pricing for Belfor’s restoration services can vary based on the extent of the damage and specific customer needs. Homeowners searching for “Fire Damage Inspection near me” will find that Belfor offers detailed assessments before any restoration work begins, which helps in understanding potential costs. This transparency allows clients to make informed decisions while budgeting for recovery efforts. Their commitment to quality ensures that repairs are done right the first time, which can lead to cost savings in the long run.
Comprehensive Service Offerings
Belfor Property Restoration stands out for its extensive range of services tailored to meet various restoration needs. They cover everything from water and fire damage restoration to mold remediation and even specialty services like electronics restoration. This broad offering ensures that customers can find solutions for multiple issues within one company, fostering convenience and streamlined project management. Their experience in diverse situations enables them to handle complex scenarios effectively, providing customers peace of mind during stressful times.
In addition to traditional restoration services, Belfor emphasizes proactive assessments such as “Fire Damage Inspection near me.” This approach allows property owners to identify potential risks before they escalate into more severe problems. By offering detailed inspections and thorough evaluations, Belfor enhances its restoration capabilities. Customers can expect quality service coupled with a commitment to safety and prevention, setting a strong foundation for exceptional post-restoration outcomes.
ServiceMaster Restore
ServiceMaster Restore provides a wide array of restoration services, specifically focusing on fire and water damage restoration. Their expertise covers everything from initial damage assessments to comprehensive repairs. Homeowners often seek “Fire Damage Inspection near me” to evaluate the extent of damage and identify necessary remediation steps. The company prides itself on employing certified technicians who utilize state-of-the-art equipment and techniques to ensure thorough restoration.
In addition to their robust service offerings, ServiceMaster Restore emphasizes rapid response times, crucial for minimizing further damage and ensuring efficient recovery. Their pricing structure varies based on the specifics of each job, including the scale of damage and required services. Many customers appreciate the transparent estimates they provide, helping homeowners make informed decisions regarding their restoration needs.
Cost Analysis and Service Efficiency
ServiceMaster Restore provides competitive pricing for its restoration services while maintaining a strong emphasis on efficiency. Their cost structure often reflects the location and extent of the damage, allowing for tailored estimates that align with the specific needs of homeowners. Evaluating their pricing model is essential for consumers, as it can vary depending on the services required, such as water extraction, mold remediation, or fire damage inspection near me. Transparency in costs plays a significant role in client satisfaction, enabling homeowners to understand what they are paying for and why.
In terms of service efficiency, ServiceMaster Restore utilizes advanced technology and training to expedite the restoration process. Their commitment to rapid response times and specialized equipment helps minimize loss and damage, allowing clients to resume their lives quickly. Performance metrics, such as time taken to complete jobs and customer feedback, contribute to understanding their operational effectiveness. Homeowners seeking reliable restoration can benefit from reviewing these factors to ensure they select the best service option for their needs.
FAQS
What are the main alternatives to ServPro for home restoration services?
Some reputable alternatives to ServPro include Paul Davis Restoration, Belfor Property Restoration, and ServiceMaster Restore.
How does Paul Davis Restoration differ from ServPro in terms of restoration techniques?
Paul Davis Restoration focuses on advanced restoration techniques tailored to each specific situation, emphasizing thorough assessments and customized solutions to ensure quality outcomes.
What comprehensive services does Belfor Property Restoration offer that might differ from ServPro?
Belfor Property Restoration provides a wide range of services, including fire, water, and mold damage restoration, as well as specialized services like electronics restoration and contents management, which may not be as extensive in some ServPro locations.
How does ServiceMaster Restore compare to ServPro regarding pricing and efficiency?
ServiceMaster Restore’s pricing can vary based on the extent of damages and required services, but they are generally known for their efficiency and quick response times, which can lead to cost savings in the long run compared to some ServPro services.
Are there any key factors to consider when choosing a home restoration service?
Key factors include the company’s reputation, range of services offered, customer reviews, response time, and transparency in pricing to ensure you select a service provider that meets your specific restoration needs.
Related Links
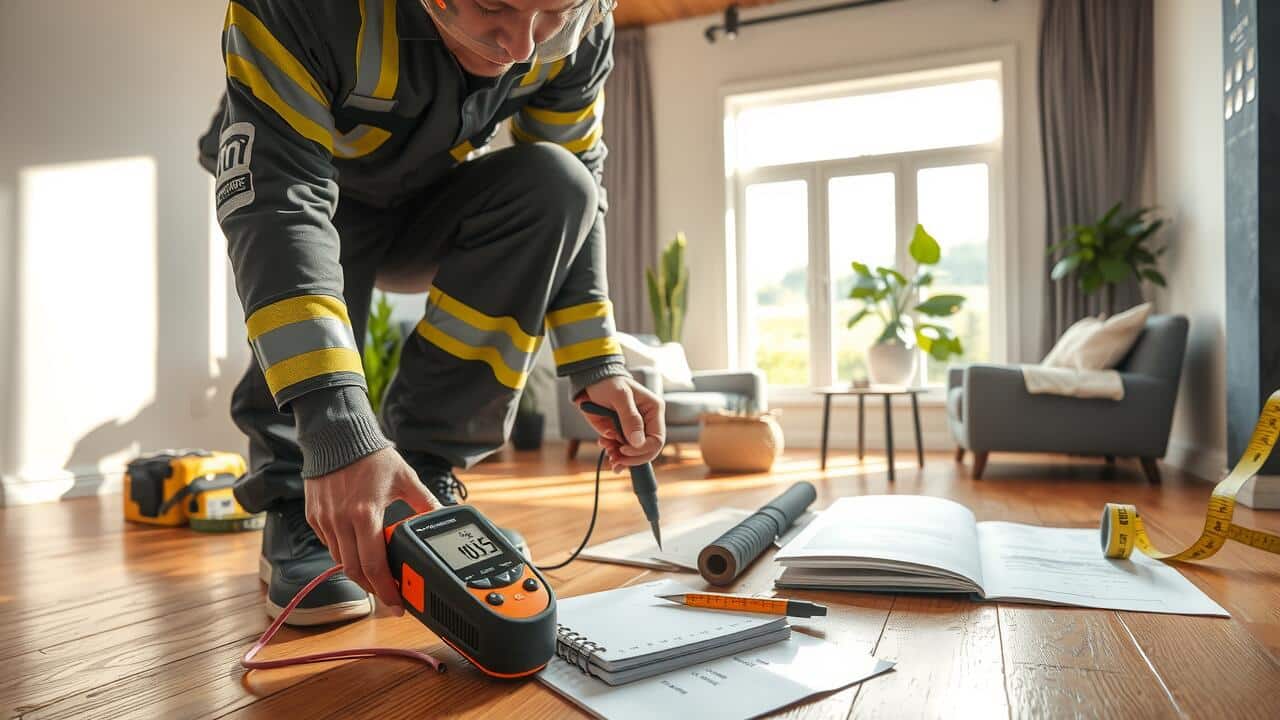
Table Of Contents
Interpreting Moisture Test Results
Interpreting moisture test results is essential for understanding the condition of materials in various environments. The numbers obtained from these tests provide insights into the moisture content of a given substance, which can significantly impact its integrity and performance. A high moisture reading might indicate potential issues such as mold growth or material degradation, while lower readings suggest a dry environment that is more conducive for construction purposes. Understanding what these numbers mean in context helps builders and property owners make informed decisions about repairs and maintenance.
Moisture testing in construction plays a critical role in assessing the suitability of materials before installation. Accurate interpretation of moisture levels helps identify areas that may require additional attention to ensure longevity and safety. Factors such as ambient humidity, temperature, and the materials used can all influence moisture levels. Therefore, analyzing the results in light of these influences enables professionals to devise effective solutions tailored to the specific conditions of a project.
What the Numbers Mean
Moisture testing in various materials provides critical numerical data that helps assess the presence of moisture and its potential implications. The results are typically presented as a percentage, indicating the volume of water within a given material compared to its dry weight. For instance, readings above a certain threshold can signify elevated moisture levels, which may lead to concerns such as mold growth or structural damage. Understanding these figures allows for immediate remediation techniques to be applied, ensuring that any risks are minimized.
Interpreting these numbers requires an understanding of acceptable moisture levels for different materials. For instance, wood generally has a safe moisture content range of 6 to 12 percent, while concrete may handle a bit more depending on its purpose. If the moisture levels exceed these benchmarks, corrective actions become crucial. Moisture testing in construction is vital for creating stable environments, preventing costly repair work, and ensuring the longevity of building materials.
Factors Affecting Moisture Levels
Several factors contribute to the moisture levels within materials and environments. Environmental conditions, such as temperature and humidity, play a significant role. Higher temperatures often increase evaporation rates, while elevated humidity can lead to moisture accumulation. Additionally, seasonal changes can also influence moisture levels, with colder months frequently resulting in condensation on surfaces.
Material properties also affect moisture retention and migration. Different building materials have varying permeability rates, which determine their ability to absorb and release moisture. For example, porous materials may retain higher moisture levels compared to more water-resistant options. Effective moisture testing in these materials is essential to identify potential issues before they escalate, impacting both structural integrity and indoor air quality.
Environmental and Material Influences
Moisture levels within materials can significantly vary depending on environmental factors such as temperature, humidity, and ventilation. For instance, areas with high humidity tend to retain more moisture, making moisture testing in those environments critical for assessing the condition of building materials. Additionally, a lack of proper ventilation can exacerbate moisture retention, creating conditions for mold growth and structural damage.
The type of material also plays a crucial role in moisture retention and evaporation. Porous materials like wood and concrete can absorb moisture, leading to increased readings during moisture testing in these substances. Non-porous materials, such as metal or plastic, generally do not hold moisture in the same way, resulting in lower moisture levels. Understanding these influences helps in accurately interpreting test results and taking appropriate action for maintaining the integrity of structures.
Moisture Testing in Construction
Moisture Testing in construction is a critical practice that helps ensure the longevity and safety of buildings. Excessive moisture can lead to a variety of issues, including mold growth, structural damage, and deterioration of building materials. By conducting moisture tests, builders can identify areas of concern early in the construction process. This proactive approach minimizes risks and can save considerable time and money in repairs down the line.
It is essential to consider the various techniques available for moisture testing in construction. Methods range from non-invasive options, like infrared thermography, to direct measurements using moisture meters and other tools. Each technique has its unique advantages and limitations based on the specific materials and environments involved. Selecting the appropriate method can significantly affect the accuracy of the results, ultimately guiding informed decisions about moisture management strategies within the project.
Importance for Building Integrity
Moisture testing in construction plays a crucial role in ensuring the long-term integrity and stability of buildings. High moisture levels can lead to various problems, including mold growth, deterioration of structural materials, and compromised indoor air quality. By identifying moisture issues early through thorough testing, builders and contractors can take proactive measures to address potential threats before they escalate, safeguarding both the structure and its occupants.
Incorporating moisture testing in the construction process also helps optimize material selection and application methods. Different materials respond uniquely to moisture presence, and knowing their moisture content assists construction professionals in choosing appropriate products and techniques. This attention to moisture management not only enhances the durability of the building but also promotes energy efficiency and lowers maintenance costs over time.
FAQS
What is a moisture test?
A moisture test is a procedure used to measure the amount of moisture present in various materials, such as soil, concrete, or wood, to assess their moisture content and ensure their suitability for construction or other applications.
Why is moisture testing important in construction?
Moisture testing is crucial in construction as it helps identify potential issues related to water damage, mold growth, and structural integrity. By understanding moisture levels, builders can make informed decisions about materials and methods, ensuring the longevity and safety of the structure.
What factors can affect moisture levels in materials?
Several factors can influence moisture levels, including environmental conditions (like humidity and temperature), the type of material being tested, and external factors such as water exposure or drainage systems.
How can I interpret moisture test results?
Moisture test results are typically expressed as a percentage, indicating the amount of moisture contained within a material. Generally, lower percentages indicate drier materials, while higher percentages may suggest a risk for moisture-related problems. It’s essential to compare results against industry standards for specific materials.
Are there different methods for conducting moisture tests?
Yes, there are several methods for conducting moisture tests, including the use of moisture meters, gravimetric testing, and relative humidity testing. Each method has its advantages and is suitable for different types of materials and situations.
Related Links
Table Of Contents
The Role of Ventilation in Moisture Control
Proper ventilation plays a crucial role in controlling moisture levels within a home. Without adequate airflow, humidity can accumulate, leading to an environment conducive to mold growth and structural damage. Effective ventilation systems not only help to expel humid air but also allow fresh air to circulate, which helps maintain a balanced indoor atmosphere. Regular moisture testing can identify areas where airflow may be insufficient, enabling homeowners to take corrective action before significant issues arise.
Incorporating exhaust fans in bathrooms and kitchens can significantly reduce moisture generated from daily activities. Opening windows and using air purifiers can improve ventilation as well. Homeowners should regularly inspect their ventilation systems to ensure they function properly. Monitoring moisture levels through moisture testing aids in assessing the effectiveness of existing ventilation and informs any necessary adjustments or upgrades to enhance humidity control.
Importance of Airflow in Reducing Humidity
Proper airflow plays a crucial role in reducing humidity levels within a home. Stagnant air can trap moisture, leading to an environment conducive to mold growth and damage to structures. Effective ventilation systems help circulate air, ensuring that humid air is vented outside while drier air is brought in. By strategically placing vents and using exhaust fans in key areas like kitchens and bathrooms, homeowners can significantly lower indoor humidity levels.
Moisture testing can further help identify areas of excess humidity that may not be immediately visible. Understanding airflow patterns and their impact on humidity can guide homeowners in making necessary adjustments to their ventilation systems. Proper maintenance of air ducts and filters also contributes to efficient airflow, ultimately supporting a healthier indoor environment.
Conducting a Visual Inspection
A visual inspection is a crucial first step in checking for moisture in your home. Begin by examining areas prone to dampness, such as basements, bathrooms, and kitchens. Look for any visible signs of water damage, such as curling wallpaper, peeling paint, or warped wood. These indicators can help identify potential problem areas that may require further investigation. Pay special attention to corners and areas around windows, as these spots are often where moisture can accumulate unnoticed.
In addition to looking for overt signs of water damage, you should also note any unusual odors that may suggest the presence of mold or mildew. Conducting moisture testing can be a helpful follow-up to a visual inspection. This process often involves using specialized tools and techniques to measure moisture levels within walls and floors. Identifying hidden moisture can prevent more serious problems down the line.
Identifying Water Stains and Discoloration
Water stains and discoloration on walls and ceilings can be clear indicators of moisture issues in a home. These stains often appear as yellow, brown, or even green patches, indicating prolonged exposure to water. Look for peeling paint or wallpaper, as these are also signs that moisture has infiltrated the area. Identifying these issues promptly can help mitigate more extensive damage.
In addition to a visual inspection, consider using Moisture Testing methods to assess the severity of the problem. Tools such as moisture meters can help determine the moisture content within various building materials. Taking immediate action upon discovering stains or discoloration can prevent mold growth and structural damage, ensuring a healthier living environment.
Professional Moisture Testing Services
For homeowners facing persistent moisture issues, professional moisture testing services offer a reliable solution. These specialists utilize advanced equipment and techniques to detect hidden moisture problems that might not be visible through a basic inspection. By measuring humidity levels and examining areas prone to dampness, they provide a comprehensive evaluation that can pinpoint the source of moisture intrusion.
Engaging a professional for moisture testing can be particularly beneficial when there are signs of water damage or unusual condensation. Experts can assess the extent of the problem and recommend appropriate remediation strategies. This proactive approach not only helps in maintaining a healthy living environment but also protects the structural integrity of the home over time.
When to Consider Hiring an Expert
If you suspect significant moisture issues in your home but lack the tools or knowledge to identify them, it may be wise to consider hiring a professional. Experts in moisture testing can provide a thorough assessment of your property. They utilize specialized equipment to detect hidden moisture levels that might not be visible to the naked eye. This targeted approach can save you time and ensure a comprehensive evaluation.
Additionally, if you’ve experienced water damage or persistent humidity problems, seeking professional help is advisable. They can recommend tailored solutions based on their findings, helping to prevent potential health risks associated with mold and mildew. Professional moisture testing not only addresses current concerns but also aids in implementing preventive measures for the future.
FAQS
What are some common signs of moisture in my house?
Common signs include water stains on walls or ceilings, peeling paint, mold growth, musty odors, and increased humidity levels in the air.
How can I check for moisture without professional help?
You can conduct a visual inspection for water stains and discoloration, use a moisture meter in areas like basements and bathrooms, and pay attention to any unusual odors.
What role does ventilation play in controlling moisture?
Proper ventilation helps to increase airflow, which can reduce humidity levels and prevent moisture buildup, leading to a drier and healthier indoor environment.
When should I consider hiring a professional for moisture testing?
You should consider hiring an expert if you notice persistent moisture issues, find extensive mold growth, or if you want a thorough assessment of your home’s moisture levels.
Can high humidity levels in my home cause health issues?
Yes, high humidity levels can lead to mold growth and dust mites, which can cause respiratory problems, allergies, and other health issues, especially for those with pre-existing conditions.
Related Links

Table Of Contents
Using Probes for Accurate Assessments
Probes are essential tools for home inspectors when assessing moisture levels within various materials in a home. These devices can accurately gauge the moisture content of wood, drywall, and other surfaces, providing vital information about potential water damage. The use of probes allows for invasive testing, which delves deeper than surface inspections to identify hidden problems that may not be obvious during a visual check. Homeowners often search for “Moisture Testing near me” to find local professionals equipped with these advanced tools.
During the inspection process, probes can reveal moisture levels that indicate leaks or other issues. Inspectors typically insert these devices into structural materials, giving a rapid reading that helps distinguish healthy wood from water-damaged areas. The data gathered from probe assessments can guide homeowners in making informed decisions about repairs and remediation. Using probes in conjunction with other methods enhances the overall accuracy of moisture testing and helps ensure a thorough evaluation of the home’s condition.
The Process of Invasive Testing
Invasive testing is a critical method used by home inspectors to obtain accurate moisture readings in areas that may not be easily accessible. This approach typically involves the use of specialized tools that penetrate surfaces such as drywall, hardwood flooring, and concrete. Inspectors may drill small holes or use probes to assess hidden spaces, allowing for a clearer understanding of the moisture levels present behind walls or under flooring. Property owners often seek services by searching for “Moisture Testing near me” to help identify underlying issues that may not be visible during a standard inspection.
The invasive testing process can also provide insight into the source of moisture problems, helping to differentiate between past leaks and ongoing issues. By obtaining samples from different depths within structures, inspectors can determine whether moisture intrusion is widespread or localized. This detailed analysis can inform necessary remediation efforts and assist homeowners in implementing effective solutions. Home inspectors prioritize thoroughness during invasive tests to ensure they capture an accurate picture of moisture conditions that could lead to more serious damage over time.
The Significance of Visual Inspections
Visual inspections play a crucial role in the home inspection process, as they allow inspectors to identify potential sources of moisture intrusion. Inspectors carefully examine areas prone to water damage, such as basements, attics, and around windows and doors. During these inspections, they look for visible signs, including stains, discoloration, and mold growth. Any of these indicators can suggest that moisture is present, providing a starting point for further investigation. Homeowners looking for thorough assessments often search for “Moisture Testing near me” to ensure comprehensive evaluations.
The significance of a visual inspection is further enhanced when combined with knowledge of the building’s history and the surrounding environment. An inspector familiar with regional weather patterns and common construction issues can better pinpoint potential problem areas. Homeowners should be proactive in addressing visible indicators of moisture, as unchecked issues can lead to more severe damage over time. Engaging a skilled inspector who utilizes both visual assessments and advanced testing methods ensures that all potential moisture-related concerns are thoroughly evaluated.
Identifying Signs of Water Damage
Home inspectors often rely on visual indicators to identify water damage within a property. Stains on walls, ceilings, or floors can reveal underlying moisture issues. These stains may appear dark or discolored and often indicate prolonged exposure to water or humidity. Areas with peeling paint, warped materials, and mold growth also signal potential moisture problems. The presence of these signs can help inspectors determine which areas require further investigation.
Conducting thorough moisture tests enhances the inspection process. If homeowners suspect water damage, searching for “Moisture Testing near me” can help them find local professionals equipped to assess the situation more accurately. Proper identification of moisture issues at the onset can prevent more significant complications, such as structural damage or health risks stemming from mold. Home inspectors prioritize a comprehensive visual assessment to pinpoint areas of concern, ensuring that they catch problems before they escalate.
Checking for Leaks with Pressure Testing
Pressure testing is a vital technique used by home inspectors to identify leaks in various systems, such as plumbing and roofing. By introducing air or water under pressure, inspectors can monitor the system for any drops in pressure that indicate leaks. Such tests are particularly useful for checking sealed systems, ensuring that they perform effectively without any hidden issues that may lead to moisture intrusion.
Homeowners looking for reliable assessments often search for “Moisture Testing near me” to find services that utilize pressure testing effectively. Accurate leak detection can prevent significant damage caused by water infiltration. Addressing leaks promptly not only safeguards the integrity of the home but also enhances the overall living environment by mitigating potential health risks associated with mold and dampness.
Understanding the Testing Process
Home inspectors often utilize a methodical approach to gauge moisture levels throughout a property. Understanding the testing process begins with the selection of appropriate tools, such as moisture meters and thermal imaging cameras. These devices enable inspectors to measure humidity levels and identify potential problem areas without causing damage. The results from these tools provide valuable insights into both current conditions and possible future complications, guiding homeowners in making informed decisions.
Incorporating moisture testing near me into the evaluation streamlines the inspection process and connects homeowners with local experts who are familiar with regional challenges. Technicians often follow established protocols that include assessing wall cavities, ceilings, and basements for unusual temperature fluctuations or water intrusion signs. The accuracy of these methods is essential, ensuring that any moisture-related issues are detected early and addressed promptly.
FAQS
What tools do home inspectors use to detect moisture?
Home inspectors typically use moisture meters, thermal imaging cameras, and probes to detect moisture in various materials and areas of a home.
How does a moisture meter work?
A moisture meter measures the moisture content in building materials by using electrical resistance or capacitance principles to provide readings that indicate moisture levels.
What is invasive testing in home inspections?
Invasive testing involves making small openings in walls or other structures to directly measure moisture levels in hidden areas, allowing for a more accurate assessment of potential water damage.
Why are visual inspections important for detecting moisture?
Visual inspections allow home inspectors to identify visible signs of water damage, such as stains, discoloration, or mold growth, which can indicate moisture problems that need further investigation.
What is pressure testing, and how does it help with leak detection?
Pressure testing involves sealing a plumbing system and applying pressure to check for leaks. It helps inspectors identify hidden leaks that could lead to moisture issues within the home.
Related Links

Table Of Contents
Areas Prone to Water Damage
Water damage can occur in various areas within a home, often where plumbing fixtures or appliances are located. Basements are particularly vulnerable due to their proximity to ground moisture. Leaking pipes, overflowing washing machines, and faulty water heaters can leave lasting damage. Attics are also at risk, especially with roof leaks or poor ventilation that allows condensation to build up.
When performing a Water Damage Inspection in these critical areas, professionals will examine both visible signs and hidden sources of moisture. They focus on areas around windows, doors, and roofs as well as inside walls and cabinets. Inspectors often check plumbing systems to identify potential leaks. Early detection can prevent severe structural damage, mold growth, and costly repairs down the line.
Locations at High Risk in Your Home
Certain locations within a home are especially vulnerable to water damage. The basement, often damp and prone to flooding, can show signs of moisture intrusion through walls and floors. Bathrooms and kitchens frequently encounter leaks from plumbing, making them high-risk areas. Inspecting these rooms for potential water damage can save homeowners significant repair costs. Water Damage Inspection in these critical spaces ensures any issues are identified early and addressed promptly.
Attics commonly overlook water damage risk, especially if the roofing has issues or if improper ventilation leads to condensation. Appliances like washing machines and dishwashers can also contribute to water damage if hoses become loose or worn over time. Areas around windows and doors may reveal water stains or mold growth due to improper sealing. Conducting a thorough Water Damage Inspection in these locations helps maintain the structural integrity of a home and prevents further complications.
The Role of Humidity Measurement
Humidity measurement plays a critical role in the Water Damage Inspection in any property. Elevated humidity levels can indicate potential water issues lurking within walls or ceilings. Professionals use hygrometers to assess moisture levels, helping identify areas that may be at risk for damage. Understanding humidity can provide valuable insights into whether moisture intrusion has occurred or if a space is prone to future problems.
Monitoring humidity over time allows for the early detection of issues that may not be immediately visible. A consistent rise in moisture levels may suggest leaks or unresolved water problems in the vicinity. By incorporating humidity measurements into regular inspections, homeowners can take proactive steps to mitigate risks and ensure a healthier living environment.
Understanding Moisture Levels in Your Environment
Moisture levels in your environment play a crucial role in understanding the potential for water damage. Various factors affect humidity, such as weather conditions, ventilation, and building materials. Regularly monitoring indoor humidity can help identify problems before they escalate. High moisture levels can create an environment conducive to mold growth and structural weaknesses, making it essential to maintain optimal humidity levels within the home.
Water Damage Inspection in areas with elevated humidity becomes a critical process. Professionals often use specialized tools to measure moisture levels in walls, floors, and ceilings. These instruments provide immediate readings, allowing experts to pinpoint potential issues and recommend necessary repairs. Understanding these moisture levels not only aids in effective inspection but also helps homeowners take preventive measures against future damage.
Evaluating Structural Integrity
Water damage can significantly compromise the structural integrity of a building. Inspectors typically look for signs of sagging ceilings, warped floors, and bowing walls, as these may indicate underlying moisture issues. Materials such as wood, drywall, and insulation can weaken over time when exposed to water, leading to a greater risk of structural failure. This makes it essential to conduct a thorough water damage inspection in any area of the home that exhibits these symptoms.
An extensive water damage inspection in residential and commercial properties enables professionals to assess the extent of any damage. They may use advanced techniques such as thermal imaging to detect hidden moisture pockets in walls and ceilings. Identifying these problem areas promptly can prevent further deterioration and ensure that the building remains safe for occupants. Recognizing the signs of water damage early plays a vital role in maintaining the overall safety and longevity of a structure.
How Water Damage Impacts Building Safety
Water damage can compromise the structural integrity of a building, leading to safety concerns. When materials like wood, drywall, and insulation become saturated, they lose strength and can warp. For instance, wooden beams may begin to rot, creating the potential for collapse. Regular water damage inspection in critical areas ensures that any signs of compromised structures are identified early, preventing hazardous situations.
In addition to physical damage, the presence of moisture can foster mold growth, further threatening the safety of occupants. Mold can exacerbate respiratory issues and lead to allergies, impacting overall health. Conducting thorough water damage inspections in spaces such as basements and attics helps in pinpointing moisture sources, allowing for timely remediation and protecting both the building and its inhabitants.
FAQS
What are the common areas prone to water damage in a home?
Common areas prone to water damage include basements, bathrooms, kitchens, and around windows and doors. Roof leaks and plumbing issues are also frequent sources of water damage.
How do professionals identify locations at high risk for water damage?
Professionals identify high-risk locations by inspecting areas with poor drainage, checking for past water damage signs, and evaluating the condition of plumbing and roofing systems.
Why is humidity measurement important in checking for water damage?
Humidity measurement helps assess the moisture levels in the environment, which can indicate the presence of water damage or potential for mold growth. High humidity can worsen water damage issues.
What tools do experts use to measure moisture levels?
Experts typically use moisture meters, thermal imaging cameras, and hygrometers to accurately measure moisture levels in various materials and environments.
How does water damage impact the structural integrity of a building?
Water damage can weaken the structural components of a building, lead to mold growth, and cause materials such as wood and drywall to rot, compromising safety and stability.
