Category: Uncategorized
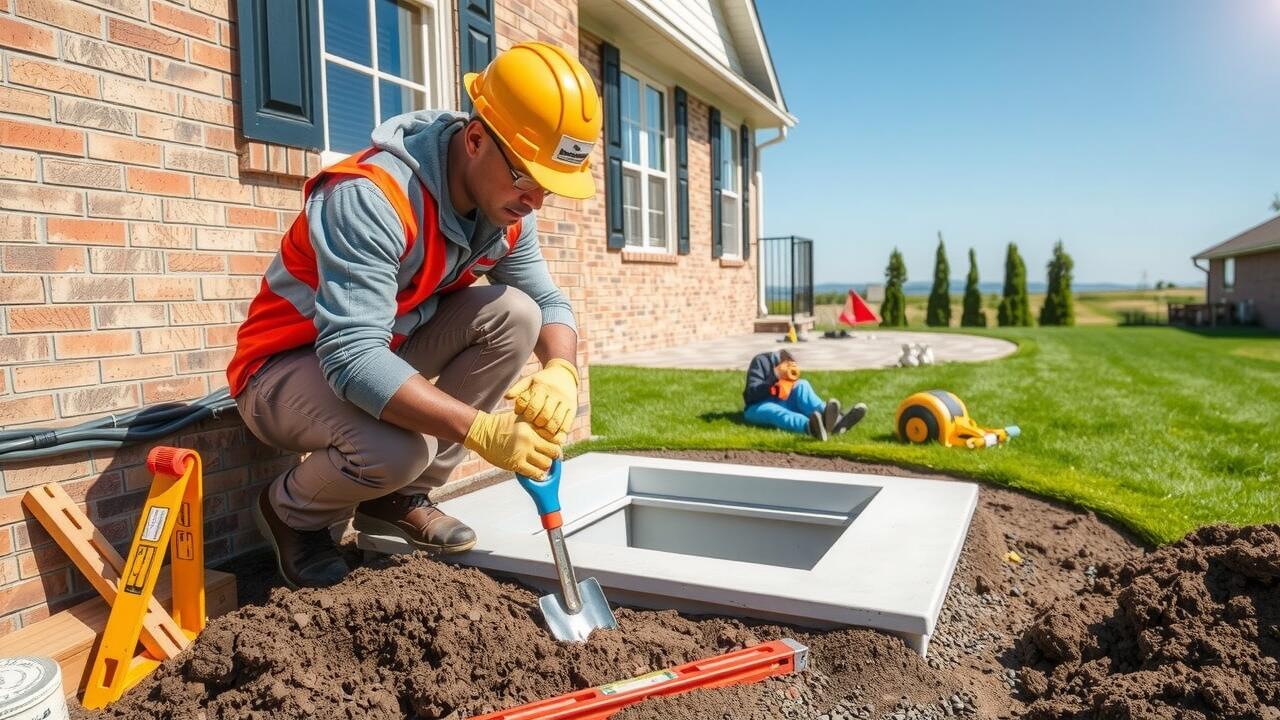
Table Of Contents
DIY Installation vs. Professional Help
When considering window well installation in a home, many homeowners weigh the option of DIY versus hiring a professional. DIY installation may seem appealing due to the potential cost savings and the satisfaction of completing a project independently. Basic tools and materials are typically accessible, and various online resources provide guidance on the installation process. However, it is crucial to assess one’s skill level and comfort with such home improvement tasks before committing to a DIY approach. Mistakes during installation can lead to higher expenses down the line.
On the other hand, opting for professional help for window well installation in a home can ensure that the job is done correctly and efficiently. Professionals bring expertise and experience, which can result in a faster installation process with a guarantee of quality. Hiring a skilled contractor may have higher upfront costs, but it often pays off by alleviating potential issues such as drainage problems or structural concerns. The assurance of knowing that the installation is handled by an expert may provide peace of mind that outweighs the additional expense.
Cost Comparisons and Considerations
When considering window well installation in both DIY and professional contexts, it’s essential to evaluate all associated costs carefully. For the DIY enthusiast, initial expenditures might include materials such as window wells, gravel, and drainage systems. While one may save on labor costs, mistakes often lead to additional spending, as correcting errors can escalate the final bill. A lack of experience can result in a project that misses structural integrity, putting the investment at risk.
On the other hand, hiring a professional can provide peace of mind with guaranteed expertise. While the upfront cost for professional installation may be higher, it often reflects quality work and ensures compliance with local building codes. Homeowners should also consider potential long-term savings, such as improved energy efficiency and reduced risk of water damage. The overall value derived from either route should be weighed carefully against personal expertise and the desire for a durable, functional installation.
Regional Variations in Pricing
Pricing for window well installation can significantly vary based on geographical location. Areas with a higher cost of living, such as large metropolitan cities, often reflect elevated material and labor costs. This can lead to a higher price range for installation compared to rural or less populated regions, where both materials and labor may be more affordable.
Weather conditions and local building codes also play a role in the cost. For example, regions that experience harsh winters may require more robust and insulated window wells, impacting overall expenses. Additionally, some areas may have specific regulations that dictate the materials used, which can influence pricing. In contrast, window well installation in less regulated areas might offer more flexibility with options and costs.
How Location Affects Installation Rates
Installation rates for window wells can greatly vary depending on geographic location. For instance, urban areas often present higher labor costs due to increased demand for skilled workers. Conversely, rural regions may benefit from lower labor costs, but they might face higher shipping fees for materials, which adds another layer of expense.
Window Well Installation in states with harsher climates may also incur additional costs. For example, areas prone to heavy rainfall or freezing temperatures might require specialized materials or techniques to ensure proper drainage and insulation. This regional variability can influence not only the base costs but also the long-term value of the installation, as homeowners seek to mitigate potential water damage or heat loss.
Average Cost Breakdown
The average cost for window well installation in residential properties can vary considerably based on several factors. Homeowners can typically expect to pay between $300 to $1,500 per well, depending on the size, materials used, and the complexity of the installation. Generic models made from plastic or metal might fall on the lower end of this spectrum, while custom-built or decorative options could quickly drive costs higher. Additional elements such as drainage solutions and gravel filling will also contribute to the overall expense.
Labor costs can further influence the total price of window well installation in different regions. Professional rates generally range from $50 to $100 per hour, with most installations taking a few hours to complete. Some local contractors might offer package deals that include both materials and labor, which can help streamline budgeting for homeowners. Overall, understanding these cost components is essential for anyone considering the addition of window wells to their property.
National Averages and Cost Ranges
The average cost of window well installation in the United States typically ranges from $300 to $1,000 per unit. This pricing includes essential materials such as the well itself, gravel for drainage, and necessary sealing components. Additional costs may arise depending on the depth and size of the well, as well as the existing landscaping or foundation challenges that could complicate the installation process. Homeowners should also consider potential extra expenses like professional labor if they opt for installation assistance.
In various regions, the price can vary significantly due to labor rates and local economic factors. For instance, window well installation in urban areas may lean towards the higher end of the spectrum, influenced by increased demand and overhead costs. Conversely, rural regions might offer more competitive pricing due to lower labor costs and easier accessibility. Homeowners are encouraged to obtain multiple quotes to gain insight into the prevailing rates in their specific locality when planning for installation.
FAQS
What is a window well, and why is it important?
A window well is a structure installed outside basement windows to allow natural light into the basement while preventing soil and water from entering. It is important for proper drainage, ventilation, and safety.
How much does it typically cost to install a window well?
The cost to install a window well can vary significantly based on factors like materials, size, and labor. On average, homeowners can expect to pay between $300 to $1,000 per window well.
Can I install a window well myself?
Yes, installing a window well can be a DIY project if you have the necessary tools and experience. However, it’s important to consider local building codes and guidelines, as well as the potential challenges involved.
What factors influence the cost of window well installation?
Factors that can influence the cost include the type of materials used, the depth and size of the well, the complexity of the installation, regional labor rates, and any additional drainage solutions needed.
Are there significant regional differences in window well installation costs?
Yes, window well installation costs can vary significantly by region due to differences in labor rates, material availability, and local building codes. It’s advisable to get quotes from local contractors for the most accurate pricing.
Related Links
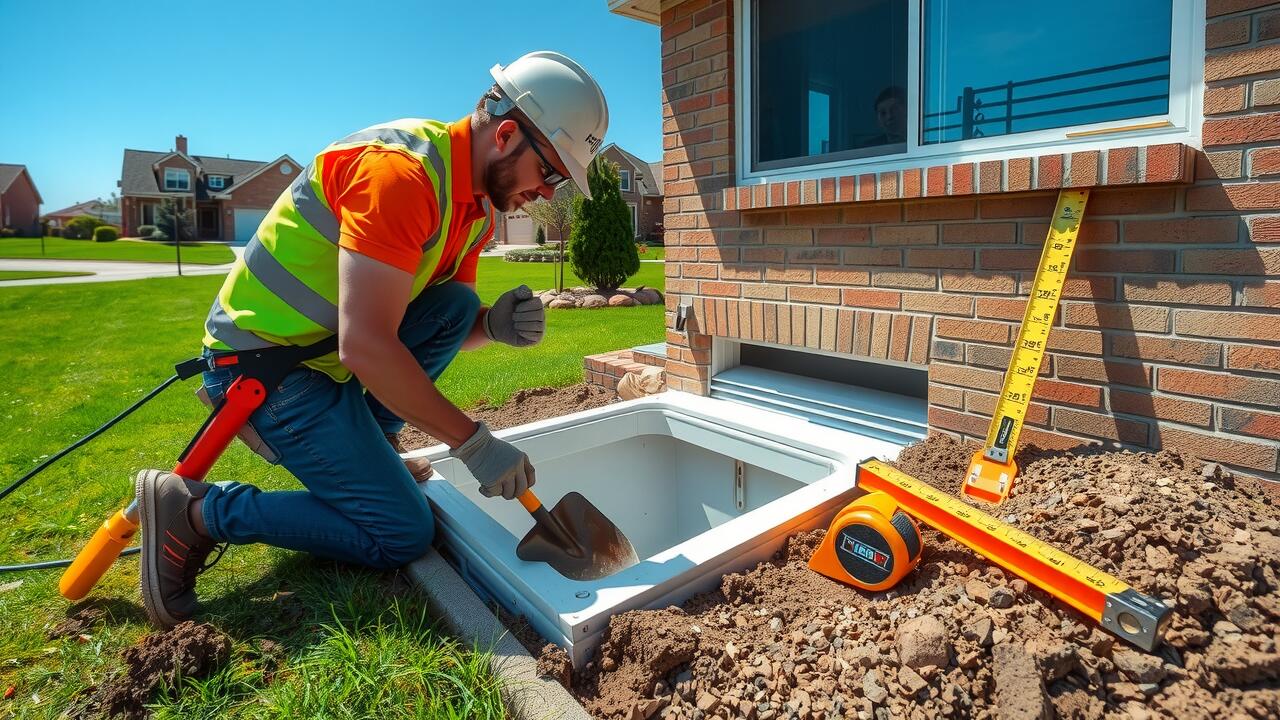

Table Of Contents
Digging the Window Well
When planning for window well installation, the first step involves proper excavation. Begin by marking the area where the well will be located. The width of the window well will typically depend on the size of the window and the specific code requirements in your area. Ensure that the excavation space allows for adequate access and maintenance around the window, accounting for any future landscaping or drainage needs. Aim for straight sides and a flat bottom to facilitate the installation process.
Once the area is marked, use a shovel or a post-hole digger to dig to the appropriate depth. The depth should generally be around three feet, but it may vary based on the specific window and regional regulations. Pay attention to the soil conditions; loose or sandy soil may require different considerations compared to harder, compacted soil. Consider the surrounding landscape as you dig, ensuring that the well will be properly positioned to divert rainwater away from the foundation.
Guidelines for Excavation Depth
When planning for proper window well installation, determining the right excavation depth is crucial. The depth of the window well should typically extend at least a few inches below the bottom of the window frame. This allows for sufficient space to accommodate drainage solutions while also ensuring that the well remains effective in directing water away from the foundation.
In addition to the depth below the window frame, consider the overall dimensions of the well itself. The walls of the well should be high enough to prevent soil and debris from falling in, which could obstruct the window’s view or compromise its functionality. Assess local building codes, as they may provide specific guidelines to follow for window well installation and excavation depth to ensure compliance and safety.
Installing the Window Well
Window Well Installation requires precise planning to ensure a successful fit and function. Begin by placing the window well in the excavated area, ensuring it aligns with the window. Check for levelness with a level tool to guarantee the well sits correctly. Discuss adjustments to the surrounding area to create an even foundation. Once positioned, mark the perimeter to outline where to secure the well.
Next, use the manufacturer’s specifications for anchoring the well to the ground. Drill holes into the foundation wall as required, then insert anchors to secure the window well firmly in place. After the well is secured, backfill the surrounding area with soil, ensuring to compact it to avoid any future settling. This step is crucial for creating a reliable barrier against water intrusion, enhancing the overall integrity of the installation.
Step-by-Step Installation Process
Before beginning window well installation, it is crucial to gather all necessary materials and tools. A concrete or plastic window well can be used based on your preference. Set the well in place over the excavated area to ensure a proper fit. If needed, adjust the location for optimal alignment with the window. Ensure that the well is sturdy and secure, as this is vital for durability.
Next, secure the window well to the foundation wall using brackets or anchors. This step is essential to prevent shifting over time. Fill the surrounding area with gravel or soil to provide stability and aid drainage. Ensure the gravel is compacted, as this will help divert water away from the well and reduce moisture buildup. After the installation is complete, perform a final inspection to ensure everything is secure and there are no gaps.
Adding Drainage Solutions
Proper drainage solutions are essential during the window well installation process. When water drains poorly, it can lead to problems such as flooding or even structural damage. Therefore, incorporating a drainage system will help direct water away from the well and the home. This can be achieved by installing a perforated pipe at the bottom of the well to collect excess water, allowing it to flow to a designated drainage area.
It’s important to ensure that the drainage system is designed to work alongside the existing landscape. A gravel bed can be added around the perforated pipe to encourage water flow and prevent debris from clogging it. Additionally, connecting the drainage pipe to a municipal storm sewer or a dry well can further enhance the efficiency of the drainage solution. Taking these steps during window well installation will greatly reduce the risk of water accumulation, promoting a dry and safe environment around the foundation.
Importance of Proper Drainage
Proper drainage is crucial in window well installation to prevent water accumulation that can lead to various issues, including mold growth and structural damage. When heavy rains occur or snow melts, water can seep into unprotected areas, creating a potential hazard for your home. Installing a drainage solution, such as a perforated pipe or gravel base, can help manage and redirect excess water, ensuring that the well functions effectively while maintaining the integrity of your basement.
In addition to protecting your property, a well-drained window well enhances the lifespan of the window itself. Standing water can weaken seals and frames, leading to leaks and costly repairs. Creating an efficient drainage system during the window well installation process is an investment in the safety and durability of your home. By prioritizing drainage solutions, homeowners can enjoy peace of mind knowing their basement is safeguarded against water infiltration.
FAQS
What tools do I need to install a window well?
To install a window well, you will typically need a shovel, a level, a tape measure, a drill with masonry bits, and safety goggles. Depending on your drainage solution, you might also need a sump pump or perforated drain pipe.
How deep should I dig the window well?
The excavation depth for a window well should generally be at least 3 feet deep to ensure proper drainage and space for the window well itself. However, it’s essential to check local building codes, as they may have specific requirements.
Can I install a window well on my own or do I need a professional?
You can install a window well on your own if you have basic DIY skills and tools. However, if you’re unsure about the process or local regulations, hiring a professional may be a better option to ensure proper installation.
What kind of drainage solutions should I add to my window well?
Common drainage solutions for window wells include gravel or crushed stone at the bottom, a perforated drain pipe leading to a sump pit, or installing a drainage mat to direct water away from the well, ensuring that water doesn’t accumulate.
Is it necessary to have a cover for my window well?
While not always required, having a cover for your window well is recommended for safety reasons and to prevent debris from entering the well, which can obstruct drainage and potentially lead to water accumulation.
Related Links

Table Of Contents
Techniques for Digging a Window Well
When planning for window well installation, the first step involves determining the appropriate depth and dimensions necessary for effective functionality. Excavation should penetrate a minimum of three feet deep to ensure ample space for drainage and maintenance. Digging straight sides helps prevent soil collapse, making the overall process more efficient. It’s important to create a shape that aligns with the window’s size and the surrounding landscape, ensuring that there’s enough room to accommodate any required safety features.
Proper techniques include using a post-hole digger or shovel to remove the soil accurately. Begin by marking the perimeter of the well with chalk or string to maintain guidelines throughout the digging process. If the task seems daunting or challenging, searching for “Window Well Installation near me” can connect homeowners with professionals who can execute the project effectively. These experts possess the right tools and experience, helping to avoid common pitfalls during the installation phase.
Equipment and Tools Needed
Having the right equipment and tools is essential for a successful window well installation. A shovel is a primary tool for digging, typically used for creating the initial hole. A post-hole digger can also be beneficial for refining the shape and depth of the well. Additionally, a level ensures the sides of the well are straight and that the bottom is even. If you’re planning on adding drainage, a trenching tool may be necessary. Including protective gear like gloves and safety glasses is also important for safety during the process.
When researching “Window Well Installation near me,” you may want to consider the availability of specific tools and materials at local hardware stores. Having access to a sturdy liner and gravel can enhance the performance of your window well. It’s advisable to gather all necessary components before beginning the installation to ensure a smooth workflow. Using these tools effectively will help create a well-designed window well that serves its purpose effectively.
Maintaining Window Wells
Regular cleaning and inspection of window wells is essential for their longevity and functionality. Keep an eye on debris, leaves, and other materials that can accumulate over time. Removing these blockages allows for proper drainage and helps prevent water damage. Set a schedule, possibly at the beginning and end of each season, to ensure the wells remain clear and effective.
If you’re not comfortable maintaining window wells yourself, consider reaching out to professionals for assistance. Searching for “Window Well Installation near me” can connect you with local experts who can perform routine maintenance. They can also provide valuable insights on how to enhance the drainage and overall condition of your window wells, ensuring that your home stays dry and your windows remain undamaged.
Regular Cleaning and Inspection
Regular maintenance of window wells is essential to ensure they function properly and protect your home from moisture and water damage. Cleaning the well periodically helps to remove debris, leaves, and dirt that may accumulate over time. This debris can block the drainage system, leading to potential flooding issues in your basement. By inspecting the well during each cleaning, homeowners can identify any signs of damage or wear that need attention.
Homeowners should also check the seals and covers of the window wells for any gaps or cracks. A tight seal is critical to preventing water infiltration. If repairs are necessary, consider contacting a professional service for assistance. For those looking to upgrade or install new window wells, searching for “Window Well Installation near me” can lead to experienced contractors who can ensure your window wells are correctly installed and maintained.
Dealing with Water Issues
Water accumulation in window wells can lead to structural problems and damage over time. To effectively address this issue, homeowners should consider the installation of proper drainage systems. These systems can help redirect water away from the foundation and ensure that window wells remain functional. It’s advisable to consult with professionals by searching for “Window Well Installation near me” to find experienced contractors in the area who can provide tailored solutions.
In addition to drainage installation, regular maintenance is crucial. Keeping the window wells free from debris and ensuring that the drainage systems remain unobstructed can prevent water buildup. Homeowners should routinely check for signs of clogs or blockages and address them promptly. This proactive approach helps maintain the integrity of the window well and protects the property from potential water damage.
Installation of Drainage Systems
Proper drainage systems are essential during window well installation to prevent water accumulation and potential damage. Different methods can be employed depending on the specific conditions of the site. A common approach involves creating a perforated drain pipe at the bottom of the well, allowing water to flow away from the window and the foundation. Gravel or crushed stone should surround the pipe to enhance water flow and filtration.
When considering a professional installation, searching for “Window Well Installation near me” can provide access to skilled contractors equipped to handle the complexities of drainage systems. Collaborating with experts ensures that the chosen drainage solution fits local regulations and site-specific requirements. Integrating a sump pump might also be advisable in areas prone to heavy rainfall, providing an added layer of protection for your property.
FAQS
How deep should a window well be dug?
A window well should typically be dug to a depth of at least 3 feet to ensure proper drainage and safety. However, the depth may vary based on local building codes and the specific requirements of the window.
What is the purpose of a window well?
The primary purpose of a window well is to provide natural light and ventilation to basements while preventing soil from blocking the window. It also helps in water drainage away from the foundation.
How wide should a window well be?
A window well should generally be at least 3 feet wide to provide adequate space for drainage and to allow easy access for cleaning and maintenance.
What tools are needed to dig a window well?
Basic tools required for digging a window well include a shovel, a post-hole digger, a level, and a measuring tape. Depending on the soil type, you may also need a pickaxe or a power auger.
How can I maintain my window well after installation?
Regular maintenance includes cleaning debris, inspecting for blockages, and checking for water accumulation. It’s also important to ensure that the drainage system, if installed, is functioning properly to prevent water issues.
Related Links
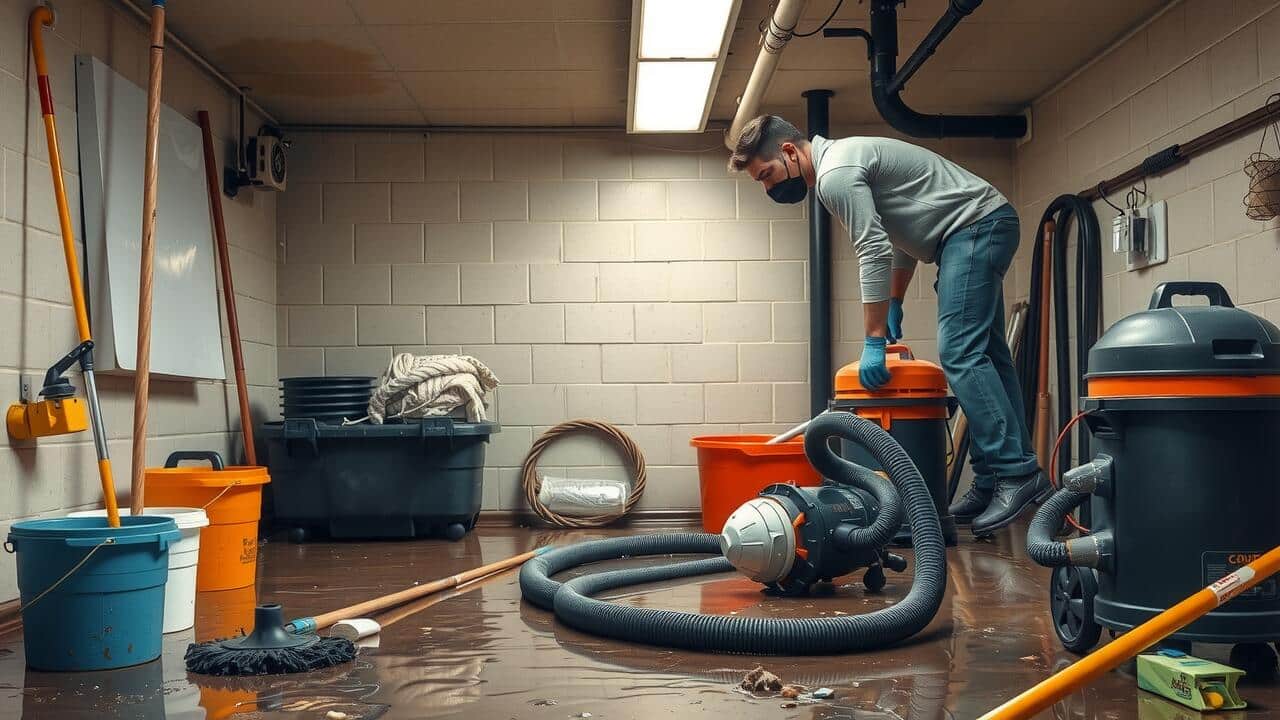
Table Of Contents
Insurance Coverage and Claims
Understanding insurance coverage for basement flooding cleanup is essential for homeowners facing this challenge. Many standard homeowner’s policies may cover water damage due to certain circumstances, such as backup from sewers or drains. However, coverage specifics can vary significantly depending on the insurer and the policy. It’s vital to review your policy details to determine what types of water damage are included and whether flood insurance is necessary.
Filing a claim for water damage can be a straightforward process if you have the right documentation. Start by taking photos of the damage, which can help support your claim. Report the incident to your insurance company as soon as possible. Be prepared to provide details about the flooded area and the cleanup efforts already made. Timely submission increases the chances of a smooth claims process and potential reimbursement for the costs associated with basement flooding cleanup.
How to File a Claim for Water Damage
To file a claim for water damage, start by documenting the extent of the damage. Take photos of the flooded area, affected belongings, and any visible structural issues. This documentation will support your claim and provide an accurate representation of the damage. Next, review your insurance policy to understand the coverage details, limitations, and any specific procedures required for filing a claim related to basement flooding cleanup.
After gathering all necessary information, contact your insurance company to report the water damage. Provide them with the documented evidence and any relevant details about the incident. Be prepared to answer questions regarding the timing and nature of the flooding. Your insurer may send an adjuster to assess the damage, so ensure that the area remains accessible for inspection during this process.
Prevention Measures for Future Flooding
Taking proactive measures to prevent flooding significantly reduces the risk of extensive water damage in your home. One effective strategy is to ensure proper grading around your property. The soil should slope away from your foundation, directing rainwater away from the basement. Additionally, regularly cleaning gutters and downspouts is crucial. Debris buildup can lead to blockages, causing overflow and potential flooding.
Installing sump pumps can provide an extra layer of protection. These devices help remove water accumulation in your basement, especially during heavy storms. Furthermore, waterproofing your basement walls and floors creates a barrier against moisture intrusion. Implementing these strategies not only minimizes the chance of basement flooding but also alleviates the burden of costly Basement Flooding Cleanup in the future.
Cost-Effective Solutions to Mitigate Risks
Homeowners can take proactive steps to reduce the risk of basement flooding. Installing sump pumps and maintaining proper drainage around the foundation can significantly mitigate water intrusion. Regular inspections of gutters and downspouts ensure that they direct water away from the foundation. These measures not only protect against flooding but can also save homeowners money in potential cleanup costs.
Another effective strategy involves sealing cracks in walls and floors. This simple maintenance task can prevent water seepage during heavy rains. Additionally, investing in water-resistant building materials can enhance protection. These cost-effective solutions represent practical investments toward safeguarding a property and reducing the need for extensive basement flooding cleanup in the future.
Hiring Qualified Professionals
When dealing with basement flooding cleanup, hiring qualified professionals is essential to effectively address the damage and prevent future issues. Look for companies that specialize in water damage restoration with a proven track record. They should have the necessary certifications and experience to handle various types of water damage, ensuring that the cleanup process adheres to industry standards and safety protocols.
In addition to proper qualifications, it’s important to consider the tools and techniques a cleanup service employs during the restoration process. Advanced equipment, such as industrial-grade dehumidifiers and powerful pumps, can significantly enhance the efficiency of basement flooding cleanup. Review customer testimonials and request references to assess the quality of service. A reputable provider will also offer a detailed estimate and explain the steps involved in the cleanup process.
What to Look for in a Cleanup Service
When searching for a cleanup service for basement flooding cleanup, it is essential to prioritize experience and expertise. Look for companies that specialize in water damage restoration, as they will have the necessary tools and knowledge to address the specific challenges posed by flooded basements. Reading reviews and checking references can provide insight into a company’s reliability and effectiveness, helping you make an informed decision.
Another important factor is the availability of certified professionals. Ensure the cleanup service employs technicians who are certified by organizations like the Institute of Inspection, Cleaning and Restoration Certification (IICRC). This certification indicates a commitment to industry standards and best practices. Additionally, confirm that the service offers a detailed plan for cleanup and restoration, including assessments of potential mold growth, which is a common concern after water damage.
FAQS
How much does it typically cost to clean up a flooded basement?
The cost to clean up a flooded basement can vary widely, typically ranging from $1,000 to $4,000, depending on the extent of the damage, the size of the area, and the services needed.
Will my homeowner’s insurance cover the cost of basement flooding cleanup?
Many homeowner’s insurance policies may cover the costs associated with water damage, but coverage can depend on the cause of the flooding. It’s best to check your policy and consult with your insurance provider.
What factors influence the cost of cleaning a flooded basement?
Factors that can influence the cost include the severity of the flooding, the size of the basement, the type of materials affected, the need for professional equipment, and whether mold remediation is necessary.
Are there preventive measures I can take to avoid future flooding?
Yes, preventive measures include regular maintenance of gutters and downspouts, installing sump pumps, sealing cracks in the foundation, and landscaping that directs water away from the house.
How can I choose a qualified professional for basement cleanup?
When hiring a cleanup service, look for licensed and insured professionals, read reviews, check references, and ensure they have experience with water damage restoration.
Related Links
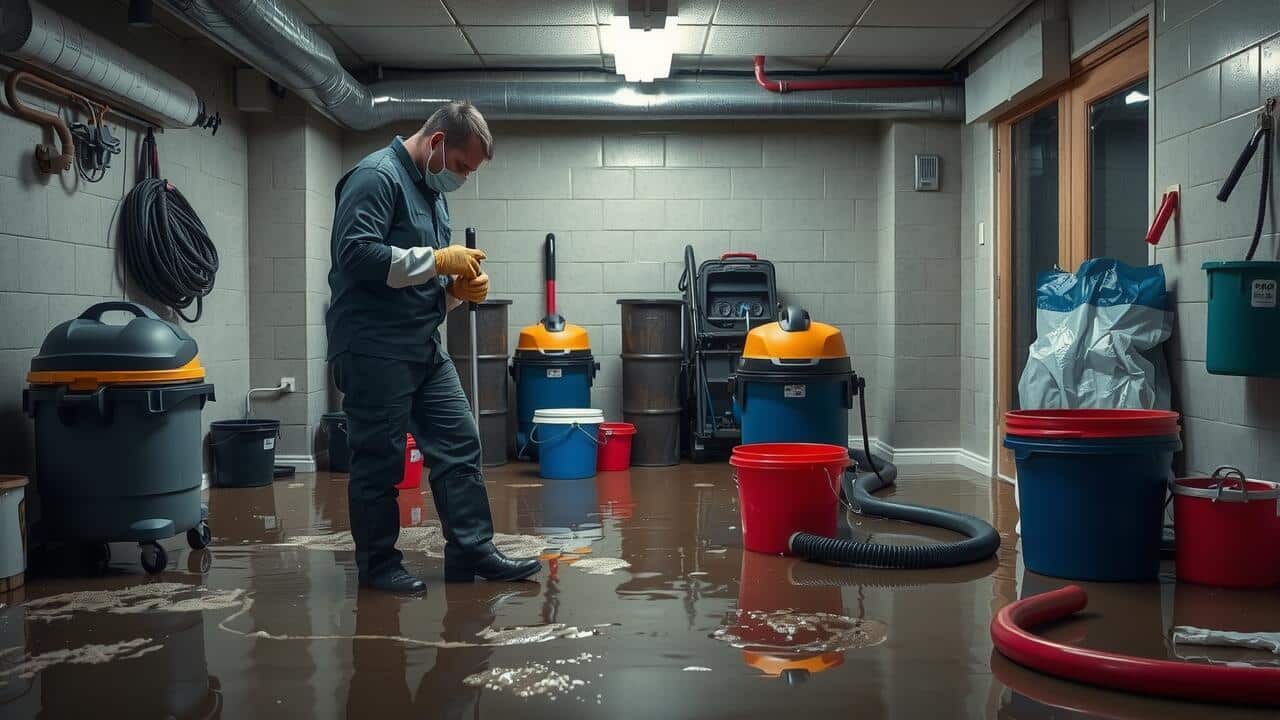
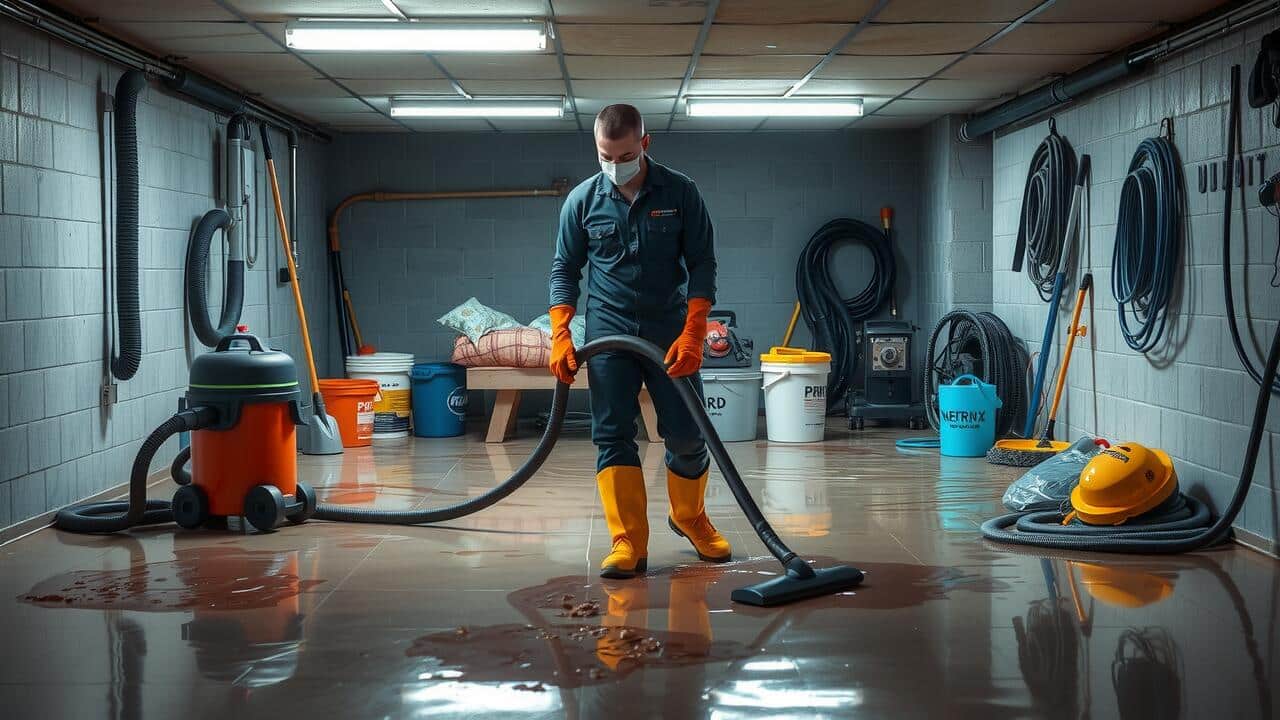
Table Of Contents
Emergency Response and Timeliness
When facing basement flooding, timely response is crucial to mitigating damage and reducing costs. Floodwaters can quickly lead to structural issues and mold growth, both of which necessitate immediate attention. SERVPRO is known for its rapid response team, ready to engage in emergency situations 24 hours a day. Their trained professionals arrive equipped with advanced tools and techniques to address the specific challenges of flooded basements.
For homeowners searching for services like “Basement Flooding Cleanup near me,” the importance of expedient action becomes clear. Rapid intervention not only speeds up the cleanup process but also enhances the chances of salvaging personal belongings and minimizing repair expenses. With SERVPRO’s commitment to quick service, clients can alleviate some of the stresses associated with water damage, giving them peace of mind during an already challenging time.
Importance of Immediate Action
Immediate action is crucial when dealing with basement flooding. Water can cause significant damage to your home and belongings within minutes. The longer water sits, the more difficult and expensive it becomes to restore the area. Mold can develop rapidly, which introduces health risks and complicates cleanup efforts. Quickly addressing the situation saves time and limits the extent of damage.
When searching for assistance, many people look online for “Basement Flooding Cleanup near me.” This phrase highlights the urgency of the situation and the need for local professionals who can respond quickly. Local services are often better positioned to provide timely help, ensuring that the cleanup process begins promptly. Employing a trusted service can ease the burden and facilitate a smoother recovery.
Insurance Coverage for Flood Damage
Homeowners facing flood damage often look to their insurance policies for relief. Many standard homeowners’ insurance policies cover water damage from unexpected leaks, including basement flooding. However, coverage can vary significantly based on policy types and the specific circumstances of the flooding event. It is crucial for homeowners to review their insurance documents carefully to understand their coverage limits and exclusions.
When filing a claim, documenting the damage thoroughly is essential. This includes taking photographs of the affected areas and keeping records of all communications with your insurance provider. If you search for “Basement Flooding Cleanup near me,” it is advisable to obtain estimates from local professionals like SERVPRO. These estimates can serve as solid evidence when negotiating with your insurer for reimbursement of cleanup and restoration costs.
What to Know About Filing a Claim
Filing an insurance claim for flood damage can be a complex process, but understanding the key steps can make it more manageable. Begin by documenting the damage thoroughly before any cleanup efforts commence. Take photographs or videos to capture the extent of the flooding. Gather any relevant policy information and familiarize yourself with your coverage, as this will be essential when contacting your insurance provider. Make sure to report the incident as soon as possible, as many policies have specific timelines for filing claims.
When looking for assistance, you might consider searching for “Basement Flooding Cleanup near me.” This approach can help you find local professionals, such as SERVPRO, who are experienced in handling these types of situations. Many of these companies can assist not only with cleanup but also with the claims process by providing documentation of the work performed and any necessary estimates. Clear communication with your insurer throughout the process is vital for a successful claim.
Customer Testimonials and Reviews
Customer testimonials play a vital role in assessing the effectiveness of SERVPRO’s services. Many customers who experienced basement flooding have shared their positive experiences regarding the prompt and professional response of the SERVPRO team. They often highlight the efficiency with which the technicians handled the cleanup, remarking on how quickly their homes were restored to a livable condition. This level of satisfaction reflects the commitment of the company to provide quality service during distressing times.
Reviews frequently mention the thoroughness of the basement flooding cleanup process, contributing to a sense of security for other homeowners. Individuals searching for “Basement Flooding Cleanup near me” often find that SERVPRO stands out for its comprehensive approach and customer-centric philosophy. These personal accounts of timely responses and effective solutions add to the company’s credibility and appeal, reinforcing the importance of choosing experienced professionals when faced with flood damage.
Real-Life Experiences with SERVPRO
Many customers have shared positive experiences with SERVPRO regarding their handling of water damage restoration. People often mention their quick response times when dealing with basement flooding. Immediate assistance can make a significant difference in minimizing damage and restoring a home. Some customers stressed the professionalism of the technicians, who not only addressed the physical issues but also provided guidance on preventing future problems.
Homeowners frequently express appreciation for the thorough approach taken by SERVPRO teams. They highlight the effectiveness of the drying equipment used during the restoration process. Reviews indicate that the service goes beyond mere cleanup; it also involves thoughtful communication throughout the job. Those searching for “Basement Flooding Cleanup near me” often find that their local SERVPRO franchise offers reliable solutions tailored to individual situations.
FAQS
What factors influence the cost of SERVPRO services for a flooded basement?
The cost of SERVPRO services for a flooded basement can be influenced by several factors, including the extent of the water damage, the size of the affected area, the type of materials that need to be removed or restored, and the necessary equipment or treatments required for effective moisture removal and mold prevention.
Does SERVPRO provide free estimates for flooded basement cleanup?
Yes, SERVPRO typically offers free estimates for flooded basement cleanup. A professional will assess the damage and provide an estimate based on the specific situation and services needed.
Does homeowners insurance cover the cost of SERVPRO services for a flooded basement?
Many homeowners insurance policies do cover water damage caused by flooding, but coverage can vary widely. It’s essential to review your policy and consult with your insurance provider to understand what is covered and how to file a claim.
How quickly can SERVPRO respond to a flooded basement situation?
SERVPRO prides itself on rapid response times, often arriving on-site within a few hours of your call. Quick action is crucial to minimize damage and prevent mold growth.
What should I do if I need to file an insurance claim for flood damage?
If you need to file an insurance claim for flood damage, start by documenting the damage with photos, contacting your insurance provider to report the claim, and keeping records of any communication. It’s also a good idea to keep a detailed list of the damages and any expenses related to the cleanup process, including SERVPRO services.
Related Links
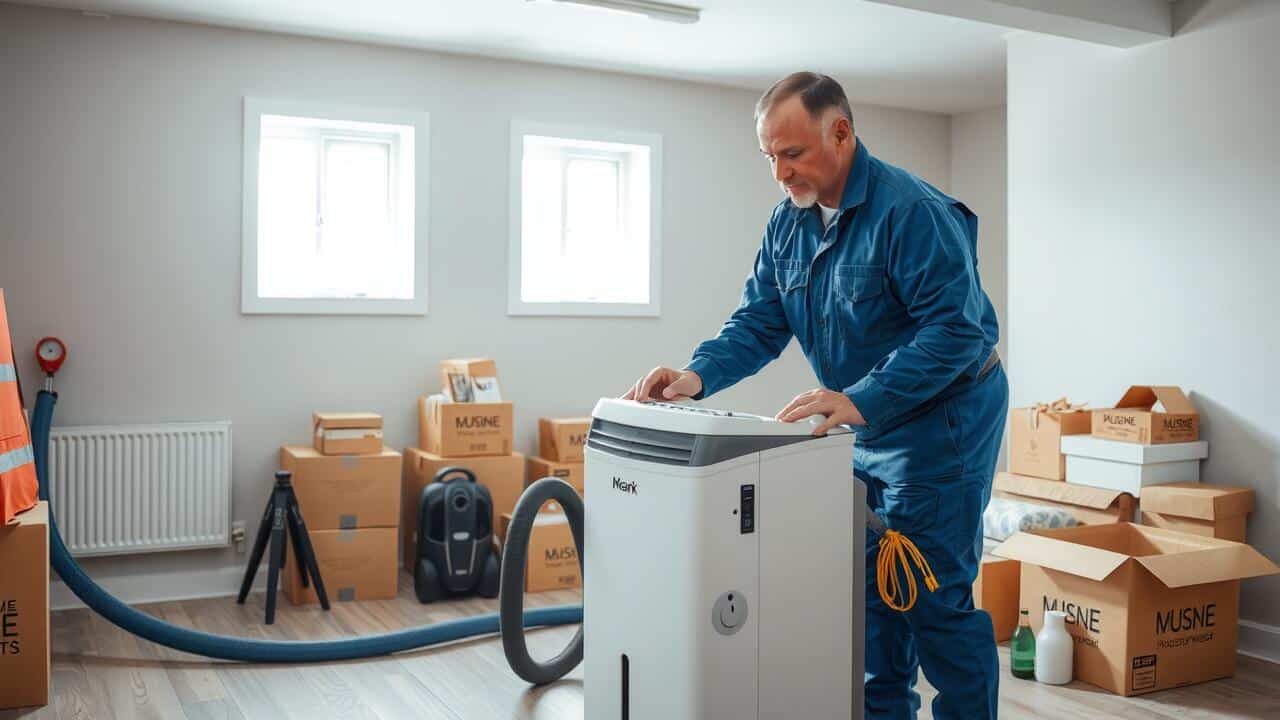
Table Of Contents
Dehumidification and Home Maintenance
Dehumidification plays a crucial role in maintaining the structural integrity of homes. Excess moisture in the air can lead to the growth of mold and mildew, which not only results in unsightly stains but can also compromise the health of occupants. Wood and other building materials may warp or rot when exposed to high humidity levels over time. Regular dehumidification can help keep moisture levels in check, ultimately extending the lifespan of a home’s structure.
In addition to protecting the physical aspects of a house, dehumidification contributes to a healthier indoor environment. High humidity can exacerbate allergies and respiratory issues, making it uncomfortable for residents. By controlling humidity levels, homeowners can create a more pleasant living space that promotes overall well-being. Investing in dehumidification systems can reduce the risk of humidity-related problems, benefiting both the home’s structure and the health of its inhabitants.
Preventing Structural Damage
Excessive moisture in the air can lead to a host of structural problems in homes, often manifesting as mold growth or wood rot. Dehumidification plays a crucial role in maintaining optimal humidity levels, which helps to protect wooden structures, walls, and ceilings from water damage. By reducing humidity, homeowners can mitigate the risk of structural issues that often arise from prolonged exposure to damp conditions.
A well-maintained moisture level also prevents condensation build-up, which can weaken building materials over time. Dehumidification devices effectively pull excess moisture from the air, creating a more stable environment for the home’s infrastructure. This proactive approach not only preserves the integrity of the property but also reduces the need for costly repairs associated with water damage.
Benefits for Sleep Quality
Dehumidification can play a significant role in enhancing sleep quality. High humidity levels tend to make the air feel heavy and stuffy, which may lead to discomfort during the night. By removing excess moisture, a dehumidifier creates a more pleasant sleeping environment, enabling easier breathing and a more comfortable temperature.
Additionally, lower humidity levels can reduce allergens such as dust mites and mold, which thrive in damp conditions. This improvement in air quality may contribute to a decrease in allergy-related disturbances during sleep. With fewer irritants present, individuals can experience deeper, more restorative sleep, leading to overall better health and well-being.
How Humidity Influences Sleep Patterns
Humidity plays a significant role in sleep quality. High levels of moisture in the air can lead to discomfort, making it difficult to fall asleep or stay asleep. When the air feels heavy and clammy, it can disrupt the body’s natural cooling processes, which are essential for a good night’s rest. Excess humidity can also lead to respiratory issues or allergies, further complicating the ability to relax and unwind before bedtime.
Dehumidification helps to create a more comfortable sleeping environment. By reducing the moisture in the air, it lowers the temperature and promotes better air circulation. This process can lead to an improvement in overall sleep patterns, allowing individuals to experience deeper and more restorative rest. A drier atmosphere can also mitigate potential sleep disturbances caused by allergens and irritants prevalent in humid conditions.
Energy Efficiency and Dehumidification
Dehumidification plays a crucial role in enhancing energy efficiency within homes. High humidity levels force air conditioning systems to work harder, which can lead to increased energy consumption. By reducing humidity, dehumidification allows these systems to operate more efficiently, maintaining a comfortable indoor climate with less energy expenditure. Homeowners often notice a decrease in their monthly utility bills after implementing dehumidification solutions.
In addition to benefiting energy costs, dehumidification can improve overall air quality. Excess moisture can lead to mold growth and dust mites, which not only impact health but also contribute to higher energy usage through HVAC systems reacting to perceived discomfort. A well-dehumidified environment minimizes these issues, leading to a healthier living space and more efficient heating and cooling operations. This combination of advantages makes dehumidification a valuable consideration for any homeowner seeking to optimize their energy efficiency.
Reducing Energy Costs in Humid Environments
Dehumidification plays a crucial role in enhancing energy efficiency, especially in regions characterized by high humidity levels. Excess moisture in the air forces air conditioning systems to work harder, consuming more energy to maintain comfortable indoor temperatures. By utilizing a dehumidifier, homeowners can minimize humidity, allowing their cooling systems to operate more efficiently and effectively. This reduction in workload can lead to significant cost savings on energy bills over time.
Implementing dehumidification not only improves indoor comfort but also preserves the lifespan of HVAC systems. When humidity levels are kept in check, these systems encounter less strain and wear. This proactive approach can decrease the frequency of repairs and extend the time between necessary replacements. Overall, opting for dehumidification contributes to a more sustainable energy strategy while simultaneously reducing costs.
FAQS
What is dehumidified air?
Dehumidified air is air that has had excess moisture removed, resulting in lower humidity levels. This process can improve comfort and reduce the risk of mold and mildew growth in indoor spaces.
How does dehumidified air help prevent structural damage?
Dehumidified air helps prevent structural damage by reducing moisture levels that can lead to the growth of mold and mildew, which can compromise the integrity of building materials and cause deterioration over time.
Can dehumidified air improve sleep quality?
Yes, dehumidified air can improve sleep quality by creating a more comfortable sleeping environment. Lower humidity levels can help regulate body temperature and reduce sweating, leading to better sleep patterns.
How does high humidity affect sleep?
High humidity can disrupt sleep by making the environment feel warmer and more uncomfortable, leading to restless nights, excessive sweating, and difficulty falling or staying asleep.
Is using a dehumidifier energy efficient?
Yes, using a dehumidifier can be energy efficient, especially in humid climates. By reducing humidity levels, it can help HVAC systems operate more effectively, leading to lower energy costs and improved comfort in the home.
Related Links

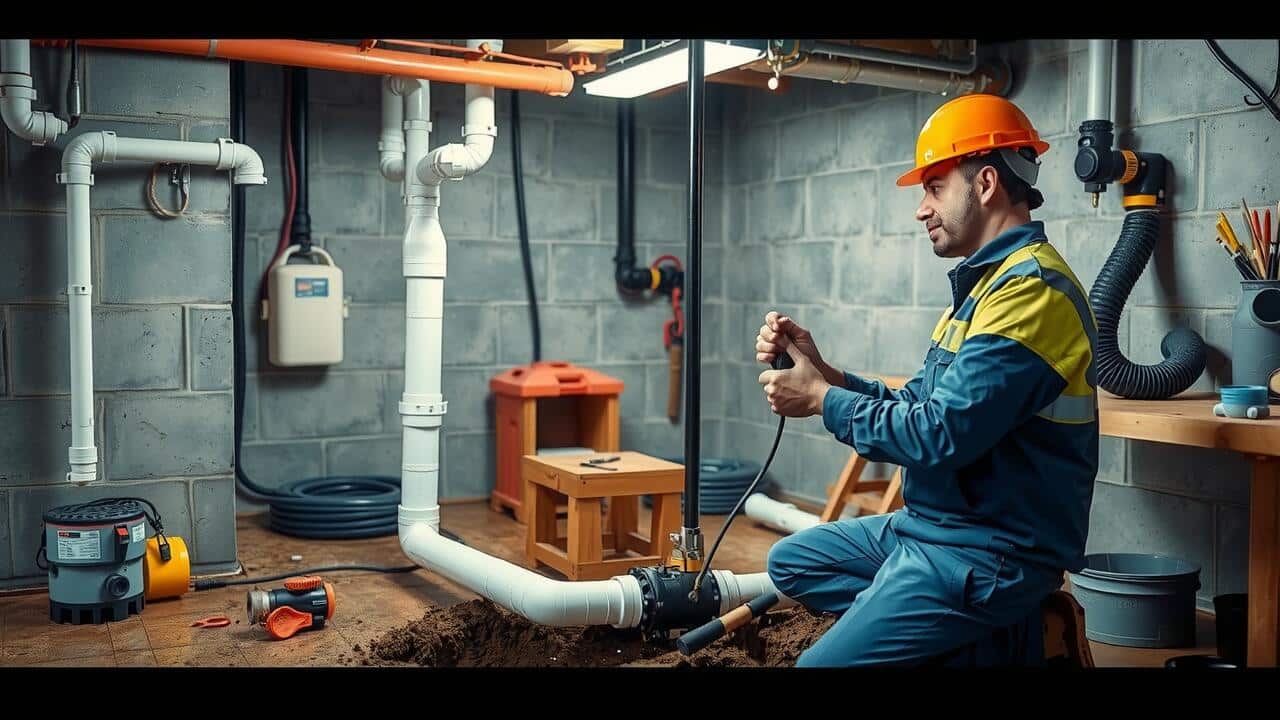
Table Of Contents
Digging the Trench
Digging the trench is a crucial first step in the Basement Drainage System Installation process. Begin by marking the intended path of the trench with stakes or spray paint. The trench should be deep enough to accommodate the drain pipes while allowing for proper sloping. Use a shovel or a trenching tool to break ground. Aim for a width that provides enough space to work comfortably, usually about 12 inches or more, depending on the size of the pipes being installed.
Consider the surrounding environment during excavation. Remove any obstacles such as roots, rocks, or debris that could disrupt the integrity of the installation. Be mindful of existing utilities underground by checking local utility maps before digging. Proper trench depth and width are essential for effective drainage, so ensure you stick to the planned dimensions. This will set a solid foundation for the remainder of the Basement Drainage System Installation.
Techniques for Efficient Excavation
Efficient excavation techniques are crucial for a successful basement drainage system installation. Start by marking the area to be excavated. Use stakes and string lines to outline the trench’s boundaries, ensuring precise measurements for proper drainage. It helps to clear away any debris such as grass, rocks, or other obstructions before digging begins. Choosing the right tools can significantly impact efficiency. A shovel works for smaller areas, while a mini-excavator is ideal for larger projects, cutting down on manual labor and time.
As you dig, maintain a slight slope in the trench, ideally at a grade of 1% to 2%, to promote water flow toward the drainage system. Regularly check the depth and width of the trench to avoid any potential complications during installation. If the digging encounters roots or rocky soil, using a pickaxe can assist in breaking through tough areas. Taking care during this excavation process lays the groundwork for a successful basement drainage system installation, ensuring long-term effectiveness and reliability.
Installing the Drain Pipes
Once the trench is prepared, it’s time to focus on installing the drain pipes. Begin by laying out the pipes in the trench, ensuring they are adequately spaced. Use perforated pipe for optimal drainage; this allows water to seep in from the surrounding soil. Make sure to adjust the pipe lengths to fit precisely, and use connectors as needed to join sections together. Each piece should fit snugly and maintain a uniform alignment throughout the trench.
Proper placement of the drain pipes is essential for effective water flow. The pipes should be installed with a slope of at least one inch per ten feet to encourage proper drainage. This slope helps direct water towards the sump pump and prevents ponding or backup. After arranging the pipes, cover them with a layer of gravel, which supports the pipe structure while allowing water to pass freely into the drainage system. This completes a critical phase in the Basement Drainage System Installation process.
Proper Placement and Slope for Drainage
Proper placement and slope are critical during Basement Drainage System Installation. The drain pipes should ideally be positioned along the perimeter of the basement floor to collect water efficiently. This location allows gravity to facilitate the movement of water towards the sump pump. The minimum slope recommended for the drain pipes is one inch for every eight feet. This slope ensures that water flows adequately without pooling in any areas, which can lead to clogs and potential backup.
Using a level during installation can help maintain the correct slope. It is essential to make minor adjustments as needed to ensure optimal drainage. When placing the drain pipes, care should be taken to avoid any barriers that may obstruct water flow. Surrounding the drain pipes with gravel or coarse stone can enhance their effectiveness by preventing sediment accumulation. Proper placement and slope significantly contribute to the overall efficiency of the Basement Drainage System Installation.
Connecting to the Sump Pump
Connecting your drain system to a sump pump is a crucial step in your basement drainage system installation. Begin by determining the optimal location for your sump pump. This should be at the lowest point of the basement where water tends to accumulate. Carefully position the sump pump basin within the trench, ensuring it sits level and that the top of the basin is flush with the surrounding floor. Once the basin is set, you can finalize the trench and prepare for adding the drain pipes.
After establishing the sump pump basin, connect your drain pipes to the sump pump’s inlet. Cut the pipe to the appropriate length, ensuring a snug fit to prevent leaks. Use PVC cement to secure the connections, providing a watertight seal. It is essential to confirm that the entire system flows smoothly toward the sump pump. This ensures effective water removal from your basement, safeguarding against potential flooding and moisture issues.
Ensuring Effective Water Removal
A sump pump serves as a critical component in the basement drainage system installation. This device is positioned at the lowest point of the basement, ensuring that any accumulated water can be effectively removed. When selecting a sump pump, consider factors such as the size of the basement and the potential volume of water it may need to manage during heavy rainfall or melting snow. Installing the pump properly will enhance its efficiency and increase its lifespan.
After positioning the sump pump, connect it to the drain pipes to facilitate seamless water flow. Ensure that the discharge pipe leads water away from the foundation to prevent any backflow or pooling around the house. Regular maintenance of the sump pump is vital, including routine checks and cleaning, to confirm that it operates at optimal performance. A well-planned basement drainage system installation will minimize water-related issues, protecting your home from potential damage.
FAQS
What tools do I need to install a basement drain system?
You’ll need tools such as a shovel or excavator for digging, a level for ensuring proper slope, a pipe cutter for cutting drain pipes, and possibly a drill for connecting to the sump pump.
How deep should the trench be for the drain system?
The trench should generally be at least 6 to 8 inches deep, but the depth may vary depending on your basement’s drainage needs and local building codes.
What type of drain pipes should I use for my basement drain system?
PVC pipes are commonly used for basement drain systems due to their durability and resistance to corrosion. Ensure you use the appropriate diameter based on your drainage requirements.
How can I ensure that my drain system functions effectively?
To ensure effective drainage, make sure the pipes are installed with a consistent slope of at least 1% (1/8 inch per foot) to promote water flow towards the sump pump.
Can I install a basement drain system myself, or should I hire a professional?
While some homeowners may choose to install a basement drain system themselves, it can be complex and labor-intensive. Hiring a professional may ensure proper installation and compliance with local codes.


Table Of Contents
Discounts and Promotions
Many carpet cleaning services offer discounts and promotions to attract customers. Seasonal offers, such as discounts in the spring or fall, can provide significant savings for homeowners looking to refresh their carpets. Additionally, companies may run special promotions around major holidays or events, making it a great time to schedule a cleaning session. Customers should inquire about any available deals when contacting service providers.
Loyalty programs are another way to save on carpet cleaning services. Some companies reward returning customers with discounted rates or bonus services after a certain number of cleanings. Online coupons and deals can also be found on various websites, allowing homeowners to compare prices and ensure they get the best value. Keeping an eye out for these promotions can help reduce the overall cost of maintaining clean carpets throughout the year.
Seasonal Offers
Many professional carpet cleaning services often run seasonal promotions to attract customers. These offers can coincide with holidays, back-to-school periods, or spring cleaning events. Taking advantage of these promotions can result in significant savings. Service providers may offer discounts on specific types of cleaning or package deals that include multiple rooms.
Additionally, certain times of the year may see reduced demand for carpet cleaning services. Off-peak seasons can lead to lower prices as companies aim to fill their schedules. This is a strategic opportunity for homeowners looking to refresh their carpets without straining their budgets. Being aware of these seasonal offers can ensure that you receive quality carpet cleaning at a more affordable rate.
DIY Carpet Cleaning vs. Professional Services
DIY carpet cleaning offers homeowners the opportunity to tackle stains and dirt without the cost associated with professional services. Many DIY options are available, including rental machines and store-bought cleaning solutions. While this approach can save money upfront, it requires time, effort, and knowledge of the proper techniques to achieve satisfactory results. Moreover, some stains may require multiple treatments or specific tools that aren’t always included with rental equipment.
On the other hand, professional carpet cleaning services typically guarantee thorough results. Trained technicians utilize advanced equipment and specialized cleaning products designed to treat various carpet types and materials effectively. This expertise can lead to a deeper clean, potentially extending the life of the carpet. Although professional services come at a higher price point, they often save time and provide peace of mind, ensuring that the job is done right without any guesswork on the homeowner’s part.
Cost Analysis of DIY Options
When considering DIY carpet cleaning, it’s essential to evaluate the costs associated with purchasing or renting equipment. Many home improvement stores offer carpet cleaning machines for rent, with prices typically ranging from $30 to $50 per day. Buying a carpet cleaning machine can involve a more considerable upfront investment, with prices varying based on the type and features. Additionally, you’ll need to factor in the cost of cleaning solutions, which can add another $10 to $30 depending on the brand and quality.
It’s important to understand that while DIY options may seem more economical initially, they require time and effort that some homeowners may not have. Carpet cleaning uses specific techniques that professional services often master through training and experience. Poor execution of a DIY job can lead to unsatisfactory results, potentially necessitating additional cleaning by professionals down the line. This consideration can impact the overall cost-effectiveness of cleaning your carpets yourself.
Frequency of Cleaning
Regular carpet cleaning plays a crucial role in maintaining both the appearance and longevity of your carpets. When dirt, dust, and allergens accumulate, they can lead to a dull look and potentially cause damage over time. Establishing a consistent cleaning schedule based on foot traffic and room usage can help in managing these issues effectively. Many homeowners find that cleaning their carpets every six to twelve months keeps them looking fresh and extends their lifespan.
Frequency of cleaning can also have significant long-term cost benefits. While it may seem like a hassle to book professional services or invest time in DIY cleaning, regular maintenance can prevent more extensive damage that necessitates costly repairs or replacements. A proactive approach in carpet cleaning not only enhances the aesthetic of your home but also contributes to a healthier indoor environment, making it a wise investment in the long run.
Long-Term Cost Benefits
Regular Carpet Cleaning can significantly enhance the longevity of your carpets. By removing dirt, allergens, and contaminants, you protect the fibers and maintain their appearance. This proactive maintenance can prevent the need for premature replacements, which can be a considerable expense. The investment in professional cleaning services or quality DIY products pays off in the long run, as well-cared-for carpets can last for years beyond their expected lifespan.
Additionally, clean carpets contribute to a healthier indoor environment. Accumulated dirt and allergens can trigger respiratory issues and allergies, leading to increased healthcare costs over time. Regular Carpet Cleaning not only reduces these health risks but also promotes overall well-being within your home. By investing in routine cleaning, homeowners can ultimately save money on allergy medications and health-related expenses, making it a wise choice from both aesthetic and financial perspectives.
FAQS
How much does professional carpet cleaning typically cost?
The cost of professional carpet cleaning usually ranges from $25 to $75 per room, depending on factors like room size, carpet type, and the cleaning method used.
Are there any discounts or promotions available for carpet cleaning services?
Yes, many carpet cleaning companies offer discounts and promotions, especially during seasonal sales or holidays. It’s advisable to check their websites or call to inquire about current offers.
Is DIY carpet cleaning a cost-effective alternative to hiring professionals?
DIY carpet cleaning can be more cost-effective initially, as you only need to purchase or rent cleaning equipment. However, it may not always provide the same level of cleanliness or stain removal as professional services.
How often should I have my carpets professionally cleaned?
Most experts recommend having carpets cleaned every 12 to 18 months, but factors such as household traffic, pets, and allergies may necessitate more frequent cleaning.
What are the long-term cost benefits of regular carpet cleaning?
Regular carpet cleaning can extend the lifespan of your carpets, maintain their appearance, and potentially save you money in replacement costs over time.
Related Links
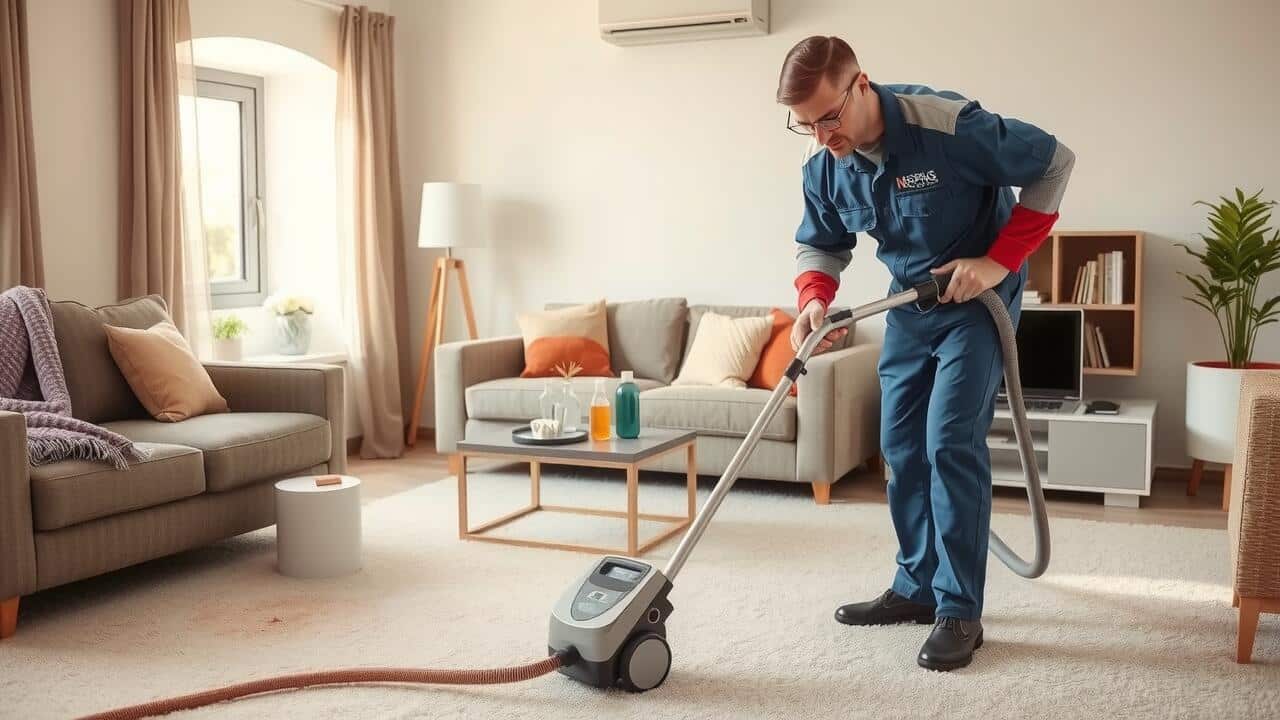

Table Of Contents
Evaluating Professional Carpet Cleaning Services
When considering professional carpet cleaning services, it’s essential to assess the range of options available. Many companies provide specialized services tailored to different types of carpets and stains, utilizing advanced equipment for deep cleaning. Pros can efficiently handle tough issues like pet odors or high-traffic stains that might be challenging for a homeowner to manage alone. Searching for “Carpet Cleaning near me” can help identify local professionals with strong reputations.
Customer reviews and testimonials play a crucial role in the evaluation process. Positive feedback can indicate a service’s reliability and effectiveness in restoring carpets to their original condition. Moreover, it’s beneficial to inquire about the cleaning methods used, particularly if you have specific concerns about chemicals or allergens. This ensures that the chosen service aligns with personal preferences and health considerations while delivering quality results.
What to Expect from a Professional Carpet Cleaning Experience
When scheduling a professional carpet cleaning, expect a thorough assessment of your carpets. Technicians will evaluate the type of carpet, the extent of soiling, and any specific stains. This initial examination helps them determine the most effective cleaning method. You’ll typically receive an overview of the services to be provided, including any pre-treatment options for stubborn spots. The process may involve hot water extraction, dry cleaning, or steam cleaning, each tailored to your carpet’s needs.
Once the cleaning begins, the professionals will move any furniture if necessary and prepare the area for a deep clean. They will use specialized equipment and solutions designed for carpets, ensuring a comprehensive clean while minimizing damage. If you find yourself searching for “Carpet Cleaning near me,” this experience usually includes follow-up advice on how to maintain your carpets in between professional cleanings.
The Environmental Impact of Carpet Cleaning
Carpet cleaning significantly influences environmental factors, particularly concerning the chemicals and water used during the process. Many traditional cleaning solutions contain harsh ingredients that can be harmful to both indoor air quality and the surrounding ecosystem. Homeowners who search for “Carpet Cleaning near me” may unknowingly choose services that utilize such substances, thus contributing to pollution and health issues. It is important to consider that not all carpet cleaning methods have the same environmental footprint.
Opting for eco-friendly carpet cleaning alternatives is a crucial step toward reducing negative impacts. Many professional services now offer green cleaning solutions that are biodegradable and non-toxic. These options help to minimize chemical waste and are often more energy-efficient, leading to less water usage. By seeking “Carpet Cleaning near me” with an emphasis on sustainability, consumers can effectively contribute to a healthier environment while maintaining the cleanliness of their homes.
Eco-Friendly Options for Home and Professional Cleaning
Many consumers now seek eco-friendly options for both home and professional carpet cleaning. Natural ingredients such as vinegar, baking soda, and essential oils provide effective cleaning without harmful chemicals. These alternatives are often less expensive and safer for families, pets, and the environment. When looking for a professional service, research companies that prioritize green practices and use biodegradable products. Searching for “Carpet Cleaning near me” can yield options that align with eco-conscious values.
In addition to DIY methods, several professional services specialize in sustainable cleaning solutions. These companies utilize advanced equipment designed to minimize water usage while still delivering exceptional results. Certifications for green cleaning methods can help you identify trustworthy providers committed to sustainability. Exploring “Carpet Cleaning near me” may reveal local professionals eager to support eco-friendly practices, ensuring your carpets remain clean without compromising the health of your home or the planet.
Factors Influencing Carpet Cleaning Costs
The cost of carpet cleaning can vary significantly depending on several factors. One of the primary influences on pricing is the size of the area being cleaned. Larger spaces typically require more time and resources, leading to higher costs. Additionally, the type of carpet fibers plays a role. More delicate or specialized carpets may need specific cleaning solutions or techniques, which can increase expenses.
Another important consideration is the method of cleaning used. Steam cleaning often costs more due to the equipment and expertise needed, while simpler techniques, such as dry cleaning, can be more budget-friendly. Local market demand also impacts pricing. Searching for “Carpet Cleaning near me” can yield varying quotes based on competition and the availability of services in your area.
Understanding What Affects Pricing in Carpet Cleaning
The cost of carpet cleaning can vary widely based on several factors including the size of the area to be cleaned, the carpet type, and the cleaning method employed. For instance, wall-to-wall carpeting may incur different rates compared to area rugs. Natural fiber carpets typically require specialized cleaning processes, which can elevate costs. Additionally, a larger space often demands more time and resources, influencing the overall pricing.
Location plays a significant role in determining carpet cleaning prices. It’s common to search for “Carpet Cleaning near me” to find local providers, and prices may fluctuate based on regional market trends. Local demand, competition among service providers, and even seasonal promotions can affect how much you might pay for professional cleaning. Knowing these factors can help you make an informed decision when considering whether to hire a service or take on the task yourself.
FAQS
Is it really cheaper to clean my own carpet compared to hiring a professional service?
Cleaning your own carpet can be cheaper upfront, but you should consider the cost of equipment, cleaning solutions, and the time required for the job. Hiring professionals may have a higher initial cost but can save you time and potentially provide better results.
What are the main benefits of hiring a professional carpet cleaning service?
Professional carpet cleaning services offer expertise, specialized equipment, and effective cleaning solutions that can remove deep stains and allergens more efficiently than DIY methods. They also save you time and effort.
Are there eco-friendly options available for carpet cleaning?
Yes, both home and professional carpet cleaning services offer eco-friendly options. These include using non-toxic cleaning solutions and methods that reduce water usage, making them better for the environment.
How often should I clean my carpets to maintain their appearance and longevity?
It is generally recommended to clean your carpets every 12 to 18 months, but high-traffic areas may require more frequent cleaning. Regular vacuuming and spot cleaning can also help maintain their appearance.
What factors can influence the cost of professional carpet cleaning?
Several factors can affect the price of professional carpet cleaning, including the size of the area to be cleaned, the type of carpet, the level of soiling, and any additional services requested, such as stain removal or carpet protection treatments.
Related Links

Table Of Contents
Sump Pumps as an Alternative
Sump pumps serve as a practical alternative to French drains for managing excess water in basements. These devices are designed to collect accumulated water from the lowest part of the basement and pump it out to a designated area outside the home. This method effectively prevents flooding and minimizes moisture buildup. Homeowners often seek professional help for proper installation, leading to increased searches for “Basement Drainage System Installation near me” to ensure reliable and efficient operation.
The effectiveness of a sump pump largely depends on its capacity and the specific conditions of the basement. Proper placement is essential for optimal performance. Additionally, integrating a sump pump with other waterproofing measures can provide an added layer of protection against water intrusion. Regular maintenance ensures that these systems function effectively, reducing the risk of unexpected failures during heavy rainfall or flooding events.
How Sump Pumps Help Manage Basement Water Levels
Sump pumps play a crucial role in managing excess water in basements. They are especially effective in areas prone to flooding or heavy rainfall. When water levels rise, the sump pump activates and directs water away from the foundation of the home. This action helps prevent water damage and keeps the basement dry. Homeowners often find peace of mind knowing that their basements are protected by this system.
Selecting a reliable contractor for a basement drainage system installation near me ensures proper setup and maintenance of the sump pump. The installation involves placing the pump in a pit, allowing it to effectively collect and discharge water. Regular checks and maintenance on the system help avoid potential failures. With a properly functioning sump pump, homeowners can mitigate water accumulation and maintain a safer, dryer living space.
Grading and Landscaping Adjustments
Proper grading and landscaping adjustments can significantly enhance water management around your home. By ensuring that the ground slopes away from the foundation, you can prevent water from pooling near the basement. This natural drainage solution helps to direct rainwater and melting snow away, reducing the risk of intrusion. Homeowners can benefit from professional advice to determine the best grading options suited for their property.
Additionally, incorporating strategic landscaping features can further aid in managing water runoff. Plants with deep root systems can absorb excess moisture, while rock beds and dry riverbeds can help divert water away from the foundation. For those looking to implement or improve their outdoor water control measures, a search for “Basement Drainage System Installation near me” can yield local experts who provide tailored solutions for efficient water management.
Modifying Surrounding Terrain to Direct Water Away
Proper grading and landscaping can significantly enhance water management around a home. Adjusting the slope of the yard away from the foundation creates a natural barrier against water intrusion. This approach reduces the chances of water pooling near the basement. Incorporating drainage swales or berms can further redirect surface water. Carefully chosen plants and vegetation can assist in drawing moisture away from the foundation.
In addition to slope modifications, the use of permeable materials for walkways and patios can improve water absorption. Installing rain gardens or dry wells can capture runoff and facilitate groundwater recharge. Homeowners might explore options like “Basement Drainage System Installation near me” for professional assistance in optimizing these solutions. Such adaptations not only protect the basement but also enhance overall landscape aesthetics.
Waterproofing Solutions
Effective waterproofing solutions are crucial for maintaining a dry and safe basement environment. One of the most reliable methods is the application of sealants that can keep moisture out. These sealants are often designed to fill cracks and gaps in concrete walls and floors. A thorough application not only enhances the integrity of the existing structure but also adds an additional layer of protection against water intrusion. Many homeowners opt for professional help, especially when dealing with significant issues, ensuring the right products are used for optimal results.
In addition to sealants, installing a waterproof barrier can also significantly improve basement conditions. This barrier can be a membrane that is applied to the walls and floors, effectively blocking moisture from penetrating. For those looking to take immediate action, searching for “Basement Drainage System Installation near me” can lead to expert assistance tailored for individual needs. These systems can complement existing waterproof solutions, providing an extra measure of security against water damage in basements.
Effective Sealants and Barriers for Basements
Effective sealants and barriers are crucial in preventing water seepage in basements. These products act as a protective layer against moisture intrusion, which can lead to mold growth and structural damage. Commonly used materials include waterproof paints, sealants, and membranes designed specifically for basement walls and floors. Applying these solutions can significantly enhance the integrity of the basement, creating a more secure and dry environment.
In conjunction with sealants, it is wise to consider the overall basement drainage system. Homeowners searching for “Basement Drainage System Installation near me” can find local professionals who specialize in implementing comprehensive solutions that complement sealant applications. This combination helps ensure that water is effectively redirected away from the foundation, reducing the likelihood of future issues related to water intrusion.
FAQS
What is a French drain, and why might I need an alternative?
A French drain is a type of drainage system that directs water away from your basement or foundation to prevent flooding. You might need an alternative if your property has unique drainage issues, limited space for installation, or if you’re looking for cost-effective solutions.
How does a sump pump work as an alternative to a French drain?
A sump pump collects water that accumulates in a sump basin, usually located in the lowest part of your basement. Once the water reaches a certain level, the pump activates and discharges the water away from your home, helping to keep the basement dry.
Are there any landscaping solutions that can work instead of a French drain?
Yes, grading and landscaping adjustments can effectively manage water runoff. By modifying the terrain around your home, such as creating slopes or adding vegetation, you can direct water away from your foundation and reduce the risk of basement flooding.
What types of waterproofing solutions can be used as an alternative?
Waterproofing solutions include sealants, membranes, and barriers that can be applied to basement walls and floors. These products create a barrier against water infiltration and can be a practical alternative to installing a French drain.
Is it necessary to combine multiple alternatives for optimal basement water management?
Yes, combining several alternatives, such as sump pumps, landscaping adjustments, and waterproofing measures, can provide a comprehensive approach to managing basement water levels effectively and preventing potential water damage.